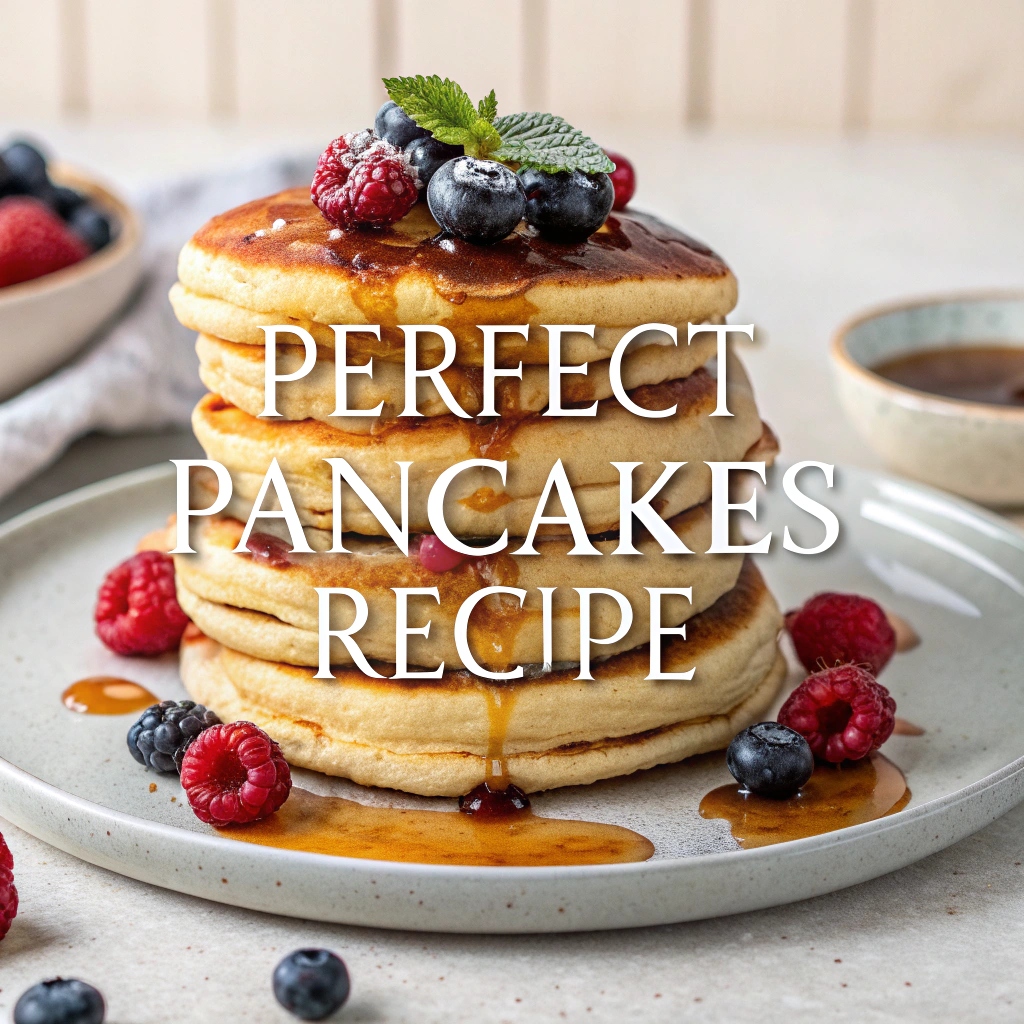
Why This Pancakes Recipe Works Every Time
Picture this: golden-brown pancakes, so fluffy they practically float off your plate, with butter melting into every nook and cranny. That’s exactly what you’ll achieve with this foolproof pancakes recipe. After years of perfecting this good old fashioned pancakes recipe in my kitchen, I’ve discovered the secrets that transform ordinary ingredients into extraordinary breakfast magic.
What makes this recipe different? It’s engineered for success. From the aluminum-free baking powder that eliminates any metallic taste to the precise butter technique that guarantees crispy edges, every detail has been tested and refined. Whether you’re making pancakes for a lazy Sunday brunch or need a quick weekday treat, this recipe delivers consistent, restaurant-quality results in just 20 minutes.
In this comprehensive guide, you’ll master not just one, but 4 different types of pancakes, learn troubleshooting tips that save any batter disaster, and discover pro techniques that elevate your pancake game. Let’s transform your breakfast routine with the best ever homemade pancakes recipe you’ll ever need.
Essential Ingredients for Perfect Pancakes
The Core Pancake Ingredients
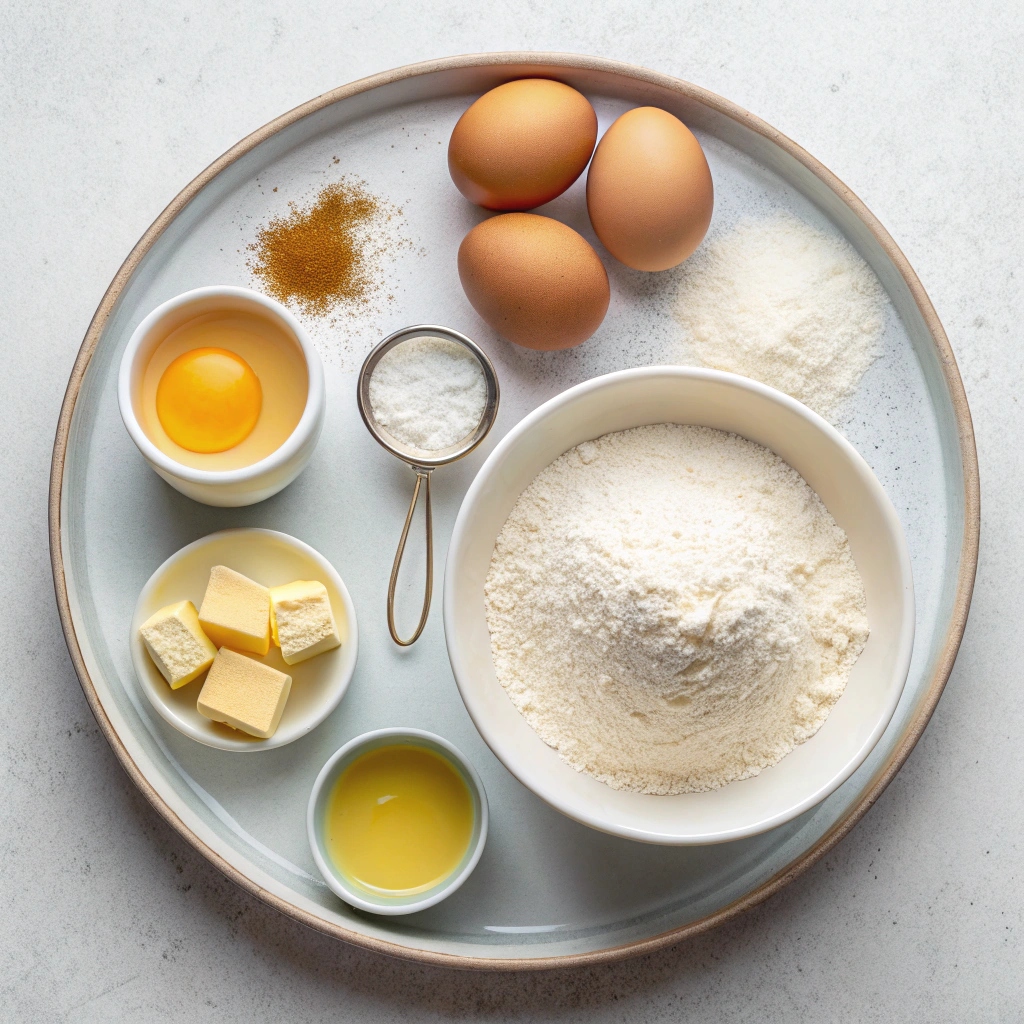
Creating exceptional pancakes starts with understanding each ingredient’s role. Here’s your complete shopping list for pancake perfection:
Dry Ingredients:
- 2 cups (260g) all-purpose flour – The foundation of fluffy pancakes
- 2 tablespoons granulated sugar – For subtle sweetness and golden browning
- 4 teaspoons aluminum-free baking powder – The secret to impressive height
- 1/2 teaspoon fine sea salt – Enhances all flavors
Wet Ingredients:
- 1 3/4 cups (420ml) whole milk – Creates tender, moist pancakes
- 2 large eggs – Provides structure and richness
- 4 tablespoons (60g) melted butter – For flavor and crispy edges
- 2 teaspoons pure vanilla extract – Adds warmth and depth
Each measurement has been tested extensively to achieve the perfect balance of fluffiness, flavor, and texture that makes this pancake recipe easy beginners can master on their first try.
Why Aluminum-Free Baking Powder Makes All the Difference
Here’s a game-changing tip most recipes miss: aluminum-free baking powder is non-negotiable for exceptional pancakes. Regular baking powder often contains sodium aluminum sulfate, which can leave a distinctly metallic, bitter aftertaste – especially noticeable in delicate batters like pancakes.
Brands like Bob’s Red Mill or Rumford provide pure leavening power without the unwanted flavors. Since we’re using a generous 4 teaspoons (for maximum fluffiness), this switch becomes even more critical. Fresh baking powder is equally important – check your expiration date, as potency decreases after about 3 months once opened.
Smart Substitutions for Dietary Needs
This versatile recipe adapts beautifully to various dietary requirements:
Dairy-Free Options:
- Replace milk with unsweetened almond, oat, or coconut milk (from carton, not can)
- Swap butter for melted coconut oil or vegan butter
Gluten-Free Version:
- Use 1:1 gluten-free flour blend (King Arthur or Bob’s Red Mill work well)
- Add 1/4 teaspoon xanthan gum if your blend doesn’t include it
Lower Sugar Option:
- Reduce sugar to 1 tablespoon without affecting texture
- The pancakes will be less golden but equally fluffy
Egg-Free Alternative:
- Replace each egg with a flax egg (1 tablespoon ground flaxseed + 3 tablespoons water, mixed and rested 5 minutes)
Step-by-Step Pancakes Recipe Instructions
Mixing the Perfect Pancake Batter
Creating the ideal batter is where the magic begins. Follow these steps for consistently fluffy results:
- Prepare your workspace: Melt the butter and let it cool slightly. This prevents it from cooking the eggs when mixed.
- Combine dry ingredients: In a large bowl, whisk together flour, sugar, baking powder, and salt. Create a well in the center – this old-fashioned technique ensures even mixing.
- Mix wet ingredients: In a separate bowl, whisk together milk, eggs, cooled melted butter, and vanilla until well combined. Don’t worry if the butter solidifies slightly upon hitting cold milk.
- The crucial combination: Pour wet ingredients into the dry ingredient well. Using a fork or whisk, gently stir from the center outward, incorporating flour gradually. Stop mixing the moment you don’t see dry flour – lumps are perfectly fine and actually preferred!
- The secret rest: Let your batter sit for 10 minutes. You’ll see bubbles forming as the baking powder activates. This rest period allows the flour to fully hydrate, resulting in more tender pancakes.
The finished batter should be thick but pourable. If it seems too thick, add milk one tablespoon at a time until it flows smoothly from a spoon.
The Secret to Cooking Pancakes Like a Pro
Temperature control separates good pancakes from great ones. Here’s your roadmap to golden perfection:
- Preheat properly: Set your non-stick skillet or griddle to medium heat. Test readiness by sprinkling water droplets – they should dance and evaporate within 2-3 seconds.
- The butter trick: Add 1/2 teaspoon butter to the pan, swirl to coat, then wipe with a paper towel, leaving just a thin film. This prevents the first pancake from being too greasy or unevenly cooked.
- Portion perfectly: Use a 1/3 cup measure for consistent 4-inch pancakes. Pour batter from a low height to maintain round shapes.
- Don’t touch: Resist the urge to press or spread the batter. Let it naturally settle for even thickness.
- Temperature adjustment: After the first batch, reduce heat to medium-low. The pan accumulates heat, so lowering prevents burnt exteriors with raw centers.
When to Flip: Visual Cues for Pancake Perfection
Timing the flip correctly ensures fully cooked, fluffy pancakes every time. Watch for these three indicators:
- Surface bubbles: Small bubbles will form across the entire surface and begin popping, leaving tiny holes
- Dry edges: The batter around the perimeter loses its shiny, wet appearance
- Golden underneath: Gently lift an edge with a spatula – you want a warm golden-brown color
Flip confidently with a quick wrist motion. The second side needs only 1-2 minutes since the pancake is mostly cooked through. You’ll know it’s done when it springs back lightly when touched.
4 Different Types of Pancakes You Can Make
Master these variations to expand your pancake repertoire and impress every breakfast guest.
Classic Buttermilk Pancakes
Transform the base recipe into tangy, extra-fluffy buttermilk pancakes:
- Replace regular milk with 1 3/4 cups buttermilk
- Reduce baking powder to 2 teaspoons
- Add 3/4 teaspoon baking soda
- Include an extra tablespoon of sugar to balance the tang
The acid in buttermilk reacts with baking soda for incredible lift and a tender crumb that’s distinctly different from regular pancakes.
Whole Wheat Pancakes
Create a heartier, nuttier version:
- Substitute 1 cup all-purpose flour with whole wheat flour
- Add an extra 2-3 tablespoons milk (whole wheat absorbs more liquid)
- Include 1 tablespoon honey for complementary sweetness
- Let batter rest 15 minutes for better texture
These provide more fiber and complex flavors while maintaining fluffiness.
Fluffy Blueberry Pancakes
Fold in fruit without creating soggy disasters:
- Prepare base batter as directed
- Gently fold in 1 cup fresh or frozen blueberries after resting
- If using frozen, don’t thaw first – this prevents bleeding
- Add berries to individual pancakes after pouring to control distribution
Decadent Chocolate Chip Pancakes
For an indulgent twist perfect alongside our cinnamon roll cake:
- Add 3/4 cup mini chocolate chips to finished batter
- Increase vanilla to 1 tablespoon
- Sprinkle extra chips on top after pouring for visible chocolate
- Reduce sugar to 1 tablespoon since chips add sweetness
Troubleshooting: How to Fix Common Pancake Problems
Why Are My Pancakes Flat?
Flat pancakes typically stem from these fixable issues:
Old baking powder: Test by adding 1 teaspoon to hot water – it should bubble vigorously. Replace if weak.
Overmixing: Beating the batter develops gluten, creating dense, flat results. Mix just until combined.
Wrong temperature: Too-hot pans cook the outside before the inside can rise. Maintain medium to medium-low heat.
Thin batter: Add flour 1 tablespoon at a time until batter coats a spoon thickly.
How to Prevent Burnt Outside, Raw Inside
This frustrating problem has simple solutions:
- Lower the heat: High temperatures create this exact issue
- Use thinner pancakes: Pour less batter until you master temperature control
- Cover briefly: Place a lid over pancakes for 30 seconds to steam-cook centers
- Check your pan: Heavy-bottomed pans distribute heat more evenly
Fixing Too-Thick or Too-Thin Batter
Too thick (doesn’t pour easily):
- Add milk 1 tablespoon at a time
- Whisk gently between additions
- Aim for slow-flowing consistency
Too thin (spreads too much):
- Add flour 1 tablespoon at a time
- Let rest 5 minutes after adjusting
- The batter should coat a spoon but still drip off
Pro Tips for the Best Ever Homemade Pancakes Recipe
These professional techniques elevate your pancakes from good to extraordinary:
The butter-wipe technique: After buttering your pan, wipe with a paper towel, leaving just a thin film. This prevents uneven browning and ensures your first pancake isn’t a throwaway.
Temperature mastery: Start at medium heat for preheating, cook the first batch, then reduce to medium-low. Each subsequent batch needs less heat as the pan accumulates temperature.
The 10-minute rest secret: This isn’t just waiting time – the flour hydrates fully, gluten relaxes, and baking powder begins activating. Skip this, and you’ll miss out on maximum tenderness.
Keeping pancakes warm: Here’s a game-changer – use a tortilla warmer! It maintains ideal temperature and moisture. Alternatively, place pancakes in a single layer on a baking sheet in a 200°F oven, covering loosely with foil.
Size consistency: Use an ice cream scoop with a release lever for perfectly uniform pancakes. A standard scoop holds exactly 1/4 cup.
Edge perfection: For crispy edges with fluffy centers, add a small pat of butter around each pancake’s perimeter while the first side cooks.
Easy Pancakes for Beginners: Simplifying the Process
5-Minute Prep Method
If you’re wondering how to making pancake from scratches quickly, here’s your streamlined approach:
- Measure dry ingredients the night before into a sealed container
- Pre-melt butter in the microwave (1 minute on 50% power)
- Room temperature ingredients mix faster – set out milk and eggs 20 minutes early
- One-bowl option: Add wet to dry in the same bowl if you don’t mind a few extra lumps
One-Bowl Mixing Technique
Minimize dishes without sacrificing quality:
- Whisk all dry ingredients in your largest bowl
- Create a deep well in the center
- Crack eggs directly into the well
- Add milk, butter, and vanilla to the well
- Whisk from the center outward in expanding circles
Visual Guide to Perfect Consistency
Your batter should:
- Flow in a thick ribbon when lifted with a spoon
- Hold its shape for 2 seconds when dropped back
- Show visible lumps (pea-sized is perfect)
- Create slow-moving bubbles after resting
If you’re making these alongside raspberry scones for brunch, prepare the pancake batter while scones bake.
How to Making Pancake From Scratches: Advanced Techniques
Creating Restaurant-Style Height
Professional pancake houses achieve impressive height through:
Double-acting baking powder: Use the full 4 teaspoons for maximum lift Minimal spreading: Pour batter from 6 inches high for thick centers Stacking method: Cook slightly thicker pancakes and stack immediately to trap steam Japanese-style technique: Separate eggs, whip whites to soft peaks, fold in for soufflé-like height
Achieving Crispy Edges with Fluffy Centers
This textural contrast defines restaurant-quality pancakes:
- Butter the pan generously for the first pancake only
- Pour batter onto the butter (don’t wipe the pan)
- Tilt the pan slightly to let butter creep up the edges
- Cook 30 seconds longer than usual on the first side
- Finish in butter: Add a small pat when flipping for extra crispness
Batch Cooking for Large Groups
Feeding a crowd? Master these efficiency tips:
- Use two pans: Alternate between them for continuous cooking
- Oven method: Cook on parchment-lined baking sheets at 425°F for 10-12 minutes
- Griddle technique: Maintain zones – hotter for starting, cooler for finishing
- Assembly line: One person pours, one flips, one plates
- Keep warm properly: Layer between parchment in a 200°F oven
Storage, Freezing & Reheating Your Pancakes
How to Store Leftover Pancakes
Proper storage maintains quality for days:
Refrigerator storage (up to 5 days):
- Cool completely to room temperature
- Layer between parchment or wax paper
- Store in an airtight container
- Keep away from strong odors
Counter storage (up to 2 days):
- Only for completely cooled pancakes
- Wrap tightly in plastic wrap
- Best for next-day breakfast
Freezer-Friendly Pancake Method
Make weekend pancakes available all week:
- Flash freeze: Lay pancakes on a baking sheet, freeze 30 minutes
- Package properly: Transfer to freezer bags with parchment between each
- Remove air: Press out excess air or use vacuum sealer
- Label clearly: Include date and reheating instructions
- Storage time: Maintains quality up to 3 months
3 Ways to Reheat Pancakes Perfectly
Microwave method (fastest):
- Place on microwave-safe plate
- Cover with damp paper towel
- Heat 20 seconds per pancake
- Add 10-second intervals if needed
Toaster method (crispiest):
- Best for firmer pancakes
- Use medium setting
- Watch carefully to prevent burning
- Great for frozen pancakes
Oven method (best for multiple):
- Preheat to 350°F
- Wrap stack in foil
- Heat 10 minutes from refrigerated, 15 from frozen
- Maintains original texture best
Creative Pancake Toppings & Serving Ideas
Transform your pancakes into memorable meals with these serving suggestions:
Classic Combinations:
- Butter pats and pure maple syrup (grade A amber for balanced flavor)
- Lemon juice and powdered sugar (European-style)
- Honey butter (whip 1/2 cup soft butter with 2 tablespoons honey)
Fresh Fruit Medleys:
- Macerated strawberries (slice and toss with sugar 15 minutes before serving)
- Caramelized bananas with cinnamon
- Mixed berry compote with fresh mint
- Grilled peaches with vanilla yogurt
Decadent Options:
- Nutella and sliced almonds
- Peanut butter and jelly swirl
- Cookie butter and mini chocolate chips
- Cream cheese frosting from our collection
Savory Twists:
- Fried chicken and hot honey
- Scrambled eggs and crispy bacon
- Smoked salmon with dill cream cheese
- Avocado and poached egg
International Inspirations:
- Japanese-style with red bean paste and whipped cream
- Dutch baby-inspired with lemon and powdered sugar
- French crêpe-style with ham and gruyère
- Mexican churro pancakes with cinnamon sugar
Good Old Fashioned Pancakes Recipe Variations
Grandma’s Secret Ingredients
Traditional recipes often included these forgotten additions:
Cake flour substitution: Replace 1/2 cup all-purpose with cake flour for incredibly tender pancakes
Sour cream addition: Add 2 tablespoons for tangy richness and extra moisture
Malted milk powder: Include 2 tablespoons for diner-style depth
Separated eggs technique: Beat whites separately, fold in last for lighter texture
Regional American Pancake Styles
Explore how different regions put their spin on this classic:
Southern style: Add cornmeal for texture, serve with sorghum syrup New England: Include maple syrup in the batter, top with apple compote Midwest: Extra thick, often with sour cream in batter Pacific Northwest: Incorporate sourdough starter, top with marionberries Southwest: Add blue cornmeal and pine nuts, serve with prickly pear syrup
Making Pancakes Without Eggs or Dairy
Create equally delicious pancakes for dietary restrictions:
Egg replacement options:
- Flax eggs (1 tablespoon ground flax + 3 tablespoons water per egg)
- Mashed banana (1/4 cup per egg, adds sweetness)
- Applesauce (1/4 cup per egg, creates denser texture)
- Commercial egg replacer (follow package directions)
Dairy-free success tips:
- Use full-fat coconut milk for richness
- Add extra vanilla for flavor depth
- Include 1 tablespoon apple cider vinegar for tang
- Coconut oil provides better flavor than vegetable oil
Pancake Recipe Easy Beginners Quick Reference
Visual Recipe Card
| Prep Time | Cook Time | Total Time | Servings |
|---|---|---|---|
| 5 minutes | 15 minutes | 20 minutes | 12-16 pancakes |
Timing Chart
| Step | Time |
|---|---|
| Mix dry ingredients | 1 minute |
| Combine wet ingredients | 1 minute |
| Mix batter | 30 seconds |
| Rest batter | 10 minutes |
| Heat griddle | 3 minutes |
| Cook each batch | 3-4 minutes |
Temperature Guide
| Pancake Stage | Heat Setting | Visual Cue |
|---|---|---|
| Preheating | Medium | Water droplets dance |
| First batch | Medium | Light sizzle when poured |
| Subsequent batches | Medium-low | Gentle bubbling |
| Keeping warm | 200°F oven | No browning continues |
Success Checklist
✓ Fresh baking powder (test if unsure)
✓ Room temperature ingredients
✓ Lumpy batter (don’t overmix)
✓ 10-minute rest period
✓ Proper heat (medium to medium-low)
✓ Patient flipping (wait for bubbles)
✓ Single flip only
✓ Warm serving plates
Frequently Asked Questions
Can I Make Pancake Batter the Night Before?
Yes, with some considerations. Prepare the batter and refrigerate in an airtight container for up to 24 hours. However, the pancakes will be slightly less fluffy since baking powder activates upon liquid contact. For best results:
- Add an extra 1/2 teaspoon baking powder before cooking
- Let batter come to room temperature (30 minutes)
- Gently stir once before using
- Expect slightly denser but still delicious pancakes
Why Do My Pancakes Taste Like Baking Powder?
This common issue has three main causes:
- Using aluminum-containing baking powder – switch to aluminum-free brands immediately
- Old or expired baking powder – replace every 3-6 months
- Too much leavening – measure carefully with level teaspoons
The metallic taste is preventable with quality ingredients and proper measurements.
What’s the Difference Between Pancake Mix and Homemade?
Commercial mixes contain:
- Dried milk powder and eggs
- Preservatives for shelf stability
- Extra salt and sugar
- Often lower-quality leavening agents
Homemade pancakes offer:
- Fresher ingredients and better flavor
- Control over sugar and salt levels
- No preservatives or additives
- Customizable to dietary needs
- Significantly better texture and taste
How Many Pancakes Does This Recipe Make?
This recipe yields 12-16 pancakes, depending on size:
- Using 1/3 cup batter: 12 pancakes (4.5 inches each)
- Using 1/4 cup batter: 16 pancakes (4 inches each)
- Using 1/2 cup batter: 8 large pancakes (5-6 inches each)
Each serving (2 pancakes) contains approximately 320 calories.
Can I Double This Pancakes Recipe?
Absolutely! This recipe scales perfectly:
- Double all ingredients exactly
- Use a very large bowl for mixing
- You may need to add slightly more milk (batter thickens with larger quantities)
- Cook time remains the same
- Doubled recipe serves 8-10 people generously
For meal prep, make a double batch on weekends and freeze portions for quick weekday breakfasts.
Conclusion – Your Path to Pancake Mastery
You’ve now unlocked every secret to creating the perfect pancakes recipe. From understanding why aluminum-free baking powder transforms your results to mastering the visual cues for flipping, you’re equipped with professional-level knowledge that ensures success every time.
Remember, great pancakes aren’t just about following measurements – they’re about understanding the why behind each step. Whether you’re making easy pancakes for beginners on a busy morning or crafting 4 different types of pancakes for a special brunch, these techniques adapt to your needs.
The beauty of this good old fashioned pancakes recipe lies in its flexibility. Start with the basic version, then experiment with the variations. Try the buttermilk version next weekend, or surprise your family with chocolate chip pancakes. Each variation builds on the solid foundation you’ve mastered.
Don’t forget to explore pairing these pancakes with other breakfast favorites from Recipes by Rahat. Imagine serving a spread with fluffy pancakes, fresh scones, and homemade sweet bread – your breakfast table will rival any restaurant!
Now it’s your turn. Gather those simple ingredients, heat up your griddle, and create pancake magic. When you pull off that first perfect stack – golden, fluffy, and irresistible – share your success! Tag your creations and let me know which variation becomes your family’s favorite. Here’s to many mornings filled with the aroma of homemade pancakes and the joy of sharing them with those you love.
Happy pancake making!
The Ultimate Fluffy Pancakes
Equipment
- Non-stick skillet or griddle
- Large mixing bowl
- whisk
- 1/3 cup measuring cup
- Spatula
Ingredients
For the Pancake Batter
- 2 cups (260g) all-purpose flour
- 2 tablespoons granulated sugar
- 4 teaspoons aluminum-free baking powder
- 1/2 teaspoon fine sea salt
- 1 3/4 cups (420ml) whole milk
- 2 large eggs
- 4 tablespoons (60g) melted butter, cooled slightly
- 2 teaspoons pure vanilla extract
For Cooking
- 2-3 tablespoons butter for the pan
For Serving
- Butter pats
- Pure maple syrup
- Fresh berries (optional)
Instructions
- Melt 4 tablespoons of butter and let it cool slightly. This prevents the butter from cooking the eggs when mixed. Ensure all ingredients are at room temperature for best results.
- In a large bowl, whisk together flour, sugar, baking powder, and salt until well combined. Create a well in the center of the dry ingredients – this classic technique ensures even mixing.
- In a separate bowl, whisk together milk, eggs, cooled melted butter, and vanilla extract until fully combined. Don’t worry if the butter solidifies slightly when it hits the cold milk – this is normal.
- Pour the wet ingredients into the well of dry ingredients. Using a fork or whisk, gently stir from the center outward, gradually incorporating the flour. Stop mixing as soon as you no longer see dry flour – lumps are perfectly fine and actually preferred for tender pancakes.
- Let the batter rest for 10 minutes. During this time, you’ll see bubbles forming as the baking powder activates. This crucial step allows the flour to hydrate fully, resulting in fluffier, more tender pancakes.
- Place a non-stick skillet or griddle over medium heat. Test if it’s ready by sprinkling a few drops of water on the surface – they should dance and evaporate within 2-3 seconds. This indicates the perfect temperature.
- Add 1/2 teaspoon butter to the hot pan and swirl to coat. Using a paper towel, wipe out most of the butter, leaving just a thin film. This professional trick prevents the first pancake from being greasy or cooking unevenly.
- Using a 1/3 cup measure, pour batter onto the hot pan to form 4-inch circles. Don’t spread or touch the batter – let it settle naturally. Cook for 1-2 minutes until bubbles form across the surface and begin popping, and the edges look dry and set.
- Flip pancakes confidently with a quick wrist motion. Cook for another 1-2 minutes until golden brown and cooked through. The pancake should spring back lightly when touched in the center. Adjust heat to medium-low after the first batch to prevent burning.
- Transfer cooked pancakes to a plate and keep warm in a 200°F oven while cooking remaining batches. Add fresh butter to the pan every 2-3 pancakes. Serve immediately with butter pats, warm maple syrup, and fresh berries if desired.