

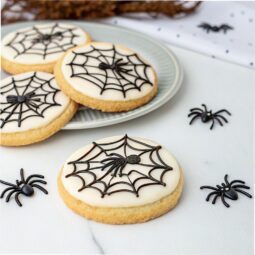
These Spooky Spider Cookies are the perfect blend of creepy and delicious, making them a hit for any Halloween gathering. With a rich, buttery base and a hint of vanilla, each bite offers a satisfying crunch that gives way to a soft, chewy center. The chocolatey spiders add a playful touch, while the gooey candy eyes bring a burst of sweetness. Ready in just over an hour, they’re surprisingly simple to whip up, leaving you more time to enjoy the festivities.
Packed with flavor and fun, these cookies are as delightful to look at as they are to eat. The combination of smooth chocolate and creamy frosting creates a decadent treat that’s impossible to resist. Whether you’re baking with kids or impressing guests, these cookies are sure to spark smiles and spooky vibes. Plus, with 40 servings, there’s plenty to share—or keep all to yourself!
Spooky Spider Cookies Ingredients
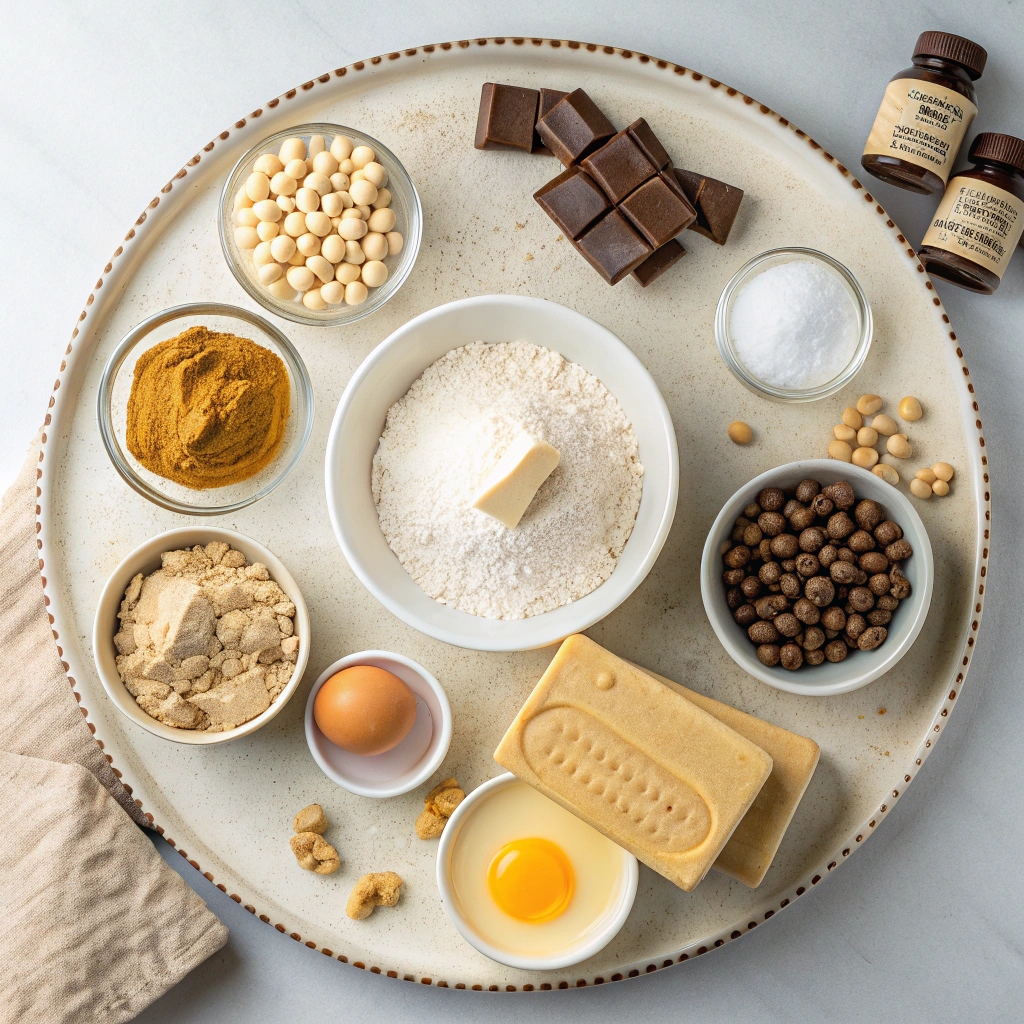
- 1 ¼ cup (282 g) unsalted butter, softened to room temperature
- 1 ½ cup (300 g) light brown sugar, tightly packed
- ¼ cup (50 g) sugar
- 1 cup (280 g) creamy peanut butter
- 2 eggs + 1 egg yolk
- 1 teaspoon vanilla extract
- 3 ¼ cups (400 g) all-purpose flour
- 1 Tablespoon corn starch
- 1 ½ teaspoons baking soda
- 1 ½ teaspoon salt
- ½ cup granulated sugar (for rolling)
- 10 ounces (285 g) dark chocolate melting wafers
- 2 cups mini marshmallows, divided
- 40 Reese’s miniature peanut butter cups (chilled in the refrigerator)
- Small candy eyes (for decorating)
Step-by-Step Instructions
- Prepare the dough: In a stand mixer, combine butter, light brown sugar, and sugar. Beat for 1 minute until well combined. Add peanut butter and mix thoroughly. Add eggs and egg yolk one at a time, scraping the bowl after each addition. Stir in vanilla extract.
- Mix dry ingredients: In a separate bowl, whisk together flour, cornstarch, baking soda, and salt. Gradually add this mixture to the peanut butter batter, scraping the bowl occasionally to ensure even mixing.
- Chill the dough: Refrigerate the dough for 30 minutes to 1 hour. If the dough is still sticky or cookies spread too much, chill for an additional 30 minutes.
- Preheat and prepare: Preheat the oven to 375°F (190°C). Line cookie sheets with parchment paper. Pour ½ cup granulated sugar into a small bowl for rolling.
- Shape and bake: Roll the dough into 1 ½-Tablespoon-sized balls, coat them in sugar, and place them 2″ apart on the cookie sheets. Bake for 8-10 minutes. Let cool on the sheet for 5 minutes.
- Add Reese’s cups: Gently press a chilled Reese’s cup into the center of each cookie. Allow cookies to cool completely.
- Make marshmallow cobwebs: Microwave ¼ cup mini marshmallows for 10 seconds until puffed. Stir to deflate, then stretch and drape the marshmallow over the cookies. Repeat with remaining marshmallows.
- Decorate with chocolate spiders: Melt dark chocolate wafers according to package instructions. Let cool for 5 minutes, then transfer to a ziploc bag with a tiny corner snipped off. Pipe a small amount of chocolate into the Reese’s indent, place the Reese’s cup (top side down), and pipe 4 legs on each side. Attach candy eyes with a dab of chocolate.
- Let set: Allow the marshmallow and chocolate to set completely before serving.
Spooky Storage Tips
Store your Spooky Spider Cookies in an airtight container at room temperature for up to 3 days. If you want to keep them fresh longer, you can refrigerate them for up to a week. Just be sure to let them come to room temperature before serving for the best texture.
Quick Fixes for Common Cookie Capers
If your cookies are spreading too much, ensure your dough is chilled properly and your baking soda is fresh. For a crisper edge, bake them a minute longer. If the marshmallow cobweb is too sticky, let it set a bit longer before adding the chocolate decorations.
Fun Variations for Frightful Flavors
Swap out the peanut butter for almond butter for a nutty twist or use white chocolate wafers instead of dark for a sweeter spider. You can also use different candy eyes for a variety of spooky expressions on your cookies.
Efficient Equipment Essentials
A stand mixer makes combining ingredients a breeze, but a hand mixer will work just fine. Use a silicone baking mat or parchment paper to prevent sticking and make cleanup easier. A piping bag or small ziploc bag with a corner snipped off is perfect for the spider legs.
Perfect Pairings for Your Creepy Creations
Serve these cookies with a glass of cold milk or a warm cup of spiced cider for a delightful contrast. Pair them with other Halloween treats like caramel apples or pumpkin spice cupcakes for a complete festive dessert spread.
Spooky Spider Cookies
Ingredients
- 1 ¼ cup unsalted butter softened to room temperature
- 1 ½ cup light brown sugar tightly packed
- ¼ cup sugar
- 1 cup creamy peanut butter
- 2 eggs + 1 egg yolk
- 1 teaspoon vanilla extract
- 3 ¼ cups all-purpose flour
- 1 Tablespoon corn starch
- 1 ½ teaspoons baking soda
- 1 ½ teaspoon salt
- ½ cup granulated sugar for rolling
- 10 ounces dark chocolate melting wafers
- 2 cups mini marshmallows divided
- 40 Reese’s miniature peanut butter cups Chilled I place mine in the refrigerator while I prepare the cookies, it keeps them from melting
- small candy eyes for decorating
Instructions
- Combine butter and sugars in the bowl of a stand mixer and beat until well combined (about 1 minute).
- Add peanut butter, stir well.
- Add eggs and egg yolk, one at a time, pausing to scrape down the sides and bottom of the bowl after each addition.
- Stir in vanilla extract.
- In a separate, medium-sized bowl, whisk together flour, cornstarch, baking soda, and salt.
- Gradually add flour mixture into the peanut butter batter, pausing occasionally to scrape down sides and bottom of bowl so that all ingredients are well-combined.
- Place your dough in refrigerator and chill for 30 minutes to one hour (start with 30 minutes, if the dough is too sticky or cookies come out too flat, return for another half an hour).
- Preheat oven to 375F (190C) and line cookie sheets with parchment paper. Pour remaining ½ cup of sugar into a small bowl and set aside.
- Once dough has chilled, remove from refrigerator and roll into 1 ½-Tablespoon-sized balls. Roll through sugar and place on prepared cookie sheet at least 2″ apart.
- Bake on 375F (190C) for 8-10 minutes, remove from oven and allow to cool on cookie sheet for 5 minutes. Use your frozen Reese’s (I keep mine wrapped) and gently make an indent by pressing the top of the Reese’s into the top of each peanut butter cookie. Allow cookies to continue to cool completely on cookie sheet before proceeding.
- Marshmallow Cobweb Instructions: Place about ¼ cup of your mini marshmallows in a small microwave-safe dish.
- Microwave for about 10 seconds or until marshmallows begin to puff.
- Remove and use a fork or spoon to stir, deflating your marshmallows.
- Using your thumb and forefinger of each hand, pinch some of the marshmallow filling. Stretch and pull the marshmallow apart with your fingers and drape it over your cooled cookies (See picture above for a visual guide).
- Marshmallow will cool quickly and become too difficult to use, once that happens with your first bowl of marshmallows, move on to a new bowl with another ¼ cup marshmallows and repeat steps until all cookies are decorated.
- Allow marshmallow to set for several minutes before proceeding with the chocolate — the longer you wait the less sticky it will be.
- Spider Decorating Instructions: Prepare your dark chocolate melting wafers according to package instructions. Allow to cool 5 minutes before proceeding (if chocolate is too hot it will be harder to control when piping).
- Pour into a small ziploc bag and snip a tiny, small corner off of the bag (the width that you want your spider legs to be).
- Pipe a small amount of chocolate into the indent on your peanut butter cookie. Work with one cookie at a time as the chocolate will harden fairly quickly.
- Place one Reese’s cup (top side/larger surface facing down) into the melted chocolate.
- Pipe four chocolate lines on either side of the Reese’s for the spider “legs”.
- Dab a small amount of the chocolate on the back of a candy eye and press it against the side of the Reese’s cup, repeat with another eye for your spider’s eyes.