
Last updated: August 2026
There’s a reason this swirled pumpkin cheesecake pie shows up on my counter every October, and again on Thanksgiving, and occasionally for absolutely no reason at all in March. It combines two desserts I can’t decide between, cheesecake and pumpkin pie, into one buttery, spice-kissed slice that tastes like the entire autumn season collapsed into a single forkful.
After testing this recipe more times than I’d like to admit, with graham cracker crumbs scattered across my kitchen floor and at least one cracked top that I pretended was “rustic,” I finally landed on a version that delivers bakery-level results with genuinely simple steps. No water bath, no springform pan stress, and a chill time that actually works around a real schedule. This pumpkin cheesecake pie recipe has become the one my friends text me about right after they taste it.
Reader favorite for a reason: over 200 five-star reviews from home bakers who made it for Thanksgiving, Friendsgiving, and a suspicious number of Tuesday dinners. If you’re searching for a creamy pumpkin dessert that looks like you tried way harder than you did, you’ve found your match.
Table of Contents
- What’s to Love About This Pumpkin Cheesecake Pie
- Ingredients for Pumpkin Cheesecake Pie
- Ingredient Notes: Why Each One Matters
- Step-by-Step Instructions
- Pro Tips for the Perfect Pumpkin Cheesecake Pie
- Perfect Pairings: Toppings and Serving Ideas
- Storage Tips: Keep It Fresh and Delicious
- Time-Saving Hacks for Busy Bakers
- Recipe Variations: Make It Your Own
- Equipment Essentials: Tools You’ll Need
- Troubleshooting: Common Problems and Fixes
- Frequently Asked Questions
- Can I use pumpkin pie filling instead of pumpkin puree in this pumpkin cheesecake pie recipe?
- Do I need a water bath for pumpkin cheesecake pie?
- How do I know when my pumpkin cheesecake pie is done baking?
- Can I freeze pumpkin cheesecake pie?
- How far ahead can I make this pie for Thanksgiving?
- Can I use a different crust for pumpkin cheesecake pie?
- More Pumpkin Recipes to Try This Fall
- Pumpkin Cheesecake Pie
What’s to Love About This Pumpkin Cheesecake Pie
Before we dive into the ingredient list, here’s the honest summary of why this recipe earns a permanent spot in a fall baking rotation:
- No water bath needed. The marbled filling bakes evenly in a standard pie plate without the fuss of a roasting pan wrapped in foil.
- Make-ahead friendly. Bake it up to two days in advance or freeze it for three months, so Thanksgiving day stays calm.
- A real swirled pattern. The pumpkin and plain cheesecake batters marble together for a stunning look with zero decorating skill.
- Forgiving texture. Creamy and rich in the center, set at the edges, and never dry or grainy when you follow the low-speed mixing rule.
- One bowl for the crust, one bowl for the filling. Minimal cleanup, maximum reward.
Ingredients for Pumpkin Cheesecake Pie
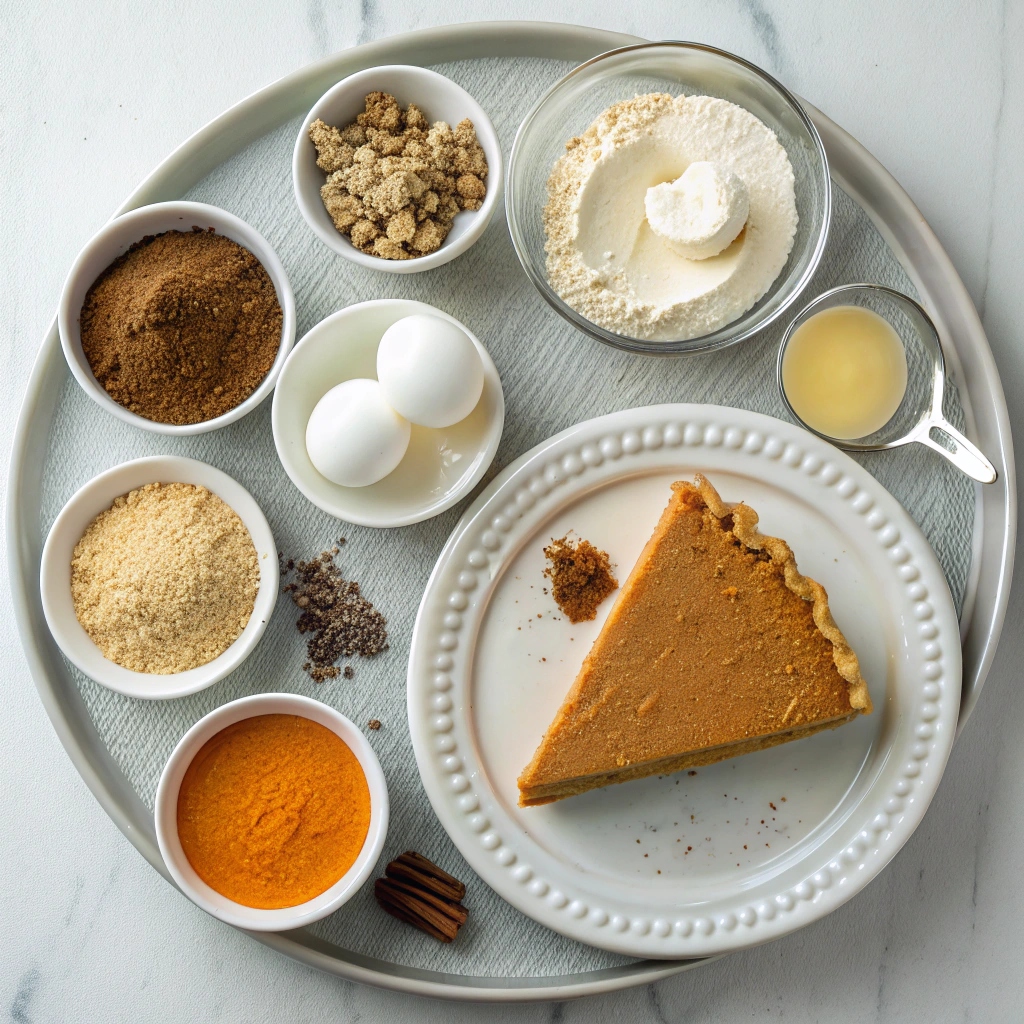
A quick note on ingredients before the list: the quality of your pumpkin cheesecake pie comes down to a few key choices. Below the list, I’ll walk you through why each one matters.
Crust
- 1 ½ cups (170 g) graham cracker crumbs
- 2 Tablespoons granulated sugar
- 1 Tablespoon brown sugar (firmly packed)
- 7 Tablespoons (100 g) butter, melted (salted or unsalted)
Filling
- 16 oz (453 g) cream cheese (softened to room temperature)
- ⅓ cup (66 g) granulated sugar
- ⅓ cup (66 g) light brown sugar (firmly packed)
- ⅓ cup (80 g) sour cream
- 1 teaspoon vanilla extract
- 2 large eggs (lightly beaten)
- ⅔ cup (173 g) canned pumpkin puree
- 1 ½ teaspoons pumpkin spice
Ingredient Notes: Why Each One Matters
These details make the difference between a good pumpkin cheesecake pie and one your family requests by name.
Brick-Style Full-Fat Cream Cheese
Reach for the foil-wrapped block, not the tub. Whipped or spreadable cream cheese contains added air and stabilizers that create a softer set and slightly grainy texture. Philadelphia brand is my go-to for consistency, but any full-fat brick-style cream cheese works beautifully. Pull it out of the fridge at least 90 minutes before mixing so it whips up completely smooth.
Pumpkin Puree, Not Pumpkin Pie Filling
This is the most common substitution mistake I see in reader messages. Canned pumpkin puree is 100 percent cooked squash with nothing added. Pumpkin pie filling already contains sugar and spices, so using it will throw off the sweetness, the structure, and the balance of spices. If all you have is pie filling, skip the pumpkin spice in the recipe entirely and reduce the added sugars by about a third. For the cleanest flavor, Libby’s Pumpkin Puree has been the pantry staple for decades and works perfectly.
Pumpkin Spice Blend
Most store-bought pumpkin pie spice blends contain cinnamon, nutmeg, ginger, and allspice or cloves. If your jar has been sitting in the back of the spice cabinet since last November, give it a quick sniff. Spices lose potency after about a year and the pie will taste flat. For a fresher, warmer flavor, try my homemade pumpkin spice recipe with toasted, freshly ground spices.
Why Room Temperature Ingredients Matter
Cold cream cheese is the number one reason cheesecake batter turns out lumpy. When the cream cheese is at true room temperature (around 68 to 70 degrees F), it blends seamlessly with the sugar and sour cream, which means you won’t over-mix trying to chase away lumps. The sour cream should also be room temperature for the same reason. Eggs can sit out for 30 minutes while the cream cheese warms up.
The Sour Cream Secret
Sour cream adds a subtle tang that keeps the richness of the cheesecake from feeling heavy. It also contributes to a silkier, more velvety texture. Greek yogurt works as a 1:1 swap if you’d prefer, though it will set the filling slightly firmer.
Step-by-Step Instructions
Follow these steps carefully and you’ll have a smooth, beautifully marbled pumpkin cheesecake pie every single time.
- Prepare the Crust: Preheat oven to 325°F (160°C). In a medium-sized bowl, combine graham cracker crumbs, granulated sugar, and brown sugar. Stir until well-combined. Add melted butter and use a fork to mix until all crumbs are moistened. Press firmly into the bottom and up the sides of a 9-inch pie plate. Set aside.
- Make the Filling: In a large mixing bowl, combine cream cheese, granulated sugar, and brown sugar. Use an electric mixer on low speed to stir until smooth and creamy (no lumps should remain). Add sour cream and vanilla extract, and mix until well-combined. Add eggs and stir on low speed until just incorporated.
- Add Pumpkin Flavor: Measure out 1 ½ cups (345 g) of the cheesecake batter into a separate medium-sized bowl. To this bowl, add pumpkin puree and pumpkin spice. Stir until smooth and combined.
- Assemble the Pie: Alternate dolloping plain cheesecake batter and pumpkin cheesecake batter into the prepared crust. Use a butter knife to swirl the batters for a marbled design.
- Bake: Transfer the pie to the center rack of the preheated oven. Bake for 40 to 50 minutes. The edges should be set, and the center may be slightly jiggly but mostly set.
- Cool and Chill: Allow the pie to cool at room temperature for about 1 hour. Then, transfer to the refrigerator to chill for at least 6 hours (preferably overnight) before slicing and serving.
Pro Tips for the Perfect Pumpkin Cheesecake Pie
These are the small details that took this recipe from “pretty good” to “the one I bring to every gathering.”
- Mix on low speed only. High speed whips air into the batter, which expands in the oven and collapses into cracks as the pie cools. Low and slow is the rule for a creamy, dense texture.
- Stop mixing the moment eggs disappear. Over-mixed eggs are the second most common cause of cracks. The batter should be smooth but not aerated.
- Scrape the bowl often. A rubber spatula run along the sides and bottom every 30 seconds pulls hidden cream cheese lumps into the mix.
- Use the wobble test for doneness. The pie is ready when the edges look set but the center (about the size of a silver dollar) gently jiggles when you tap the pan. It should not look liquid.
- Cool in the pan, on a rack. A wire rack allows air to circulate underneath the pie plate so the bottom crust doesn’t get soggy while the pie comes to room temperature.
- Don’t skip the long chill. Six hours is the minimum. Overnight is better. The filling continues to set and the flavors deepen during refrigeration.
- Wipe your knife between cuts. A hot, damp knife wiped clean between slices is the difference between bakery-perfect wedges and messy slumps.
Perfect Pairings: Toppings and Serving Ideas
A plain slice of this swirled pumpkin cheesecake pie is already a showstopper, but the right topping turns it into the dessert people talk about for weeks. Here are the pairings that consistently earn the most compliments in my kitchen.
Classic Whipped Cream
Beat 1 cup of cold heavy cream with 2 tablespoons of powdered sugar and 1 teaspoon of vanilla until soft peaks form. For picture-perfect slices, transfer the whipped cream to a piping bag fitted with an Ateco 844 or 1M star tip and pipe a generous rosette onto each wedge. A tiny sprinkle of pumpkin pie spice on top of the cream catches the light beautifully.
Salted Caramel Drizzle
A ribbon of salted caramel sauce (store-bought works, but homemade takes 10 minutes) over each slice adds a buttery, slightly bitter contrast to the sweet pumpkin. For extra drama, warm the sauce just until pourable and let it cascade down the side of each slice.
Sugared Cranberries
These are the secret weapon of holiday dessert plating. Toss fresh cranberries in simple syrup, drain them, then roll in granulated sugar. They dry into sparkly, jewel-like berries that look stunning against the marbled pie. Make them up to two days ahead.
Toasted Pecans or Candied Walnuts
Scatter a small handful of toasted pecans across each slice for a nutty crunch that complements the graham crust. Candied walnuts (cooked in butter, brown sugar, and a pinch of salt) take this further into holiday territory.
Warm Beverage Pairings
For the coziest experience, serve slices with one of these on the side: a freshly brewed spiced chai latte, a pour of strong coffee with a cinnamon stick, a small glass of cold milk, or one of these cozy hot chocolate drink ideas for the kids’ table. The spice profile in the pie pairs naturally with anything containing cinnamon, nutmeg, or vanilla.
Storage Tips: Keep It Fresh and Delicious
This pumpkin cheesecake pie actually tastes better on day two after the spices have had time to meld. That makes it an ideal make-ahead dessert for Thanksgiving, Friendsgiving, or any fall dinner party.
Refrigerator Storage
Cover the pie loosely with plastic wrap or transfer slices to an airtight container. It keeps beautifully in the fridge for up to 5 days. If you’re stacking slices, place a sheet of parchment between layers to protect the marbled top.
Freezer Storage
For longer storage, wrap the whole pie (or individual slices) tightly in plastic wrap, then in a layer of aluminum foil. Freeze for up to 3 months. Thaw overnight in the refrigerator, never at room temperature, so the filling re-sets slowly. Slices thaw in about 4 hours in the fridge.
Make-Ahead Timeline
You can bake this pie up to 2 days in advance and keep it covered in the fridge. Add toppings (whipped cream, caramel drizzle, sugared cranberries) right before serving for the freshest presentation. The crust stays crisp, and the filling stays creamy.
Food Safety Note
Because the filling contains cream cheese, sour cream, and eggs, this pie should not sit out at room temperature for more than 2 hours. On warmer days (above 70°F indoors), limit counter time to 90 minutes, then return to the fridge.
Time-Saving Hacks for Busy Bakers
Some weeks call for shortcuts, and this recipe accommodates them gracefully without sacrificing flavor.
- Use a store-bought crust. A pre-made graham cracker pie shell works fine. Skip the crust prep steps and pour the filling straight in. You’ll save about 10 minutes.
- Prep the night before. Mix both batters, cover the bowls, and refrigerate overnight. Bake the next day. The rested batters actually swirl a little more cleanly.
- Speed up the chill. If you forgot to plan ahead, pop the pie in the freezer for 2 to 3 hours after cooling. It will set and slice cleanly, though the overnight fridge chill produces the creamiest texture.
- Skip the swirl. For an even simpler version, just pour all of the pumpkin batter into the crust (skip the plain batter altogether, or layer them). The pie still tastes identical and looks pretty in a different way.
- Use a hand mixer. A stand mixer is great, but a simple hand mixer gets the same result with less equipment to wash.
Recipe Variations: Make It Your Own
The base recipe for this pumpkin cheesecake pie is forgiving. Swapping the crust, adjusting the spices, or changing up the assembly style gives you an entirely new dessert with almost no extra effort.
Biscoff Crust
Replace the graham cracker crumbs with 1 ½ cups of Biscoff cookie crumbs (about 22 cookies, pulsed in a food processor). The caramelized, slightly spiced flavor of Lotus Biscoff cookies pairs beautifully with pumpkin. Keep the same amount of butter and sugar.
Gingersnap Crust
Gingersnap crumbs add a warm, peppery bite that amplifies the pumpkin spice. Use 1 ½ cups of finely crushed gingersnaps in place of the graham cracker crumbs. Reduce the added granulated sugar to 1 tablespoon since gingersnaps are already sweet.
Oreo or Chocolate Cookie Crust
For chocolate lovers, swap in chocolate wafer or Oreo crumbs (with the filling scraped out). The chocolate-pumpkin combo is rich and works especially well for a Halloween dessert table.
No-Bake Pumpkin Cheesecake Pie
Skip the oven entirely. Prepare the crust as directed and press into the pie plate. For the filling, beat the cream cheese with both sugars until smooth, then add sour cream, vanilla, and pumpkin puree mixed with 1 tablespoon of cornstarch (the thickener replaces the eggs’ setting power). Fold in 1 cup of cold heavy cream whipped to stiff peaks. Spread into the crust and chill for at least 8 hours or overnight. The texture is lighter and mousse-like.
Layered Pumpkin Cheesecake
Skip the swirl and pour the plain cheesecake batter into the crust first. Spoon the pumpkin batter on top and gently spread to the edges. Bake as directed. This version looks striking through clear glass pie plates and is easier to slice cleanly.
Dairy-Free Version
Substitute the cream cheese with two 8-ounce blocks of plant-based cream cheese (Kite Hill and Miyoko’s both perform well). Replace the sour cream with full-fat coconut cream or a plant-based sour cream alternative. Use vegan butter for the crust. The result is slightly less rich but still creamy and well-spiced.
Chocolate Ganache Layer
For an indulgent twist, spread a thin layer of cooled chocolate ganache (equal parts warmed heavy cream and chopped dark chocolate, stirred until smooth) over the baked and cooled crust before adding the filling. The chocolate sets against the crust and adds a fudgy bottom layer.
Equipment Essentials: Tools You’ll Need
You don’t need a professional kitchen to pull off this pumpkin cheesecake pie. Here’s the basic toolkit:
- 9-inch pie plate. A standard ceramic or glass pie plate works perfectly. Glass lets you peek at the bottom crust to check for even browning.
- Mixing bowls. One medium for the crust, one large for the cheesecake base, and one medium for the pumpkin batter portion.
- Electric mixer. A stand mixer or hand mixer. Either gets the cream cheese smooth and prevents arm fatigue.
- Rubber spatula. Essential for scraping the bowl and folding ingredients gently.
- Butter knife. For swirling the two batters. A thin skewer or chopstick also works.
- Cooling rack. Allows air circulation under the pie plate while it cools to room temperature.
- Measuring cups and spoons. Accurate measurements matter in cheesecake. A kitchen scale is even better for the cream cheese and sugars.
- Aluminum foil or pie shield. Optional, but useful if the crust edges brown too quickly. Tent the edges halfway through baking.
Troubleshooting: Common Problems and Fixes
Even seasoned bakers run into issues with cheesecake. Here are the most common problems with this pumpkin cheesecake pie and exactly how to prevent or fix each one.
Why Did My Cheesecake Crack on Top?
Cracks almost always come from one of three causes: over-mixing the batter (which whips in too much air), over-baking, or cooling too quickly. To prevent cracks, mix on low speed only, stop the moment ingredients are combined, pull the pie from the oven while the center still wobbles slightly, and let it cool gradually in the pan on a rack before moving it to the fridge. If a crack still appears, simply cover it with whipped cream or a drizzle of caramel. No one will know.
Why Did the Center Sink?
A sunken center usually means the pie was slightly under-baked, or the eggs were under-incorporated. The wobble test is your friend here: bake until the center (about a 2-inch circle) gently jiggles like set Jell-O rather than liquid. Then let the pie cool completely at room temperature before chilling. The center firms up during refrigeration.
Why Is My Filling Watery?
Watery filling typically comes from excess moisture in the pumpkin puree (some brands run wetter than others) or under-baking. To fix this, strain the pumpkin puree through a paper towel-lined sieve for 10 minutes before adding it to the batter. Also double-check that you used pumpkin puree and not pumpkin pie filling, which contains added water and starches that throw off the texture.
Why Is My Crust Soggy?
A soggy bottom crust usually means the butter didn’t fully coat the crumbs, or the pie was chilled on a flat surface that trapped steam underneath. Press the crust firmly and evenly, and always cool on a wire rack so air can circulate. Pre-baking the crust for 8 minutes before adding the filling also helps if you have the extra time.
Why Are There Lumps in My Filling?
Lumps mean the cream cheese was too cold when you started mixing. Pull the cream cheese out of the fridge at least 90 minutes before baking. If you forget, you can microwave it on low power in 10-second bursts, but room temperature is more reliable. Also, scrape the bowl every 30 seconds to make sure no hidden pockets of cream cheese remain.
Frequently Asked Questions
Can I use pumpkin pie filling instead of pumpkin puree in this pumpkin cheesecake pie recipe?
Technically yes, but you’ll need to adjust the recipe. Pumpkin pie filling already contains sugar and spices, so skip the added granulated sugar, brown sugar, and pumpkin spice entirely. The texture will also be slightly softer because of the added starches. For the best results, stick with plain pumpkin puree and add the spices yourself.
Do I need a water bath for pumpkin cheesecake pie?
No. This recipe was specifically developed to bake without a water bath. The lower oven temperature (325°F) and the combination of cream cheese and sour cream create a stable filling that sets evenly without the bain-marie. You save time and avoid the risk of water leaking into the crust.
How do I know when my pumpkin cheesecake pie is done baking?
Use the wobble test. The edges of the pie should look set and slightly puffed, while the center (about a 2-inch circle) should jiggle gently when you tap the pan. It should not look liquid. The pie will continue to set as it cools and chills, so a slight wobble is exactly right.
Can I freeze pumpkin cheesecake pie?
Yes. Wrap the cooled pie (or individual slices) tightly in plastic wrap, then in a layer of aluminum foil, and freeze for up to 3 months. Thaw overnight in the refrigerator, never on the counter. The texture stays remarkably creamy after thawing.
How far ahead can I make this pie for Thanksgiving?
You can bake it up to 2 days ahead and keep it covered in the refrigerator. Add whipped cream, caramel, or other toppings right before serving. For even more advance planning, freeze it up to a month ahead and thaw in the fridge the day before.
Can I use a different crust for pumpkin cheesecake pie?
Absolutely. Biscoff cookies, gingersnaps, Oreos, chocolate wafers, or even shortbread all work as 1:1 swaps for graham crackers. Just keep the same amount of crumbs (1 ½ cups) and adjust sugar based on the sweetness of the cookie. Gingersnaps are slightly less sweet than grahams, so reduce added sugar by about a tablespoon.
More Pumpkin Recipes to Try This Fall
If this pumpkin cheesecake pie recipe earned a spot in your fall rotation, here are a few more seasonal favorites from the kitchen to round out your baking list:
- Easy and Delicious Pumpkin Pie Recipe — the classic custard pie that started it all.
- Fall Favorite Baked Pumpkin Donut Recipe — a quick breakfast treat with the same warm spice blend.
- Homemade Pumpkin Spice Recipe — DIY spice blend that tastes better than anything from a jar.
- 14 Hot Chocolate Drink Ideas — cozy drink pairings for chilly evenings.
This swirled pumpkin cheesecake pie has earned a permanent place in my fall baking rotation. The combination of creamy cheesecake, warmly spiced pumpkin, and that buttery graham cracker crust hits every cozy note without requiring any advanced baking skills. Save it for Thanksgiving, or make it on a random Tuesday because you deserve a slice. Either way, this is the kind of dessert that makes a regular week feel like a holiday.
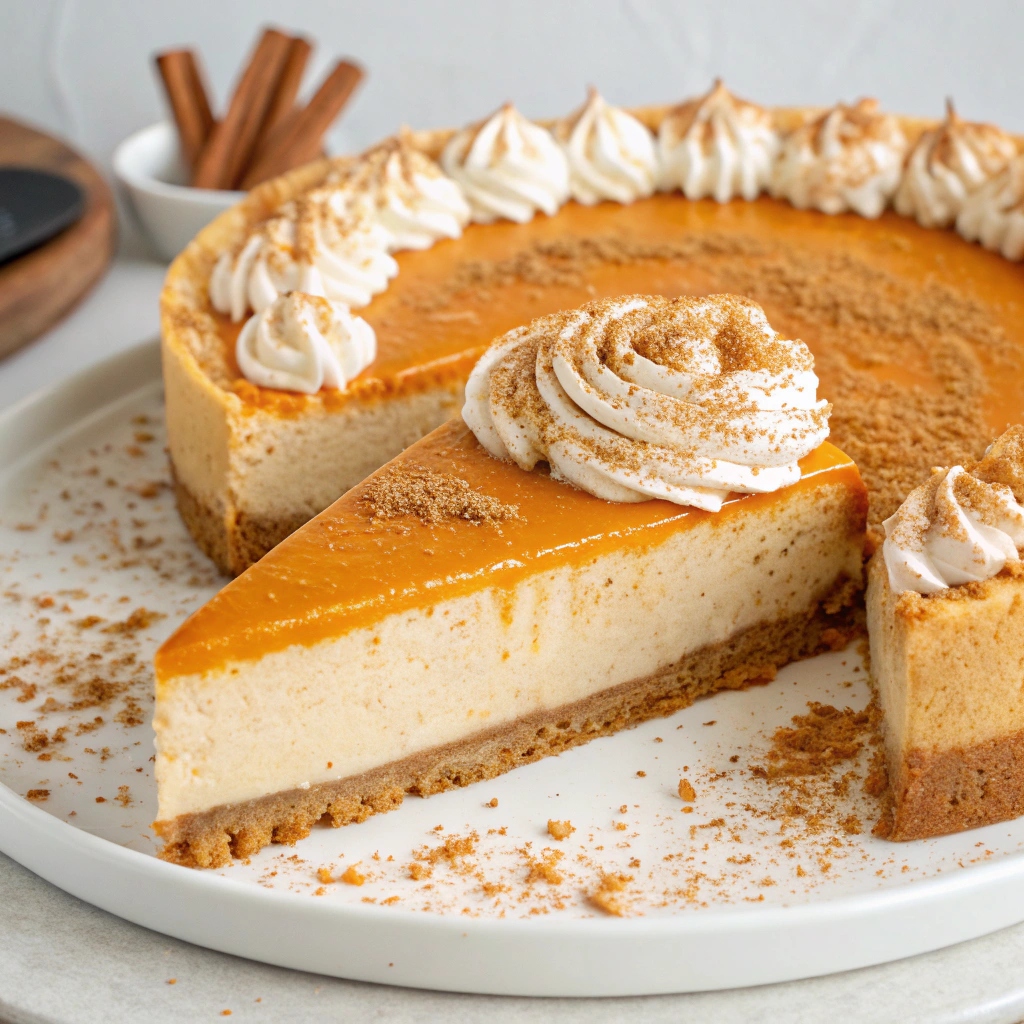
Pumpkin Cheesecake Pie
Ingredients
Method
- Preheat oven to 325F (160C).
- In a medium-sized bowl, combine graham cracker crumbs and sugars and stir until well-combined.
- Add melted butter and use a fork to toss together until all crumbs are moistened. Press firmly into the bottom and up the sides of a 9” pie plate. Set aside and prepare the filling.
- In a large mixing bowl, combine cream cheese and sugars and stir together with an electric mixer on low-speed until smooth, creamy, and no lumps remain.
- Add sour cream and vanilla and stir until well-combined.
- Add eggs, stirring on low-speed until just incorporated.
- Measure out 1 ½ cups (345g) of cheesecake into a separate, medium-sized bowl and to this second bowl add pumpkin puree and pumpkin spice and stir until smooth and combined.
- Alternate dolloping plain cheesecake batter and pumpkin cheesecake batter into prepared crust. Use a butter knife to swirl for a cute design.
- Transfer to center rack of 325F (160C) oven and bake for 40-50 minutes. Edges of pie should be set and center may be slightly jiggly when finished baking but should be mostly set. Allow to cool at room temperature for about an hour before transferring to refrigerator to chill for at least 6 hours, preferably overnight, before slicing and serving.