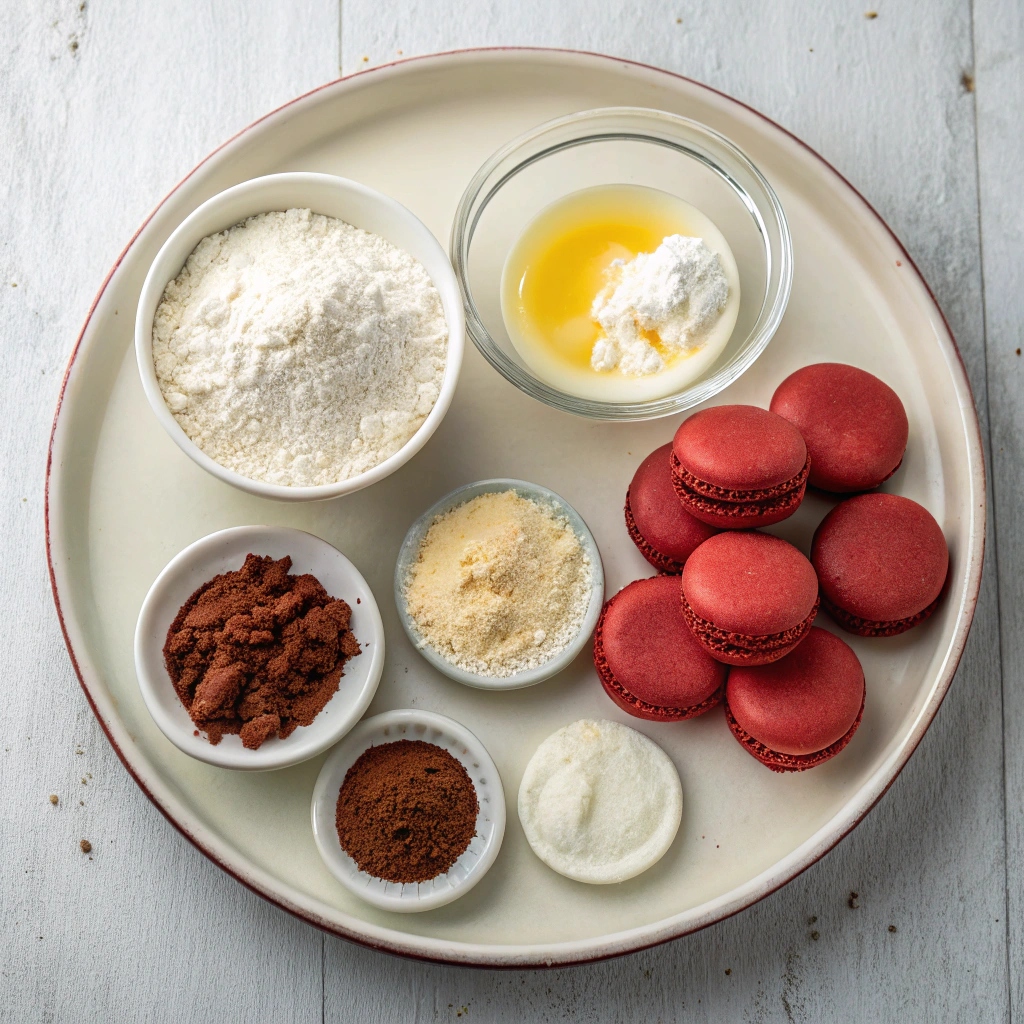
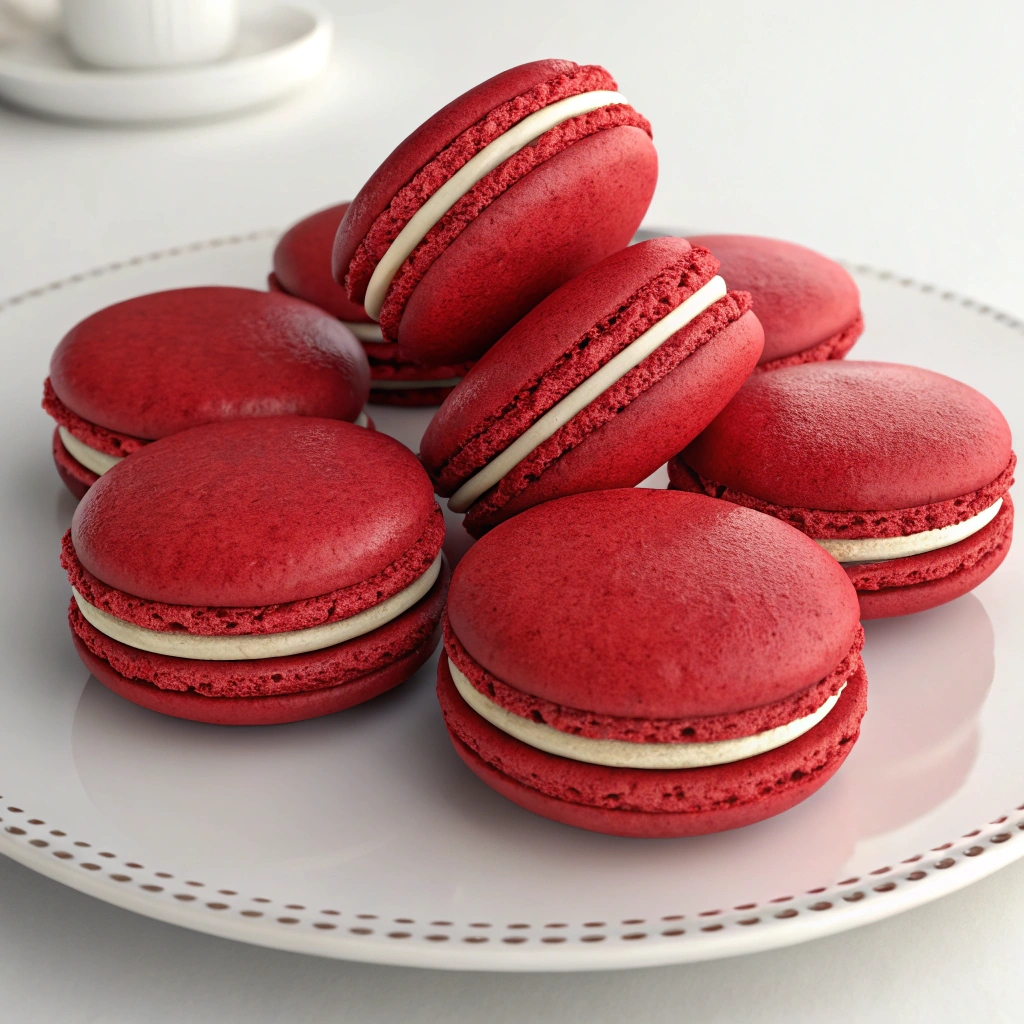
If you’ve ever admired those jewel-toned confections at a French bakery and wondered whether you could recreate them at home, this red velvet macarons recipe is your starting point. Red velvet macarons bring together everything people love about classic red velvet cake in a sandwich cookie form: a subtle cocoa note, a tangy cream cheese filling, and a striking crimson color that turns heads at any dessert table.
Macarons have a reputation for being tricky, and honestly, they aren’t an “after-dinner on a Tuesday” kind of bake. But once you understand the French method and a few fundamentals like aged egg whites, the macaronage technique, and proper resting time, the process becomes repeatable. I’ve baked these red velvet macarons dozens of times in my home kitchen, and the steps below reflect what actually works when you’re not working in a professional pastry kitchen.
This guide walks you through everything: the equipment list, ingredient notes explaining why each one matters, a phased step-by-step walkthrough, troubleshooting for the four most common problems (cracked tops, hollow shells, no feet, oily surfaces), and storage tips so your batch lasts for days. Expect about an hour of active work plus resting and baking time, with a yield of roughly 30 sandwiched macarons.
If this is your first attempt at macarons, I’d recommend reading my foundational French macaron recipe first to get comfortable with the technique, then coming back here for the red velvet variation.
Table of Contents
- Equipment You’ll Need
- Ingredients for Red Velvet Macarons
- How to Get Vibrant Red Color
- Step-by-Step Instructions
- Troubleshooting Red Velvet Macarons
- Perfect Pairings: Sauce and Topping Ideas
- Storage Secrets: Keeping Macarons Fresh
- Make-Ahead and Freezing
- Time-Saving Tips for Busy Bakers
- Nutrition Information
- Special Notes for Success
- Frequently Asked Questions
- Why are my red velvet macarons cracked and hollow?
- How do I get a vibrant red color without my shells getting sticky?
- Do I really need to age my egg whites?
- How long do red velvet macarons last?
- Can I freeze red velvet macarons?
- Can I use carton egg whites instead of fresh eggs?
- How thick should the batter be when I’m done folding?
- Can I use regular cocoa powder instead of Dutch-process?
- Conclusion
- Red Velvet Macarons
Equipment You’ll Need
Macarons are unforgiving when it comes to equipment. A clean, grease-free setup is non-negotiable because any fat residue can deflate your meringue. Before you start, gather the following:
- Electric stand mixer or hand mixer: A stand mixer is easier on the arms, but a hand mixer works fine for smaller batches. Avoid whisking by hand; meringue needs consistent high speed.
- Large glass or metal mixing bowl: Glass or metal only. Avoid plastic or rubber, which can harbor grease and prevent proper peaks.
- Kitchen scale: Volume measurements are unreliable for macarons because almond flour compacts differently in every cup. Weighing your ingredients is the single biggest upgrade you can make for consistent results.
- Fine-mesh sieve: For sifting almond flour, powdered sugar, and cocoa together to remove any larger pieces that would create lumpy shells.
- Silicone baking mat (Silpat) or parchment paper: Silicone mats produce more consistent feet and even browning, but parchment works in a pinch. Do not grease either surface.
- Piping bag and round tip: An Ateco 804 round tip produces the classic 1.5-inch macaron size. If you don’t have a tip, simply snip the end of a sturdy piping bag.
- Macaron template or silicone mat with guides: A printed template under your parchment helps you pipe uniform circles. You can also buy silicone mats with printed guides.
- Toothpick: For popping air bubbles on the surface of your piped shells right before baking.
- Oven thermometer: Oven dials are notoriously off, often by 25 to 50 degrees. An inexpensive oven thermometer gives you an accurate read and is the most common cause of cracked or hollow macarons.
- Two to three rimmed baking sheets: Flat sheets work best because warped pans cause uneven shells.
Ingredients for Red Velvet Macarons
This recipe yields about 30 sandwiched macarons (60 shells). Every ingredient pulls weight, so substituting carelessly is a recipe for failure.

For the Macaron Shells:
- 150 grams superfine blanched almond flour (about 1 ¼ cups, sifted): Don’t use almond meal; you need finely ground, blanched (skinned) almonds for a smooth shell surface.
- 145 grams powdered sugar (about 1 ¼ scant cups, sifted): Powdered sugar adds sweetness and prevents the shells from spreading too much.
- 5 grams Dutch-process cocoa powder (1 Tablespoon): Dutch-process has a smoother, less acidic flavor than natural cocoa. Keep the amount small because too much cocoa dulls the red color.
- 110 grams aged egg whites (about 3 large egg whites, room temperature): Aged means the whites have sat in the fridge uncovered for 24 to 48 hours. Aging reduces moisture content and creates a more stable meringue with higher volume.
- 95 grams granulated sugar (scant ½ cup): Added gradually to the whipping whites to create a glossy, stable meringue.
- ⅛ teaspoon cream of tartar (optional): Helps stabilize the meringue and prevents over-beating. Skip if you prefer, but it adds insurance.
- ⅛ teaspoon table salt: Balances the sweetness and enhances flavor.
- 1 teaspoon pure vanilla extract: Adds warmth and depth. Use pure extract, not imitation.
- Gel red food coloring (about 1 teaspoon Americolor Super Red): Gel-based only. Liquid food coloring adds too much moisture to the batter and won’t produce a vibrant red. See the dedicated color section below for specifics.
For the Cream Cheese Frosting Filling:
- 4 oz block-style cream cheese (113g, softened): Use the brick-style wrapped in foil, not the spreadable kind in tubs. Spreadable versions contain stabilizers that make the frosting too soft.
- ¼ cup unsalted butter (4 Tablespoons, 57g, softened): Softened to room temperature so it creams smoothly with the cream cheese.
- ½ teaspoon pure vanilla extract
- ⅛ teaspoon table salt
- 1 ¾ cups powdered sugar (220g): Adds sweetness and structure to the frosting.
How to Get Vibrant Red Color
Color is the single most common pain point when making red velvet macarons. Walk into any forum for bakers and you’ll see posts titled “Why are my red velvet macarons still pink?” and “The red color always gives me trouble.” The culprit is almost always one of three things: liquid food coloring, not enough gel, or too much cocoa powder dulling the hue.
Use gel food coloring, never liquid. Liquid food coloring is water-based, and adding enough of it to reach a vibrant red throws off the moisture balance of your batter. Gel colorings like Americolor Super Red are highly concentrated, so a small quantity produces dramatic color without affecting batter consistency.
How much to use: For a true bright red, you’ll need roughly 1 teaspoon of Americolor Super Red, or about 8 to 10 drops of a Wilton gel. Start with less than you think you need because you can always add more, but don’t add so much that the batter thins out.
Cocoa powder dulls red. This is why the recipe uses only 1 tablespoon of cocoa. If you add more, you’ll end up with brownish-red shells. The small amount of cocoa gives the shells that subtle red velvet flavor without overwhelming the red pigment.
Add color at the right moment. Mix the gel coloring into the meringue at the stiff peak stage, after you’ve added the sugar. Adding it earlier can affect how the whites whip. If you’re using a brand new jar of gel that’s thick, you can warm the closed tube in hot water for a minute to make it easier to dispense.
For an even deeper red: A pinch of powdered food coloring mixed in can intensify the color further if gel alone isn’t enough. Powdered color doesn’t add any moisture to the batter.
Step-by-Step Instructions
I’ve broken the process into five clear phases: Preparation, Meringue, Macaronage, Piping, and Baking. Following these phases in order and resisting the urge to skip ahead is what separates a good macaron from a bakery-quality one. If you’re new to macarons, the French macaron recipe walks through the same phases with extra photos.
Phase 1: Preparation
Before you crack a single egg, set yourself up for success. Macaron batter waits for no one, and a frantic hunt for a sieve mid-fold is a recipe for overmixing.
- Age your egg whites. Separate the whites from the yolks and store them in a covered container in the fridge for 24 to 48 hours. Bring them to room temperature before whipping. If you’re short on time, you can microwave them for 10 to 15 seconds on low power to simulate aging, but fresh-aged whites produce the most stable meringue.
- Wipe down equipment. Rinse your mixing bowl and whisk attachment with a bit of white vinegar or lemon juice, then dry thoroughly. This removes any grease that could deflate the meringue.
- Line baking sheets. Place silicone mats or parchment on your baking sheets. If using parchment, trace 1.5-inch circles as a piping guide and flip the parchment over so the ink doesn’t touch the batter.
- Sift dry ingredients. In a medium bowl, sift together the almond flour, powdered sugar, and cocoa powder. Discard any large bits that don’t pass through the sieve. Set aside.
- Preheat oven to 325°F (160°C). Place an oven thermometer inside to verify the actual temperature. Adjust if needed.
Phase 2: Whip the Meringue
The meringue is the structural heart of your macarons. Get this right and the rest of the process is forgiving.
- Foamy stage: In your clean mixing bowl, beat the egg whites on medium speed until foamy, about 30 seconds. They should look like soap bubbles.
- Add cream of tartar: Sprinkle in the cream of tartar and beat for another 30 seconds to stabilize the whites.
- Stream in the sugar: With the mixer running on medium, add the granulated sugar one tablespoon at a time, waiting about 30 seconds between each addition. Don’t dump it all at once; gradual addition is what creates a glossy, stable meringue.
- Add flavor and color: Once all the sugar is incorporated, add the vanilla, salt, and about 1 teaspoon of red gel food coloring. Continue beating on medium-high until the meringue reaches stiff peaks: when you lift the beaters, the peak should hold its shape without folding over or shrinking back.
Phase 3: Macaronage (Folding the Batter)
Macaronage is the French term for folding the dry ingredients into the meringue. This is where most beginners go wrong, either overmixing (runny batter, no feet) or undermixing (lumpy batter, peaked shells).
- Add dry ingredients in thirds. Add about one-third of the sifted almond flour mixture to the meringue. Use a spatula to fold gently, cutting through the center, scraping along the bottom, and turning the bowl as you go.
- Repeat additions. Add the next third, fold until just combined, then add the final third. Don’t worry about streaks; they’ll disappear with continued folding.
- Test with the figure-8. Continue folding until the batter flows like lava and falls from the spatula in a slow ribbon. To test, lift your spatula and let the batter drizzle back into the bowl. You should be able to draw a figure-8 on the surface with the batter that holds its shape for a few seconds before dissolving back into the rest. If the ribbon breaks immediately, fold a few more strokes. If it disappears too quickly, you’ve gone too far.
- Smear technique. Periodically press the batter against the side of the bowl with your spatula to deflate any large air pockets. This is the secret to smooth tops.
Phase 4: Pipe the Shells
Piping sets the final shape of your shells. Steady hands and a level surface make all the difference.
- Transfer to piping bag. Fit a piping bag with an Ateco 804 round tip (or just snip the end of a sturdy bag). Fill with batter, then twist the top closed to push the batter down.
- Pipe circles. Hold the bag straight up and down, perpendicular to the baking sheet. Pipe 1.5-inch circles, spacing them about 2 inches apart. End each shell with a quick flick of your wrist in a “C” motion to prevent peaks.
- Pop air bubbles. Once a tray is piped, hold the sheet a few inches above the counter and drop it firmly to release trapped air. Then run a toothpick through any visible bubbles on the surface; trapped air is the leading cause of cracked shells.
- Rest until a skin forms. Let the shells sit at room temperature until a matte skin forms on the surface. The “matte test” is simple: lightly touch a shell with the pad of your finger; if it feels dry and not tacky, it’s ready. This typically takes 30 to 45 minutes, though red gel coloring can extend drying time to an hour because the pigment adds slight moisture.
Phase 5: Bake and Cool
- Bake one tray at a time. Place the tray on the center rack and bake for 10 to 11 minutes. Rotate the pan halfway through for even browning. The shells are done when the feet look dry and matte, and a gentle press on the top of a shell doesn’t yield.
- Cool completely. Let the shells cool on the baking sheet for 10 minutes, then transfer to a wire rack. They must be fully cool before filling; warm shells will melt the frosting and slide apart.
- Match shells. Once cool, pair up similar-sized shells so each sandwich has matching halves. This is a small detail that makes your finished macarons look polished.
Phase 6: Make the Cream Cheese Frosting
- Cream together. In a medium bowl, beat the softened cream cheese, butter, vanilla, and salt until smooth and fluffy, about 2 minutes.
- Add powdered sugar gradually. Add the powdered sugar a half-cup at a time, mixing on low until incorporated, then increasing speed to whip until light and fluffy.
- Adjust consistency. If the frosting is too thick, add a teaspoon of milk or cream. If it’s too soft, add a tablespoon more powdered sugar. The ideal texture is spreadable but holds its shape when piped.
Phase 7: Assemble and Mature
- Pipe filling. Transfer frosting to a piping bag fitted with a round tip. Pipe a generous dollop onto the flat side of one shell.
- Sandwich. Top with a matching shell and press gently until the filling reaches the edges.
- Mature in the fridge. Place assembled macarons in an airtight container and refrigerate for at least 24 hours before serving. This maturation step is essential; it allows the filling to soften the interior of the shells, creating that signature chewy-meets-crisp texture. Optionally, drizzle melted white chocolate over the tops before chilling.
Troubleshooting Red Velvet Macarons
Even seasoned bakers hit snags with macarons. Here are the four most common problems and how to fix them.
Hollow Shells
If you crack open a baked macaron and the interior is full of air pockets, the cause is almost always trapped air that expanded during baking. Common culprits include under-folded batter (too thick to release air during piping), oven temperature that’s too high (the outside sets before the inside can release steam), or whipping the meringue to peaks that are too stiff.
To prevent hollow shells, make sure you complete the macaronage properly (the figure-8 test should give a slow-melting ribbon), bang the trays firmly on the counter after piping to release air, and use an oven thermometer to verify you’re actually baking at 325°F rather than 350°F.
Cracked Tops
Cracks form when the surface of the shell isn’t dry enough before baking, so the oven’s heat forces the wet batter to expand and burst. The fix is patience: let the shells rest until they pass the matte test. In kitchens with high humidity, this can take 45 to 60 minutes or longer. A fan pointed at the trays can speed drying.
Other causes of cracking include an oven that’s too hot, batter that’s overmixed (too runny), or trapped air bubbles that weren’t popped with a toothpick before baking.
No Feet (or Weak Feet)
The “feet” are the ruffled edge that forms at the base of each shell during baking. They’re a sign of a properly made macaron. If your shells are coming out flat without feet, the most likely cause is under-resting: the skin didn’t have time to form, so the batter spread instead of rising.
Other causes include overmixing the batter (too runny to hold its shape) or opening the oven door during the first few minutes of baking. Don’t peek for at least 8 minutes.
Oily or Wrinkled Tops
If the tops of your shells look slick or have a wrinkled, oil-spotted appearance, the issue is usually excess moisture or fat in the batter. The most common cause is using liquid food coloring instead of gel; the extra water separates during baking and rises to the surface. A greasy mixing bowl or whisk can also cause this; wipe everything down with vinegar before starting.
For more cocoa-heavy recipes, oily tops can also result from too much cocoa powder. Stick to the recipe’s 1 tablespoon measurement.
Perfect Pairings: Sauce and Topping Ideas
These macarons are stunning on their own, but a few finishing touches can elevate them into show-stopping dessert centerpieces. Here are my four favorite ways to dress them up:
White Chocolate Drizzle
Melt 2 oz of white chocolate chips with ½ teaspoon of coconut oil in 20-second microwave bursts, stirring between each. Transfer to a small piping bag (or a zip-top bag with the corner snipped) and drizzle in a criss-cross pattern over the tops of your assembled macarons. Let them set in the fridge for 10 minutes before serving. The contrast of crisp white chocolate against the red shells looks stunning on a dessert tray.
Crushed Shell Garnish
Save any broken or imperfect shells, pulse them in a food processor until finely crushed, and sprinkle the crumbs over the cream cheese filling before sandwiching. This adds texture, hides any small cracks, and creates a beautiful bakery-style presentation.
Raspberry Coulis
Blend ½ cup fresh or thawed raspberries with 1 tablespoon powdered sugar and a squeeze of lemon juice. Strain through a fine-mesh sieve to remove seeds, then drizzle alongside each macaron or spoon a small dollop on top. The bright tartness pairs perfectly with the sweet cream cheese filling.
Cocoa Powder Dusting
For an elegant minimalist look, lightly dust the tops of the shells with a fine layer of Dutch-process cocoa powder using a small sieve. This subtle detail is perfect for bridal showers and tea parties.
For another cocoa-based macaron variation, try my chocolate macarons recipe. And if you love colorful confections, my Fruity Pebble macarons use the same French method with a playful twist.
Storage Secrets: Keeping Macarons Fresh
Macarons are one of those rare baked goods that actually improve with age. The 24-hour maturation in the fridge softens the interior of the shells, creating that signature chewy-crisp texture. Here’s how to store them at every stage:
Refrigerator Storage (Filled Macarons)
Place filled macarons in a single layer in an airtight container, separating layers with parchment paper to prevent sticking. They’ll keep in the fridge for up to 5 days. For best flavor and texture, bring them to room temperature 15 to 20 minutes before serving; cold macarons taste muted and the filling firms up too much.
Freezer Storage (Filled Macarons)
For longer storage, freeze filled macarons in a single layer on a parchment-lined sheet until solid, then transfer to a freezer-safe container or zip-top bag. They’ll keep for up to 1 month. Thaw overnight in the refrigerator, then bring to room temperature before serving. Do not microwave; the filling will separate and the shells will go soft.
Unfilled Shells
If you want to bake shells ahead and fill them later, store unfilled shells in an airtight container at room temperature for 2 days, in the fridge for up to 1 week, or in the freezer for 1 month. The cream cheese frosting keeps separately in the fridge for up to 1 week in a sealed container; bring it to room temperature and re-whip briefly before using.
Make-Ahead and Freezing
Macarons are a perfect make-ahead dessert because the mandatory 24-hour maturation is built into the process. Plan ahead and you can spread the work across several days:
- 3 to 4 days ahead: Bake the shells and store unfilled in an airtight container at room temperature.
- 2 days ahead: Make the cream cheese frosting and store covered in the fridge.
- 1 day ahead: Assemble the macarons and refrigerate in an airtight container. The flavors meld and the texture improves.
- Day of serving: Pull from the fridge 15 to 20 minutes before serving to bring to room temperature.
For parties or holiday gifting, you can freeze fully assembled macarons for up to a month. Thaw in the fridge overnight, then bring to room temperature before plating. They taste just-baked.
Time-Saving Tips for Busy Bakers
Macarons aren’t fast food, but a few prep-ahead tricks cut your active time nearly in half:
- Pre-measure everything the night before. Sift the almond flour, powdered sugar, and cocoa into one bowl; measure the sugar into another; set the egg whites out. On bake day, you’re just combining.
- Use a kitchen scale for every ingredient. Weighing is faster than spooning and leveling, and the precision means fewer failed batches.
- Skip parchment in favor of silicone mats. Mats are reusable, washable, and produce more consistent feet than parchment. They’re worth the small upfront cost if you make macarons more than once.
- Pipe in batches. While one tray bakes, pipe the next. By the time your first tray is done, the second will have rested and is ready to go in.
- Make double batches. Macarons freeze beautifully, so bake two trays at once and freeze the extras for last-minute entertaining.
Nutrition Information
Each sandwiched red velvet macaron (one filled macaron) contains approximately 130 calories, 7g fat, 16g carbohydrates, 12g sugar, 2g protein, 30mg sodium, and 35mg cholesterol. Exact values vary based on shell size and filling amount. Macarons are best enjoyed as an occasional treat rather than a daily snack.
Special Notes for Success
A few final tips that make the difference between good and great macarons:
- Aging egg whites matters. Even a short 24-hour rest in the fridge improves meringue stability. Don’t skip this step.
- Avoid carton egg whites. Pasteurized liquid egg whites from cartons produce inconsistent meringue. Fresh egg whites work better every time.
- Block-style cream cheese is essential. Spreadable tubs contain additives that prevent the frosting from setting properly.
- Trust the figure-8 test. It’s the most reliable way to know when macaronage is done. Pulling the spatula too early or too late is the most common mistake.
- Resist opening the oven. Every peek drops the temperature and can cause cracked shells or weak feet. Set a timer and trust it.
Frequently Asked Questions
Why are my red velvet macarons cracked and hollow?
Cracked tops combined with hollow interiors usually point to two separate issues. Cracking means your shells didn’t rest long enough before baking; the wet batter expanded and burst in the oven. Hollow shells mean air was trapped inside during piping or the oven ran hot. Bang trays firmly on the counter after piping, pop air bubbles with a toothpick, rest until the matte test passes, and use an oven thermometer to confirm 325°F.
How do I get a vibrant red color without my shells getting sticky?
Use gel food coloring only, never liquid. Liquid adds too much moisture and prevents skin formation. Americolor Super Red is the most popular brand for a true bright red; use about 1 teaspoon. Wilton gel works but requires slightly more. Adding the gel at the stiff peak stage helps minimize moisture disruption. If shells still take a long time to dry, point a fan at the trays to speed evaporation.
Do I really need to age my egg whites?
Aging is highly recommended, especially for beginners. Egg whites that have sat uncovered in the fridge for 24 to 48 hours lose moisture, which produces a more stable meringue with higher volume and glossier peaks. If you’re short on time, microwave fresh whites for 10 to 15 seconds on low to mimic the effect, but proper aging produces better results.
How long do red velvet macarons last?
Filled macarons keep in an airtight container in the fridge for up to 5 days, with peak texture at 24 to 48 hours. For longer storage, freeze them for up to 1 month and thaw overnight in the fridge. Unfilled shells can be stored at room temperature for 2 days, refrigerated for 1 week, or frozen for 1 month.
Can I freeze red velvet macarons?
Yes, macarons freeze beautifully. Freeze filled macarons in a single layer on a parchment-lined sheet until solid, then transfer to a freezer-safe container. They’ll keep for up to 1 month. Thaw overnight in the refrigerator, then bring to room temperature 15 to 20 minutes before serving. Avoid microwaving, which melts the filling.
Can I use carton egg whites instead of fresh eggs?
Carton pasteurized egg whites are not recommended for macarons. They often contain additives that affect whipping, and they produce inconsistent meringue volumes. Fresh, properly aged egg whites give the most reliable results. If you must use carton whites, whip them with a small amount of cream of tartar to compensate.
How thick should the batter be when I’m done folding?
The batter should flow like thick lava and fall from your spatula in a slow, continuous ribbon. Test by drawing a figure-8 on the surface of the batter with batter falling from your spatula. The line should hold for a few seconds before slowly dissolving back into the rest of the batter. If it breaks immediately, fold a few more strokes. If it disappears too quickly, you’ve overmixed and the shells will spread without feet.
Can I use regular cocoa powder instead of Dutch-process?
Yes, you can substitute natural cocoa powder in a pinch, though Dutch-process is preferred for its smoother, less acidic flavor that complements the cream cheese filling. If using natural cocoa, the shells may have a slightly tangier taste and a touch less vibrant color. Use the same 1 tablespoon measurement either way.
Conclusion
Red velvet macarons are the kind of bake that earns you a reputation. They look like they came from a French patisserie, they taste like the best slice of red velvet cake you’ve ever had, and once you master the French method, the flavor variations are endless. The keys are patience during the resting phase, an accurate oven temperature, and a willingness to learn from your first batch.
If this is your first macaron adventure, start with my foundational French macaron recipe before tackling red velvet. Once you’re comfortable with the technique, you’ll be able to bake any flavor you can imagine. Happy baking.

Red Velvet Macarons
Ingredients
Method
- Before beginning: If you are a beginner, first read through the post and watch my video on how to make chocolate macarons. ALL equipment must be completely clean, dry, and grease-free. Avoid rubber, silicone, and plastic materials when whipping egg whites.
- Line several cookie sheets with parchment paper or clean, dry, silicone mats and set aside.
- In a medium-sized bowl, sift together almond flour, powdered sugar, and cocoa powder. Set aside.
- Add egg whites to a separate, large mixing bowl and use an electric mixer to beat on medium-speed until foamy (30 seconds).
- Add cream of tartar and stir again on medium speed (another 30 seconds).
- Add about 1 Tablespoon of granulated sugar and beat for about 30 seconds before adding the next Tablespoon. Repeat, stirring for about 30 seconds between additions, until all sugar has been added.
- Once all sugar has been added, add vanilla extract, salt, and red food coloring (I typically need about a teaspoon to get a bright red color). Continue to beat on medium/medium-high speed until mixture reaches thick, fluffy, stiff peaks. This means if you lift the beaters from the bowl, the peak that forms will hold its shape and not fold over or shrink back in on itself.
- Add approximately a third of the cocoa powder mixture to the meringue and use a spatula to fold until combined. Repeat with the next third of the mixture, then the remaining dry mixture.
- Continue to fold the batter, moving your spatula in sweeping motions, scraping down the sides and bottom of the bowl and cutting through the middle of the batter and turning your bowl as you go. Use your spatula to smoosh the mixture against the side of the bowl periodically to help deflate it. Continue to fold until the batter flows smoothly and falls from the spatula in a smooth ribbon. You should be able to JUST BARELY make a figure-8 with the batter before the meringue breaks.
- Transfer macaron batter into a large pastry bag fitted with a round tip (I use the Ateco 804).
- Holding the piping bag straight up and down, pipe batter into 1 ½” circles onto prepared baking sheets. Flick your wrist in a “C” motion at the end of piping to complete the macaron (and to not leave it with peaks). Space macarons approximately 2″ apart.
- Bang each pan very firmly on your countertop several times to release any air bubbles. Preheat your oven to 325F (160C).
- Allow macarons to rest until a skin forms on the surface (if you run the pad of your finger lightly over the top it should feel dry and not sticky or tacky). This typically takes about 35 minutes in my kitchen, but may vary in your own.
- Bake one tray at a time in the center rack of your oven for 10-11 minutes, turning the pan halfway through the baking time. Once finished baking, the feet should appear dry and if you very gently press on the top of a macaron it shouldn’t give.
- Allow macaron shells to cool completely before filling with cream cheese filling.
- Cream cheese frosting filling
- Combine softened cream cheese and butter, vanilla, and salt in a medium-sized mixing bowl and stir until smooth and creamy.
- Gradually add powdered sugar until it has all been incorporated and frosting is smooth.
- Pipe frosting onto the bottom of one macaron shell, sandwich with another. For best results allow macarons to mature for 24 hours in an airtight container in the refrigerator before enjoying. If desired, drizzle melted white chocolate over shells before refrigerating.