
Picture a dessert so refined it draws a quiet hush at the table: a chilled, vanilla-scented custard hiding beneath a sheet of glass-like caramel that cracks with the tap of a spoon. That is crème brûlée (pronounced krem broo-LAY), a French classic whose name literally translates to "burnt cream." The "crème" refers to the silky custard base, while "brûlée" captures the torched sugar crust that defines this dessert.
Despite its restaurant-only reputation, this homemade crème brûlée recipe uses just six everyday ingredients and comes together in about an hour of hands-on time. The custard bakes low and slow in a water bath, chills until firm, and gets its signature crackable top from a quick pass under a kitchen torch. Whether you are planning a Valentine’s Day dinner, a Mother’s Day brunch, or simply want a fuss-free dessert for a weeknight, this easy crème brûlée delivers an impressive result every time.
Below you will find the full ingredient breakdown, a step-by-step walkthrough, dedicated success tips, a guide to the perfect caramelized topping, storage advice (including freezer instructions), and a packed FAQ to answer the questions most home cooks ask.
Table of Contents
- What Is Crème Brûlée?
- Ingredients for Crème Brûlée
- Step-by-Step Instructions
- Crème Brûlée Success Tips
- How to Get the Perfect Caramelized Sugar Top
- Perfect Pairings: Sauce and Topping Ideas
- Serve It Right: Presentation Tips
- Make It Ahead: Storage and Reheating Tips
- Mix It Up: Recipe Variations
- Kitchen Essentials: Equipment Guidance
- Frequently Asked Questions
- What is the secret to crème brûlée?
- What is crème brûlée filling made of?
- What is the best cream to use for crème brûlée?
- Is crème brûlée one of the hardest desserts to make?
- Can I make crème brûlée without a torch?
- Why use only egg yolks in crème brûlée?
- Can you freeze crème brûlée?
- Why does my crème brûlée taste like eggs?
- How do you fix runny crème brûlée?
- Crème Brûlée Recipe
- Crème Brûlée Recipe
- Final Thoughts
What Is Crème Brûlée?
The name tells the whole story. Crème means cream and brûlée means burnt, so the dessert is "burnt cream" in its purest sense. A chilled vanilla custard is topped with a thin layer of sugar and torched until it melts into a crisp, amber shell. The first documented version of a cream-and-egg dessert finished with a hot iron appeared in a 1691 French cookbook, and the torched-sugar version we know today became a staple of French restaurant menus in the late 1800s.
What makes this French dessert feel so luxurious is the contrast in temperatures and textures. The custard is cool and silky, almost soft-set like panna cotta, while the topping is hot, brittle, and shatters the moment your spoon breaks through. That signature crack is what every cook is chasing, and it is exactly what this recipe delivers.
Ingredients for Crème Brûlée
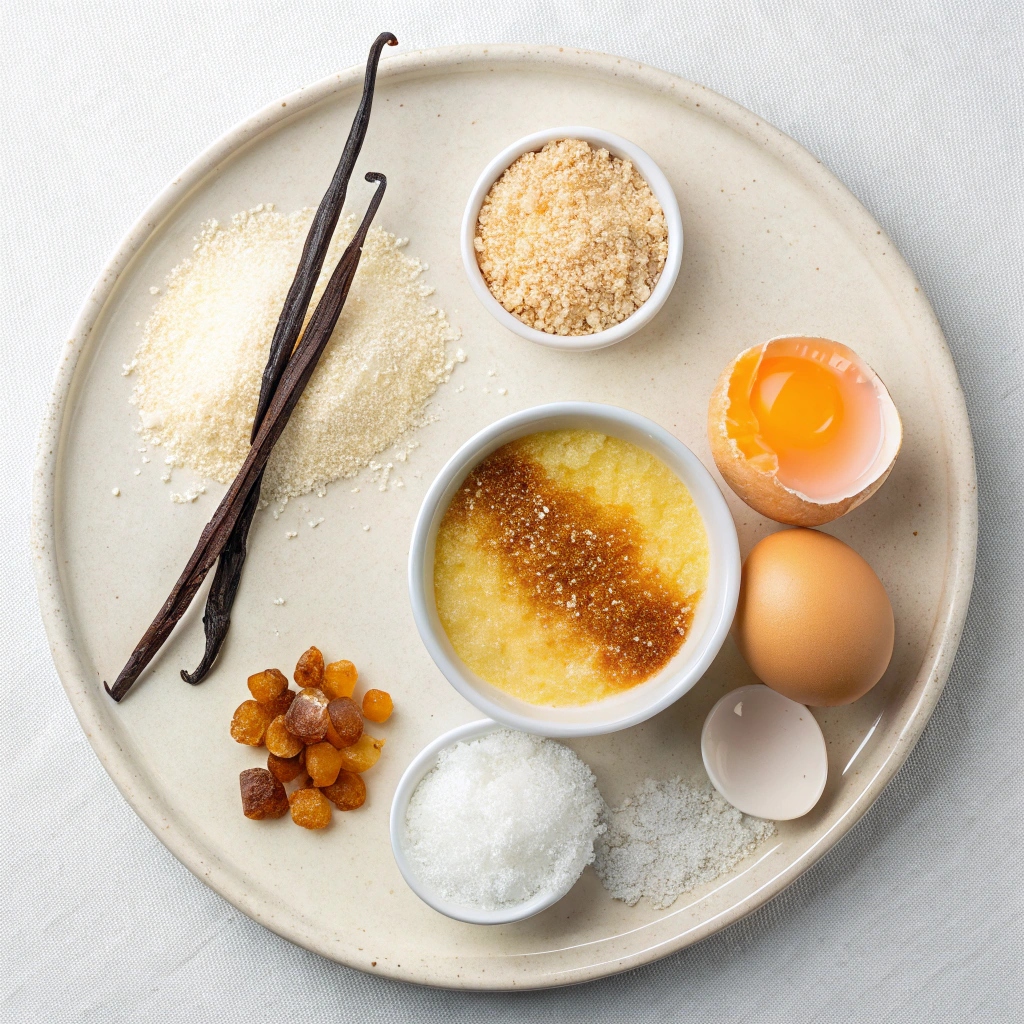
You only need six main ingredients for this classic crème brûlée recipe, plus a bit of hot water for the bain-marie and extra sugar for the topping. Here is what each one does, plus easy swaps if you need them.
- 2 cups (475 ml) heavy cream, divided. Use heavy cream with at least 36% milkfat for the silkiest set. Lower-fat cream (33%) will work but yields a slightly looser custard. For a dairy-free version, full-fat canned coconut milk is the closest substitute.
- ⅓ cup (66 g) granulated sugar. Just enough to sweeten the custard without overpowering the vanilla. You can use superfine sugar if you have it for an even smoother base.
- ⅛ teaspoon finely ground sea salt. A pinch of salt balances the sweetness and brightens the vanilla flavor. Skip it and the custard tastes flat.
- 1 vanilla bean (or 1 teaspoon pure vanilla extract). A split vanilla bean gives you those beautiful black flecks and the deepest flavor. If you only have extract, add it off the heat after the cream cools. Vanilla bean paste is a great middle-ground option.
- 6 large egg yolks, room temperature. Yolks only (no whites) give the custard its rich, spoonable texture. Whole eggs make the custard firmer and more like a baked cheesecake. Save the whites for an egg white omelet or pavlova.
- Hot water, for the water bath. A bain-marie (water bath) protects the custards from the oven’s direct heat, keeping them silky and preventing cracks.
- Additional granulated sugar (about 6 teaspoons), for the caramelized topping. You’ll need roughly 1 teaspoon per ramekin. Superfine sugar melts faster and more evenly, but regular granulated sugar works perfectly.
Step-by-Step Instructions
- Preheat your oven to 300°F (150°C). Prepare 6 (4-oz) shallow ramekins by wrapping the bottom and sides with aluminum foil, making sure the foil reaches at least 2 inches up the sides to keep water from seeping in. Place the ramekins in a large roasting pan and set aside.
- In a medium saucepan, combine 1½ cups (355 ml) of the heavy cream, the sugar, and the salt. Split the vanilla bean lengthwise, scrape out the seeds with the back of a knife, and add both the seeds and the empty pod to the pan. Stir well and bring to a gentle boil over medium heat, stirring occasionally so the bottom doesn’t scorch.
- Once the mixture bubbles, remove from the heat, cover, and let it cool for 15 minutes. This resting step lets the vanilla infuse evenly and brings the cream down to a safe temperature for the yolks.
- In a separate bowl, whisk the 6 egg yolks until smooth and slightly pale, about 30 seconds. They should fall in a slow ribbon off the whisk when ready.
- Fish the vanilla pod out of the cream and discard. Stir the remaining ½ cup (120 ml) of cold heavy cream into the warm cream mixture. This drops the temperature so the yolks won’t scramble.
- Slowly drizzle about ⅓ cup of the warm cream mixture into the yolks while whisking constantly. This is called tempering, and it gently raises the temperature of the eggs without scrambling them. Once that first splash is fully incorporated, gradually whisk in the rest of the cream mixture in a thin stream.
- Strain the combined mixture through a fine-mesh sieve into a large measuring cup or bowl. This step catches any tiny bits of cooked egg and any vanilla pod fragments, guaranteeing a silky-smooth custard.
- Divide the mixture evenly among the prepared ramekins, filling each about ⅔ to ¾ full. If you have extra, discard it (do not overfill).
- Carefully pour hot water into the roasting pan until it reaches about halfway to two-thirds up the sides of the ramekins. Hot water from the kettle prevents the custards from cooling down before they go into the oven.
- Bake for 25 to 35 minutes, until the edges are set but the center still wobbles like Jell-O when you nudge the pan. For a sure sign, insert an instant-read thermometer into the center: it should read 170 to 175°F (77 to 80°C).
- Using the foil as handles, lift each ramekin out of the water bath and place on a cooling rack. Cool for at least 20 minutes, then remove the foil, cover loosely with plastic wrap, and refrigerate for 4 to 6 hours (or overnight). The custards need that chill to fully set.
- Just before serving, sprinkle 1 teaspoon of granulated sugar evenly over the top of each custard. Hold a kitchen torch 3 to 4 inches away and move it in slow circles until the sugar melts, bubbles, and turns a deep amber, about 60 to 90 seconds. Serve immediately so the crust stays crisp.
Crème Brûlée Success Tips
The line between a perfect crème brûlée and a scrambled-egg disaster is thinner than you think. These are the cues that separate the best homemade crème brûlée from the rest.
- Temper the yolks slowly. Adding hot cream to cold yolks all at once will cook them on contact. Pour in just a third of a cup first, whisking the whole time, then slowly stream in the rest.
- Skip the whole eggs. Recipes that use whole eggs turn out firmer and more like a baked cheesecake. Yolks only give the custard that signature silky, melt-in-your-mouth texture.
- Use a water bath, every time. The bain-marie surrounds the custards with gentle, even heat and keeps the yolks from curdling. Skip it and you’ll almost always end up with a cracked, rubbery top.
- Pull them out while still jiggly. The center should wobble like a wave when you tap the pan. It will continue to set as it cools. If the center is firm in the oven, it will be overcooked by the time it chills.
- Trust the thermometer. Visual cues can be deceiving, especially in a dark oven. An instant-read thermometer set to 170 to 175°F in the center removes all the guesswork.
- Lower is better than higher. 300°F bakes the custards gently and slowly. Anything above 325°F risks overcooking the edges before the center is set.
- Strain the custard. That fine-mesh sieve is doing real work. It catches any tiny bits of cooked egg and the vanilla pod, leaving you with a custard that’s perfectly smooth.
How to Get the Perfect Caramelized Sugar Top
The crackable sugar top is the whole point of crème brûlée. Getting it right is less about magic and more about technique. Here is how to nail that thin, glass-like crust every single time.
Choose your sugar. Regular granulated sugar works beautifully and is what most recipes call for. Superfine (caster) sugar melts faster and more evenly, which is helpful if you’re nervous about scorching. Avoid coarse sanding sugar, which won’t melt into a smooth sheet.
Use a thin, even layer. About 1 teaspoon per ramekin is plenty. Sprinkle the sugar in a circle, then tilt the ramekin or tap the side to spread it evenly. A thick layer will stay gummy in the middle; a paper-thin layer will burn before it fully melts.
Working with a kitchen torch. Hold the torch 3 to 4 inches above the sugar and move it continuously in slow circles. Start at the edges and work your way to the center. The sugar should bubble, melt, and turn deep amber in 60 to 90 seconds. If you see black spots, you’re holding the flame too close or staying too long in one spot.
No torch? Use the broiler. Place the sugared ramekins on a baking sheet and set them on the top rack, 3 to 4 inches from the broiler element. Broil on high for 4 to 6 minutes, watching closely. The sugar can go from golden to burnt in seconds, so stay right there. Rotate the pan if your broiler has hot spots.
Troubleshooting the topping. If the sugar sinks into the custard instead of melting on top, the custards aren’t cold enough. Chill them for the full 4 to 6 hours before torching. If the crust turns soft after a few minutes, the sugar layer was too thick or the custard was too warm. Serve immediately after torching for the best crack.
Perfect Pairings: Sauce and Topping Ideas
Pure vanilla crème brûlée is a showstopper, but a finishing touch can take it over the top. Try a quick raspberry coulis or homemade caramel sauce drizzled around the plate. A handful of fresh berries (raspberries, strawberries, or blueberries) adds color and a tart contrast to the rich custard. For a restaurant-style finish, garnish with a small mint sprig or a fine dusting of powdered sugar right before serving.
If you don’t have a torch, you can skip the crackable top entirely and serve the chilled custard with a topping instead. Try a spoonful of fresh berries macerated with a little sugar, a drizzle of our easy salted caramel sauce, or a few shavings of dark chocolate over the surface. They all give you that same elegant feel without the torch step.
Serve It Right: Presentation Tips
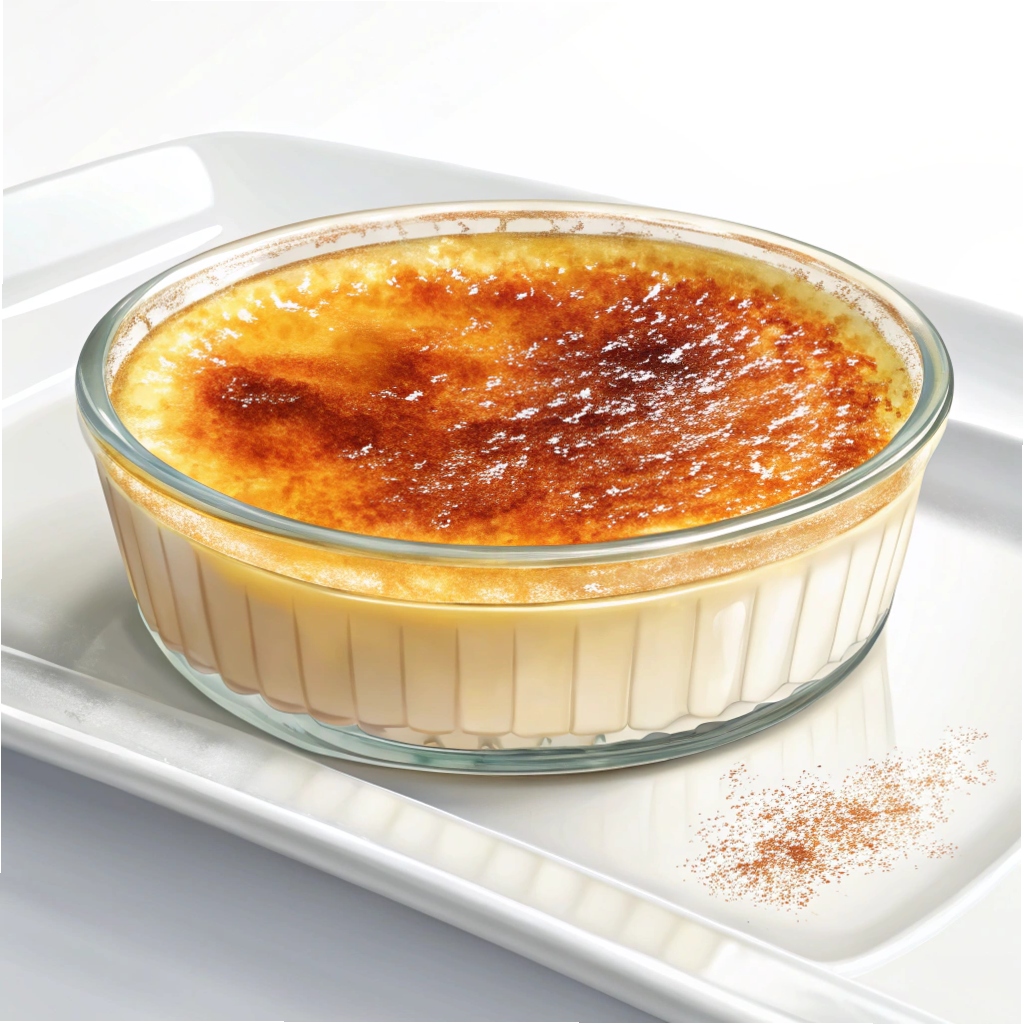
The reason crème brûlée feels like a special-occasion dessert is that every detail is on display. Choose shallow 4-oz ramekins with a wide opening so the sugar topping has plenty of surface area to crack. White porcelain is the classic choice, but clear glass dishes also show off the vanilla flecks in the custard and make for a stunning presentation.
Always serve crème brûlée with a small dessert spoon that guests can use to break through the crust. For plated desserts, set the ramekin on a small plate with a folded linen napkin and a few berries on the side. A short crack of freshly cracked black pepper on top of the burnt sugar sounds unusual but enhances the caramel notes beautifully. For a contrasting bite on a dessert platter, try pairing these ramekins with our lemon poppy seed cookies on the side for dipping.
This is the dessert to make when you want to impress without the stress. It is a top pick for Valentine’s Day, Mother’s Day, anniversaries, and dinner parties because every element can be prepped ahead. Guests get to experience the drama of cracking the sugar themselves, which makes the whole evening feel intentional.
Make It Ahead: Storage and Reheating Tips
Crème brûlée is one of the best make-ahead desserts because the custard actually benefits from time in the fridge. Once the ramekins have cooled, press a piece of plastic wrap directly onto the surface of each custard. This prevents a skin from forming and keeps the texture silky. They will keep in the refrigerator for up to 3 days.
For longer storage, you can freeze the custards for up to 1 month. Wrap each ramekin tightly with two layers of plastic wrap, then a layer of aluminum foil. Thaw overnight in the refrigerator, then proceed with the sugar topping and torching step just before serving. The custard may release a tiny bit of liquid as it thaws, just pour it off before adding the sugar.
Always torch the sugar topping right before serving. If you torch them too early, the sugar absorbs moisture from the custard and goes soft within minutes. If you have made-ahead custards waiting in the fridge, pull them out 10 minutes before serving, add the sugar, and torch just as guests sit down.
One note on reheating: don’t. The custard is meant to be served cold, with the sugar topping freshly torched. If your custard has been in the fridge and feels too cold, let it sit at room temperature for 10 minutes before topping and serving.
Mix It Up: Recipe Variations
The vanilla base here is a perfect blank canvas. Once you have the method down, you can take the flavor in just about any direction. Here are some tried-and-true variations, each made by adding the ingredient to the warm cream in Step 2 before you temper the yolks.
- Chocolate Crème Brûlée. Add 3 tablespoons of unsweetened cocoa powder to the cream before heating. Whisk until smooth, then proceed with the recipe. Top with chocolate shavings.
- Espresso Crème Brûlée. Stir 1 tablespoon of instant espresso powder into the warm cream along with the sugar. The slight bitterness plays beautifully against the burnt sugar top.
- Lavender Crème Brûlée. Add 1 teaspoon of dried culinary lavender to the cream as it heats, then strain it out before tempering. A small amount goes a long way.
- Orange Zest Crème Brûlée. Add the zest of 1 large orange to the cream while it heats. The bright citrus lifts the rich custard without stealing the show.
- Chai-Spiced Crème Brûlée. Add 1 cinnamon stick, 2 cardamom pods, 2 cloves, and a small slice of fresh ginger to the cream as it heats. Strain before tempering.
- Pumpkin Spice Crème Brûlée. Whisk ¼ cup of pumpkin puree and 1 teaspoon of pumpkin pie spice into the warm cream. Strain before tempering for a smooth texture.
- Matcha Crème Brûlée. Whisk 2 teaspoons of culinary-grade matcha powder into the warm cream and strain. The earthy green color and flavor pair wonderfully with the caramelized top.
- Bourbon Crème Brûlée. Stir 1 to 2 tablespoons of bourbon into the cream after it has cooled for 15 minutes. Skip the vanilla bean and let the bourbon shine.
Kitchen Essentials: Equipment Guidance
You don’t need a lot of specialty gear to make a great crème brûlée. Here is what each tool does and why it matters.
- Shallow 4-oz ramekins. Wider, shallower ramekins give you more surface area for the crackable sugar top. Deep, narrow ramekins need longer to bake and give you less of that signature crust.
- Large roasting pan or 9×13 baking dish. This holds the ramekins for the water bath. Make sure there’s at least 1 inch of clearance between the ramekins and the sides of the pan.
- Aluminum foil. Wrapping the ramekins keeps water from seeping into the custard. Don’t skip it.
- Medium saucepan. For heating the cream and sugar. Heavy-bottomed is ideal so the cream doesn’t scorch.
- Fine-mesh strainer. Non-negotiable for silky custards. It catches any tiny bits of cooked egg and the vanilla pod.
- Instant-read thermometer. The surest way to know when your custards are done. Aim for 170 to 175°F in the center.
- Kitchen torch (butane or propane). A small butane culinary torch gives you the most control. If you don’t have one, the oven broiler on high works well (see the topping section above).
- Cooling rack and plastic wrap. For cooling and storing the custards without forming a skin on top.
Frequently Asked Questions
What is the secret to crème brûlée?
The secret to perfect crème brûlée is gentle heat and patience. Bake the custards low and slow in a water bath at 300°F, pull them out when the center is still jiggly, and chill them for 4 to 6 hours before torching the sugar top. A fine-mesh strainer and instant-read thermometer are the tools that take the guesswork out entirely.
What is crème brûlée filling made of?
Classic crème brûlée filling is made from just 6 ingredients: heavy cream, granulated sugar, a pinch of salt, vanilla bean or extract, and egg yolks. The mixture is gently heated, tempered, strained, baked in a water bath, and chilled until set. It is naturally gluten-free and can be made dairy-free with full-fat coconut milk.
What is the best cream to use for crème brûlée?
Heavy cream with at least 36% milkfat gives the silkiest, most luxurious custard. Lower-fat cream (33%) will still set but produces a slightly looser texture. Avoid half-and-half or milk alone, as they don’t have enough fat to thicken properly. For a dairy-free version, full-fat canned coconut milk is the best substitute.
Is crème brûlée one of the hardest desserts to make?
Not at all. Despite its fancy restaurant reputation, crème brûlée is actually one of the easiest desserts to make at home. The ingredient list is short, the active time is just 15 minutes, and the oven does most of the work. The water bath handles the gentle baking, and the hardest part is simply waiting for the custards to chill before torching the top.
Can I make crème brûlée without a torch?
Yes. Use your oven broiler on high. Place the sugared ramekins on a baking sheet on the top rack, 3 to 4 inches from the broiler element, and broil for 4 to 6 minutes. Watch them closely because the sugar goes from golden to burnt in seconds. Alternatively, serve the custards with fresh berries, caramel sauce, or shaved chocolate instead of a crackable sugar top.
Why use only egg yolks in crème brûlée?
Yolks only give the custard its signature rich, silky texture. Whole eggs contain a lot of white protein, which sets the custard firm and rubbery, more like a baked cheesecake. Yolks are mostly fat and emulsifiers, so they thicken gently as they bake and create that melt-in-your-mouth spoonable custard you want.
Can you freeze crème brûlée?
Yes, you can freeze crème brûlée for up to 1 month. Wrap each ramekin tightly with two layers of plastic wrap and a layer of aluminum foil, then thaw overnight in the refrigerator before serving. You can also freeze the custards without the sugar topping, then add fresh sugar and torch just before serving for the best crackable crust.
Why does my crème brûlée taste like eggs?
An eggy flavor usually means the custard was baked too long or at too high a temperature. Pull the custards when the center is still jiggly and use a thermometer to confirm 170 to 175°F. Also make sure your vanilla is fresh and use a generous amount, as vanilla is what balances the yolk flavor.
How do you fix runny crème brûlée?
Unfortunately, you cannot fix a runny custard after baking. The best approach is prevention: bake the custards low and slow at 300°F, use a water bath, and pull them when the center is still jiggly but the edges are set. If they are still liquid after cooling, you can re-bake them at 275°F for 10 to 15 minutes, but the texture will be slightly looser than ideal.
Crème Brûlée Recipe
Crème Brûlée Recipe
Ingredients
Method
- Preheat oven to 300F (150C). Prepare 6 ramekins by wrapping the bottom and sides with foil (see video below or images in post for a visual, the foil should be reaching at least 2” up the sides of each ramekin to protect the creme brulee from the water bath). Set prepared ramekins inside a large roasting pan⁴ and set aside.
- Combine 1 ½ cups (355ml) heavy cream cream, sugar, and sea salt in a medium-sized saucepan. Split vanilla bean, scrape out seeds and add to saucepan and then toss in the vanilla bean as well. Stir mixture well and bring to boil over medium heat, stirring occasionally.
- Once mixture comes to a boil, remove from heat and allow it to cool for 15 minutes.
- Meanwhile, combine your egg yolks in a separate medium-sized bowl and whisk well.
- Once cream has cooled, retrieve vanilla bean and discard. Pour remaining ½ cup (115ml) heavy cream into warm cream mixture and stir well.
- Take approximately ⅓ cup of the cream mixture and slowly drizzle it into egg mixture while whisking yolks constantly (this gradual addition while whisking will keep the hot cream mixture from cooking your eggs).
- While whisking, drizzle remaining cream mixture into egg yolks until mixture is combined.
- Pour mixture through a strainer into a separate bowl.
- Divide mixture evenly into prepared ramekins, filling each ⅔-¾ full (do not overfill, if you have any extra mixture discard).
- Carefully, making sure to not get get any water into the ramekins, pour hot water into the roasting pan, using enough so that the water height is about ⅔-¾ as high as the top of the ramekins (not the foil!).
- Carefully transfer to oven and bake on 300F (150C) for 25-35 minutes or until center is set on top but still jiggling, I recommend using an instant read thermometer to check that the temperature is at 175F (80C).
- Gripping the foil, carefully lift each creme brulee out of the roasting pan and set on a cooling rack to cool for at least 20 minutes. Discard foil, transfer to refrigerator and allow to chill for at least 4-6 hours.
- When ready to serve, generously sprinkle the top of each creme brulee with about 1 teaspoon of granulated sugar. Holding a culinary torch several inches from the sugar, cook the sugar (moving the torch constantly) until sugar is melted and golden browned (about 90 seconds).
- Serve and enjoy! Hint: Creme Brulee is great topped with fresh fruit!
Nutrition
Final Thoughts
Homemade crème brûlée is one of those rare desserts that looks far more complicated than it actually is. With six ingredients, a water bath, and a few hours of chilling time, you can serve a restaurant-quality French dessert at home for a fraction of the price. The contrast between the cool, silky custard and the warm, crackable sugar top is what makes this dish unforgettable, and once you have the technique down, the variations are endless.
Save this crème brûlée recipe for your next dinner party, date night, or holiday celebration. It is a make-ahead dessert that gets better as it chills, and the dramatic torch moment right before serving always gets a reaction. If you try this recipe, leave a comment below and let me know which variation you tried, or check out my other easy dessert recipes for more inspiration.