
Gender reveal cupcakes are having a serious moment in 2026, and honestly, it’s never been easier to pull off a stunning reveal from your own kitchen. I baked my first batch for my sister’s virtual shower, and watching twenty people lose their minds over a single pink sprinkle was pure joy. This recipe uses a sturdy vanilla base that holds up to coring, a soft pillow of Swiss meringue buttercream on top, and a hidden shower of pink or blue sprinkles tucked inside each cupcake. Total clock time is under an hour, and the make-ahead-friendly approach means you can bake the night before and still serve cupcakes that look freshly decorated.
This updated guide for 2026 walks you through everything from choosing the right filling to sealing the seams so the surprise stays hidden until that first bite. I’ll cover a from-scratch version, a shortcut cake-mix variation, and a chocolate option for the chocolate lovers in your family. You’ll also get a make-ahead timeline, troubleshooting tips for the most common cupcake fails, and a FAQ section that answers the questions I get asked most often in the comments. Whether you’re planning a grand gender reveal party or an intimate family announcement, this recipe scales beautifully from a dozen to a few dozen cupcakes.
Table of Contents
- What Is a Gender Reveal Cupcake?
- Ingredients for Gender Reveal Cupcakes
- Step-by-Step Instructions
- Frosting Fun: Creative Topping Ideas
- Perfect Presentation: Serving Suggestions
- Storage Secrets: Keeping Cupcakes Fresh
- Make-Ahead Timeline
- Time-Saving Tips for Busy Bakers
- Equipment Essentials: Tools You’ll Need
- Variations & Substitutions
- Frequently Asked Questions
- How do you do a gender reveal with cupcakes?
- What is an easy recipe for a gender reveal cake?
- What is the best frosting for gender reveal cupcakes?
- Can I make gender reveal cupcakes ahead of time?
- What can I use instead of sprinkles for gender reveal filling?
- Can I use a box mix for gender reveal cupcakes?
- What if my cake crumbles when I try to core it?
- Conclusion
- Gender Reveal Cupcakes
What Is a Gender Reveal Cupcake?
A gender reveal cupcake is a vanilla cupcake baked with a hidden surprise center filled with pink or blue sprinkles, colored candies, or dyed frosting. On the outside, the cupcake looks ordinary, frosted in white or a neutral color. The surprise is revealed when guests bite in (or the baker slices one open) and discover the color inside, announcing whether the baby is a boy or a girl.
The concept borrows the drama of the traditional gender reveal cake but trades the knife-and-tableau moment for a more personal, bite-sized experience. Each guest gets their own little reveal, which makes the moment interactive and keeps the surprise alive until everyone has taken their first bite. The cupcake itself acts as a neutral canvas, with the colored filling doing all the storytelling. For a stress-free party, the filling stays hidden until the cupcake is split, sliced, or bitten.
Ingredients for Gender Reveal Cupcakes
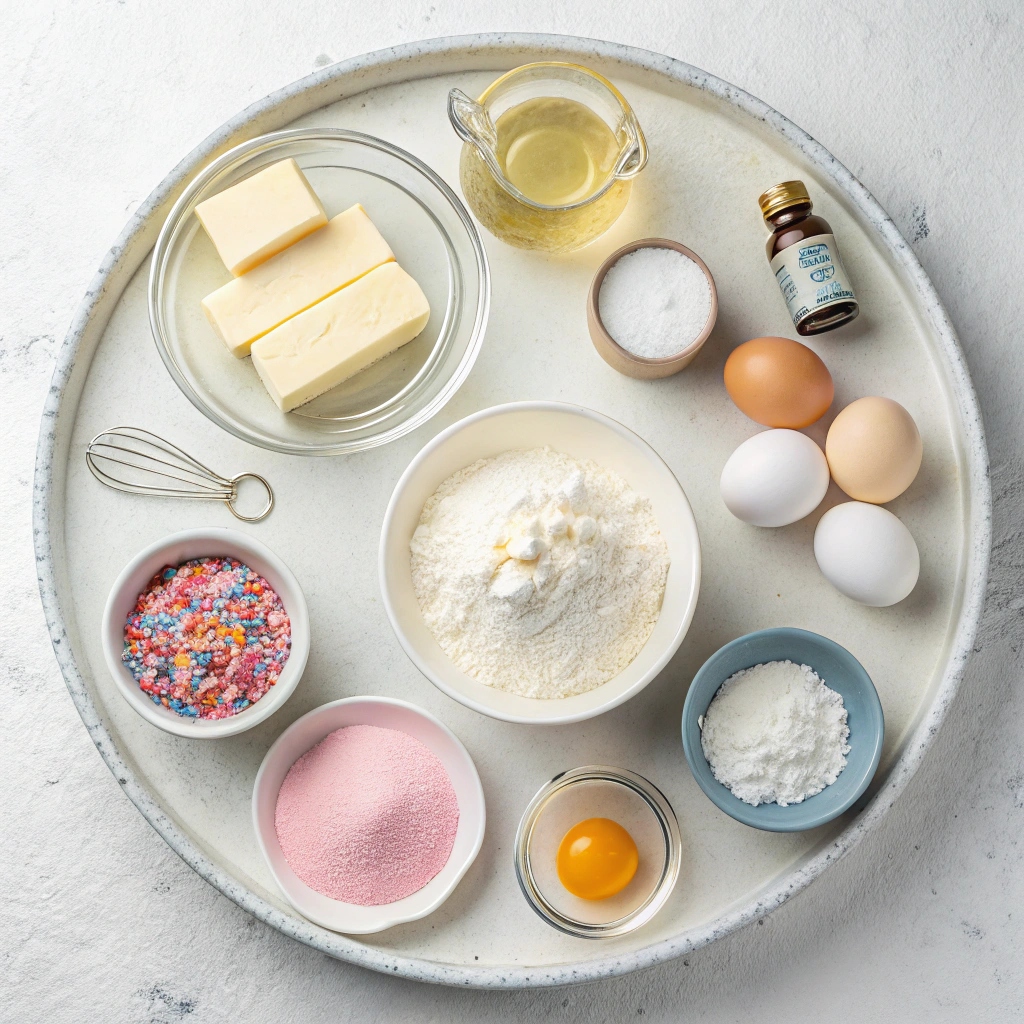
- 3 large egg whites (122 g, room temperature; ensure no yolk is present for proper whipping)
- 3 Tablespoons unsalted butter (softened to room temperature)
- ⅓ cup canola oil or vegetable oil (80 ml)
- 1 cup sugar (200 g)
- 1 ½ teaspoons vanilla extract
- ½ cup sour cream (120 g)
- 1 ⅓ cup + 1 Tablespoon all-purpose flour (172 g)
- ½ teaspoon baking powder
- ¼ teaspoon baking soda
- ½ teaspoon salt
- ¾ cup pink or blue sprinkles (for the reveal)
- 1 batch Swiss Meringue Buttercream (or your preferred frosting)
Step-by-Step Instructions
- Preheat oven to 350°F (175°C) and line a 12-count cupcake tin with paper liners. Set aside.
- In a clean, dry, grease-free bowl, beat egg whites with an electric mixer on high speed until stiff peaks form. Set aside.
- In a separate bowl, beat together butter, oil, and sugar until creamy and well-combined.
- Scrape down the sides of the bowl, then stir in vanilla extract and sour cream until combined.
- In another bowl, whisk together flour, baking powder, baking soda, and salt.
- Using a spatula, gently fold the dry ingredients into the wet ingredients until fully combined. Avoid over-mixing.
- Carefully fold the beaten egg whites into the batter until no streaks remain.
- Divide the batter evenly into the prepared cupcake tin.
- Bake for 17-19 minutes, or until a toothpick inserted into the center comes out mostly clean or with a few moist crumbs.
- Allow cupcakes to cool completely before assembling.
- Assembly: Use a small knife to cut a 1” diameter and 1” deep hole into each cupcake (do not cut through the bottom). Remove the core, slice off the bottom, and save the top piece.
- Fill each cavity with pink or blue sprinkles, then replace the reserved cupcake piece on top, pressing gently.
- Frost the cupcakes with Swiss Meringue Buttercream or your preferred frosting.
How Do You Fill Gender Reveal Cupcakes?
Filling gender reveal cupcakes is the part that intimidates most first-time bakers, but the technique is straightforward once you understand the goal: cut a clean nest, fill it, and seal the top so the color stays hidden. After your cupcakes have cooled completely, grip each one gently and use a small paring knife or a dedicated cupcake corer to cut a 1-inch-wide, 1-inch-deep hole in the center. Angle the blade slightly so the top of the hole is wider than the bottom, which keeps the plug from sinking.
Pull out the core, slice off the bottom, and set the top piece aside next to its matching cupcake. Spoon 1 to 2 teaspoons of pink or blue sprinkles into each cavity, then drop the plug back on top and press down lightly so the seam disappears. A thin crown of frosting will hide the seam completely. If you want even more drama, fill the cavity with a layer of sprinkles and a small dot of pink or blue colored buttercream for a true fairy-dust reveal.
Pro Tips for a Clean Reveal
A clean reveal comes down to three details: a sturdy cupcake, a properly sized hole, and a thick blanket of frosting. Bake the cupcakes a day ahead so they firm up and coring becomes less destructive. A dedicated cupcake corer ($8 to $12 online) cuts a perfectly neat plug every time, but a small serrated knife works just as well. Finally, pipe a generous swirl of frosting on top so the plug seam is buried, and avoid red-, orange-, or translucent-colored sprinkles that can leak color through white frosting.
Chill the filled cupcakes for 15 minutes before frosting. The cold helps the sprinkles set and prevents the buttercream from melting into the cake surface. If you are transporting them to a party, set them in a cupcake carrier with a flat top tray so the frosting does not smush.
Frosting Fun: Creative Topping Ideas
While Swiss Meringue Buttercream is the classic choice for its cloud-soft texture, you can swap in any frosting that holds its shape. A piped rosette of [chocolate Swiss meringue buttercream](https://recipesbyrahat.com/chocolate-swiss-meringue-buttercream-recipe/) adds a deep cocoa contrast that looks gorgeous on camera. For a tangy finish, try my [cream cheese frosting](https://recipesbyrahat.com/cream-cheese-frosting-recipe/) – it spreads like a dream and pairs especially well with the vanilla cupcake base.
Want a true neutral canvas? A [white chocolate buttercream](https://recipesbyrahat.com/white-chocolate-buttercream-recipe/) keeps the outside snowy white and lets the surprise sprinkles do the talking. For visual flair, add a few drops of pink or blue food coloring to the frosting, but keep the color subtle so guests don’t guess the gender before the big bite. Top with extra sprinkles, edible glitter, or a small fondant baby-themed topper for a finished photo-ready look.
Perfect Presentation: Serving Suggestions
Set the stage before guests arrive by arranging the cupcakes on a white tiered stand so the inside-out reveal feels monumental. Place a small wooden sign that reads “Cut to Reveal” or “Bite for the Surprise” right in front to set expectations. For maximum drama, dim the lights and have the parents-to-be cut the first cupcake on camera while everyone watches – the gasp when the color shows is the moment everyone came for.
Pair the cupcakes with pink or blue sparkling cider, a fruit punch, and a coordinating balloon arch for a complete announcement table. If you want guests to participate, hand each person a small fork and let them slice their cupcake at the same time. Save one or two extra cupcakes for the photographer, since the inside shot is the money photo for the announcement post. A simple white napkin or doily under each cupcake keeps the photo clean and bright.
Storage Secrets: Keeping Cupcakes Fresh
Store your cupcakes in an airtight container at room temperature for up to 2 days. If you need to keep them longer, refrigerate for up to 5 days, but let them come to room temperature before serving for the best texture. For longer storage, freeze unfrosted cupcakes in a freezer-safe container for up to 3 months. Thaw at room temperature and frost before serving.
Make-Ahead Timeline
For a party-day stress release, plan backward from the event. Up to 3 months ahead, bake the cupcakes, cool them completely, and freeze in a single layer before transferring to a freezer bag. Two days ahead, thaw the cupcakes in the fridge overnight. The morning of the party, core and fill each cupcake, then set them on a tray while you whip the frosting.
Frost the cupcakes 2 to 4 hours before guests arrive so the buttercream has time to set without drying out. If your kitchen runs warm, refrigerate the frosted cupcakes for 15 minutes to firm up the buttercream, then let them sit at room temperature for 10 minutes before serving. The sprinkles hold best when chilled, so the assembly-to-party window should stay under 8 hours.
Time-Saving Tips for Busy Bakers
To save time, prepare the cupcake batter the night before and refrigerate it overnight. Just give it a quick stir before baking. You can also use a store-bought frosting if you’re short on time-just add a personal touch with a piping bag and decorative tip. Pre-measure your sprinkles and have all your tools ready to streamline the assembly process.
Equipment Essentials: Tools You’ll Need
Make sure you have a 12-count cupcake tin, paper liners, and an electric mixer for whipping the egg whites and creaming the butter. A small knife or cupcake corer will make carving the cupcakes a breeze. For frosting, a piping bag and Ateco 848 tip (or similar) will give your cupcakes a professional finish.
Variations & Substitutions
This base recipe is a starting point, and small swaps open up a ton of party-ready options. Prefer a shortcut? Use a white or vanilla boxed cake mix (such as Betty Crocker SuperMoist) and follow the package directions for 24 cupcakes. The texture is slightly more airy than from-scratch, so let the cupcakes cool completely before coring to prevent crumbling. Box mixes also take about 5 minutes of active prep, which is a lifesaver for last-minute parties.
For chocolate lovers, swap the all-purpose flour for a 1:1 chocolate cake mix, or replace ¼ cup of flour with ¼ cup of unsweetened cocoa powder. Pair the chocolate cupcake with a [chocolate buttercream frosting](https://recipesbyrahat.com/chocolate-buttercream-frosting-recipe/) and pink or blue sprinkles for a high-contrast reveal. M&M candies work beautifully as a filling alternative too – they make a satisfying crack when bitten and create a fun candy surprise that photographs well.
For a richer, slightly tangy filling, swap the sprinkles for a tinted [cream cheese frosting](https://recipesbyrahat.com/cream-cheese-frosting-recipe/) dyed pink or blue. Spoon the colored frosting into the cored cupcake, then seal with the plug and a white frosting top. If you want a different base entirely, try my [classic vanilla cupcake recipe](https://recipesbyrahat.com/easy-vanilla-cupcakes-recipe/) for a slightly denser crumb that holds up to heavier fillings and longer transport times.
Frequently Asked Questions
How do you do a gender reveal with cupcakes?
Bake a neutral vanilla cupcake, core out the center, fill the cavity with pink or blue sprinkles, replace the top plug, and frost the outside with white buttercream. When each guest takes a bite, the colored surprise announces the gender. The reveal works for one person or a crowd, and the cupcakes can be sliced instead of bitten if you prefer a more dramatic moment.
What is an easy recipe for a gender reveal cake?
The easiest gender reveal cakes use a vanilla box mix baked into cupcakes with a hidden filling of colored sprinkles. Bake the cupcakes, cool them, cut a 1-inch hole in the top, fill with pink or blue sprinkles, and seal with the reserved cupcake plug. Frost with white or neutral-colored buttercream to keep the surprise hidden until the first bite.
What is the best frosting for gender reveal cupcakes?
Swiss meringue buttercream is the best frosting for gender reveal cupcakes because it holds its shape, pipes cleanly, and stays bright white so the surprise color stays hidden. Cream cheese frosting and white chocolate buttercream work well too as neutral, photo-ready options. Avoid very soft or glaze-style frostings that can let the colored filling bleed through.
Can I make gender reveal cupcakes ahead of time?
Yes. Bake the cupcakes up to 3 months ahead and freeze them unfrosted. Thaw in the fridge overnight, then core, fill, and frost the day of the party. Assembled and frosted cupcakes keep well in the fridge for up to 24 hours, but the cleanest reveal happens when you fill them within 8 hours of serving.
What can I use instead of sprinkles for gender reveal filling?
Mu0026amp;M candies, mini chocolate chips tinted with food coloring, colored sanding sugar, dyed cream cheese frosting, or small pieces of pink or blue cake all work as fun alternatives to sprinkles. The filling should be dry and color-stable so it does not leak through the cupcake or frosting. For the cleanest reveal, choose a filling that contrasts with the frosting color.
Can I use a box mix for gender reveal cupcakes?
Absolutely. A white or vanilla box cake mix produces sturdy cupcakes that work well for coring and filling. Follow the package directions for 24 cupcakes, then cool completely before coring to minimize crumbling. Box mixes are a great time-saver when you need to bake a large batch for a bigger party.
What if my cake crumbles when I try to core it?
Crumbling usually means the cupcakes are still warm or the crumb is too soft. Cool them completely (or chill for 30 minutes) before coring, and use a sharp cupcake corer instead of a knife for cleaner cuts. Baking a day ahead also helps the crumb firm up. If the plug still breaks, crumble it into the filling instead of trying to replace it as a solid cap.
Conclusion
That brings us to the end of this 2026 gender reveal cupcakes recipe, and I hope you feel ready to bake the sweetest little announcement your family has ever seen. The beauty of this recipe is that it stays simple on the outside while keeping a colorful surprise on the inside, which is exactly the kind of low-stress, high-impact moment every party needs. From the first stiff peak of egg whites to the final swipe of buttercream, every step is designed to set you up for a clean, photo-ready reveal.
Whether you stick with the classic vanilla and pink sprinkles or branch out into chocolate cake with M&M filling, the key is a sturdy cupcake, a white frosting blanket, and a generous sprinkle of joy. Save the make-ahead timeline for later, pin the FAQ for your party prep, and treat yourself to one cupcake before the guests arrive. The baker’s tax is real, and the first bite is always the most fun. If you make this gender reveal cupcakes recipe, tag me on social or drop a comment below with the color you revealed – I love seeing your celebrations come to life.
Gender Reveal Cupcakes
Ingredients
Method
- Preheat oven to 350F (175C) and prepare a 12 count cupcake tin by lining with paper liners. Set aside.
- Place your egg whites in a completely clean, dry, and grease-free bowl. Using an electric mixer, beat on high-speed until stiff peaks form.¹ Set aside.
- In a separate bowl, use an electric mixer to beat together butter, oil, and sugar. Beat until ingredients are creamy and well-combined.
- Scrape down the sides and bottom of the bowl and then stir in your vanilla extract and sour cream, stirring until combined.
- In a separate bowl, whisk together your flour, baking powder, baking soda and salt.
- Using a spatula and stirring by hand (don’t use your mixer or you run the risk of over-beating the batter), stir the dry ingredients into the wet (butter/sugar mixture) until completely combined. Scrape the sides and bottom of the bowl to ensure ingredients are well-combined. Set aside.
- Using a spatula, gently fold your egg whites into your batter. While you do not want to over-mix this batter, it is important that the egg whites are completely combined. Use a gentle hand and stir until you can’t see any streaks of egg whites in the batter.
- Divide batter evenly into prepared cupcake tin.
- Bake on 350F (175C) for 17-19 minutes, or until a toothpick inserted in the center comes out mostly clean or with a few moist crumbs (no wet batter).
- Allow cupcakes to cool completely before carving and frosting:
- Once cupcakes have cooled completely, use a small knife to cut a hole about 1” in diameter and 1” deep into a cupcake (do NOT cut all the way down to the bottom, you are making a little nest for your sprinkles). Try to make the top of the hole slightly larger than the bottom. Remove this core/plug piece of your cupcake and then slice off the bottom so that only the surface of your cupcake (about ¼” thick) remains (see photo in post or video below for visual). Save this piece with the cupcake that you cut it out of so you can easily match each piece when you go to fill your cupcakes. Repeat with all remaining cupcakes.
- Fill each cupcake cavity with sprinkles, filling just below the surface of each cupcake. Top with your cupcake plug that you reserved and gently press down.
- Top cupcakes with frosting.
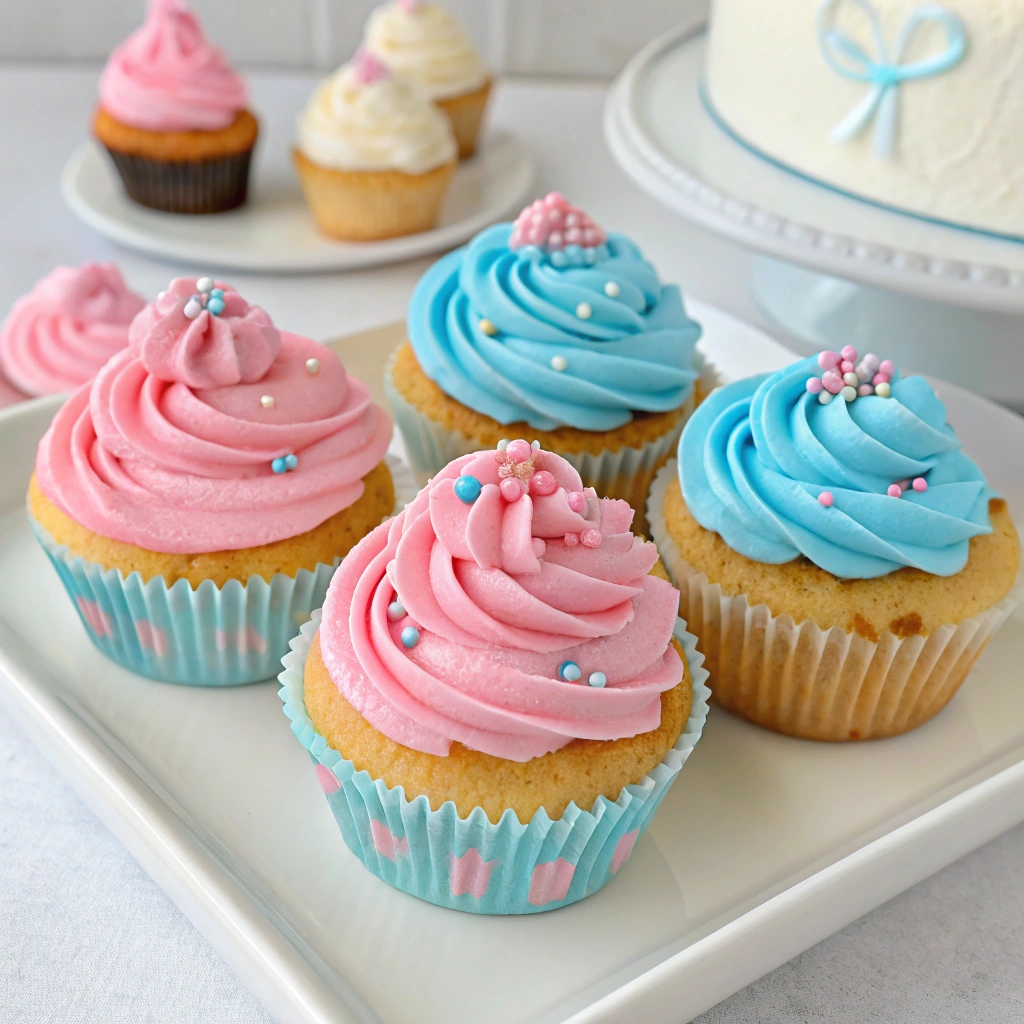
- Feel free to use your favorite frosting with this recipe! I used my Swiss Meringue Buttercream for the cupcakes in these pictures (piped with an Ateco 848 tip) but will include more options below in the notes section.