
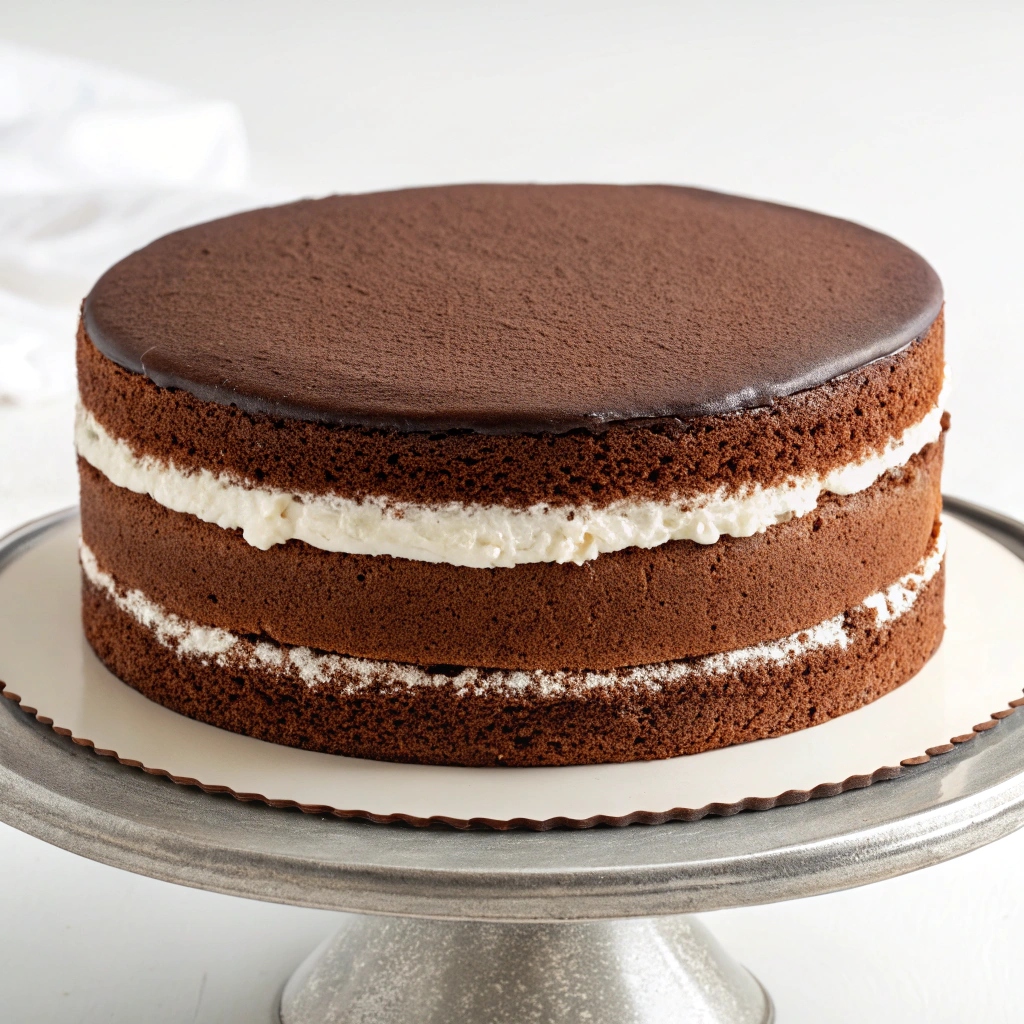
If you grew up tearing open a Hostess Ding Dong at lunchtime, this Ding Dong Cake recipe brings that nostalgic chocolate-snack-cake experience straight to your kitchen in full-size layer-cake form. A moist chocolate cake surrounds a fluffy snow-white ermine filling, all sealed under a glossy layer of fudgy chocolate ganache. It is the kind of homemade dessert that looks impressive but breaks down into manageable steps anyone can follow.
This copycat Hostess treat has been climbing recipe searches in 2026, and for good reason. The combination of buttermilk chocolate cake, a not-too-sweet boiled milk filling, and rich ganache hits a balance that standard American buttercream cannot match. Whether you are baking for a birthday, a potluck, or just a serious chocolate craving, this cake delivers every single time.
Table of Contents
- Why This Ding Dong Cake Recipe Works
- Ingredients for Ding Dong Cake
- How to Make Ding Dong Cake
- Troubleshooting: Ermine Frosting Fixes
- Perfect Pairings: Serving Suggestions
- Keep It Fresh: Storage Tips
- Quick Fixes: Time-Saving Tips
- Mix It Up: Recipe Variations
- Essential Tools: Equipment Guidance
- Frequently Asked Questions
- Wrapping Up This Ding Dong Cake Recipe
- Ding Dong Cake
Why This Ding Dong Cake Recipe Works
- Authentic texture: The ermine frosting uses a flour-and-milk roux base, producing a light, silky filling that tastes like the real childhood snack cake, not heavy buttercream.
- Deep chocolate flavor: Hot coffee blooms the natural cocoa powder, while brown sugar adds moisture and a caramel-like depth that keeps the cake tender for days.
- Not too sweet: The boiled milk frosting is noticeably less sugary than conventional frostings, letting the chocolate shine instead of overwhelming your palate.
- Make-ahead friendly: The filling base and cake layers can be prepared a day in advance, so you can spread the work across two sessions instead of rushing.
- Nostalgic crowd-pleaser: If you love the classic cream-filled snack cake, this grown-up from-scratch version brings back childhood memories with every slice.
Ingredients for Ding Dong Cake
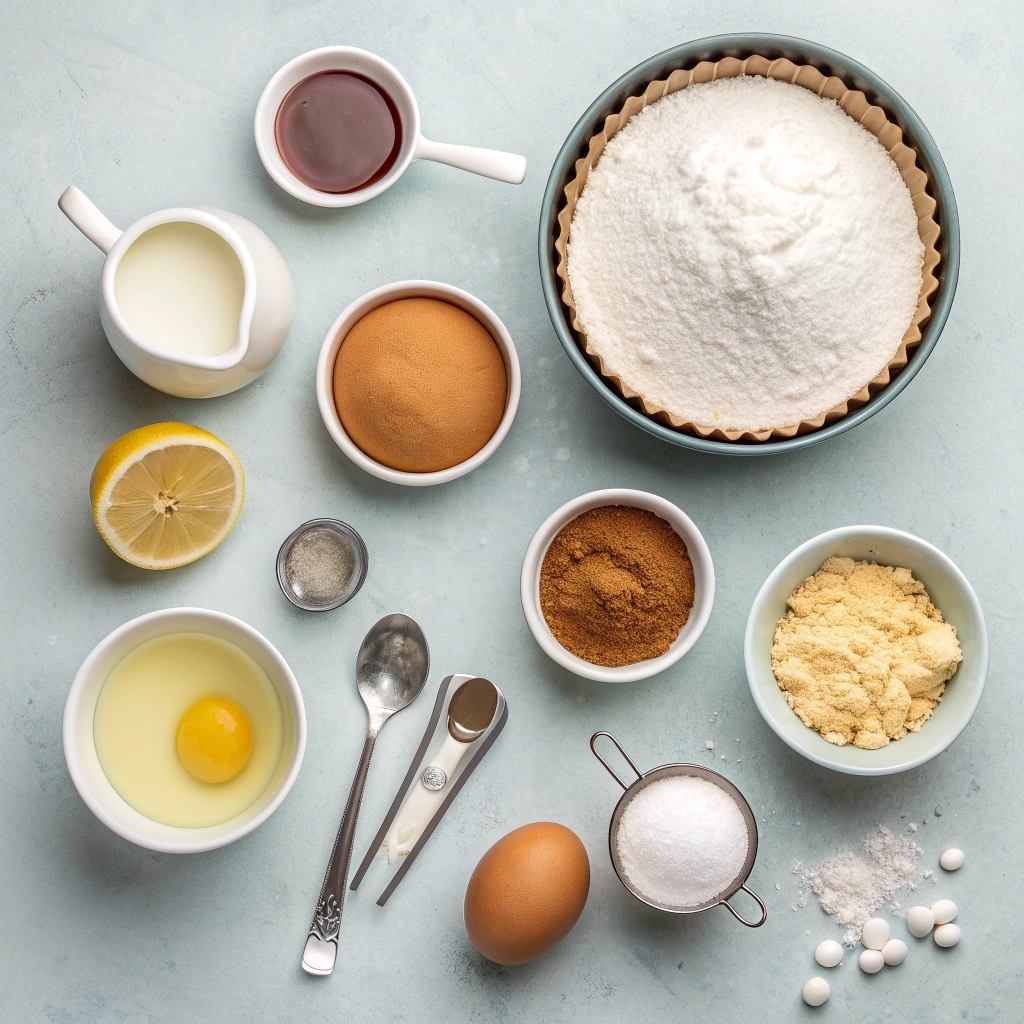
- Filling Base:
- 1 cup (200 g) granulated sugar
- 5 Tablespoons (40 g) all-purpose flour
- 1/4 teaspoon salt
- 1 cup (236 ml) whole milk
- Cake:
- 1 3/4 cups (205 g) all-purpose flour
- 1 cup (200 g) brown sugar (firmly packed)
- 1 cup (200 g) granulated sugar
- 3/4 cup (75 g) natural cocoa powder
- 1 1/2 teaspoons baking soda
- 3/4 teaspoon salt
- 1/2 cup (113 g) unsalted butter (melted)
- 1/2 cup (118 ml) neutral cooking oil (canola, vegetable, or avocado oil)
- 2 large eggs + 1 egg yolk (room temperature preferred)
- 2 teaspoons vanilla extract
- 1 cup (236 ml) buttermilk (room temperature preferred)
- 1/2 cup (118 ml) hot coffee (may substitute hot water)
- Filling:
- 1 filling base (from above)
- 1 cup (226 g) unsalted butter (softened)
- 1 teaspoon clear vanilla extract
- Ganache Frosting:
- 8 oz (226 g) semi-sweet chocolate
- 1 cup (236 ml) heavy whipping cream
Ingredient Notes and Smart Substitutions
Understanding why each ingredient is here makes a real difference in the final result. The hot coffee is not just for flavor; it actually blooms the cocoa powder, releasing complex flavor compounds you cannot get from cold liquid alone. If you are worried about a coffee taste, do not be; the bitterness cooks out entirely during baking and simply deepens the chocolate character.
The buttermilk does double duty in this recipe. Its acidity reacts with the baking soda to give the cake a tender lift, and it also keeps the crumb moist for several days. No buttermilk on hand? Stir one tablespoon of white vinegar or lemon juice into a cup of regular milk and let it sit for five minutes.
Natural cocoa powder is specified deliberately here because it pairs with the baking soda for proper leavening. Dutch process cocoa has been treated with alkali, which neutralizes the acid your baking soda needs to work. Stick with natural cocoa for the cake, and save the Dutch process for a different project.
Clear vanilla extract keeps the ermine frosting brilliant white, which is what gives that classic Ding Dong look. Pure vanilla extract works fine if you cannot find clear, but the filling will have a slight ivory tint rather than a snow-white appearance.
For the ganache, use real baking chocolate or quality chocolate chips. The heavy whipping cream is what creates that silky fudgy coating, so do not substitute milk or half-and-half. Semi-sweet chocolate strikes the right balance, but see the variations section below if you prefer dark or milk chocolate.
How to Make Ding Dong Cake
This Ding Dong Cake recipe comes together in five stages: the filling base, the cake layers, the finished filling, the ganache, and the final assembly. Take each step one at a time and the whole process feels very approachable.
- Step 1: Make the Filling Base
- In a medium saucepan, whisk together the sugar, flour, and salt until evenly blended.
- Slowly pour in the milk while whisking continuously until the mixture is smooth and free of lumps.
- Set the pan over medium heat and whisk constantly until the mixture thickens to a pudding-like consistency. You will know it is ready when the whisk leaves a visible trail through the custard.
- Take the pan off the heat, transfer the mixture to a heat-proof container, and press wax paper directly against the surface to prevent a skin from forming. Let it cool completely to room temperature.
- Step 2: Bake the Chocolate Cake Layers
- Preheat the oven to 350 degrees F (175 degrees C). Line two 8-inch round cake pans with parchment paper rounds, then lightly grease and flour the sides.
- In a large bowl, whisk together the flour, both sugars, cocoa powder, baking soda, and salt. You can do this by hand or with a stand mixer using the paddle attachment.
- Add the melted butter and oil, stirring until the mixture comes together.
- Mix in the eggs, egg yolk, and vanilla extract until the batter is uniform. Scrape down the sides and bottom of the bowl to catch any dry pockets.
- Gradually pour in the buttermilk and stir until smoothly incorporated.
- Carefully add the hot coffee and stir gently until fully combined. Give the bowl one more scrape to make sure nothing has settled at the bottom.
- Divide the batter evenly between the two prepared pans and bake for 33 to 35 minutes. A toothpick inserted into the center should come out clean or with just a few moist crumbs.
- Let the cakes cool in their pans for 15 minutes, then turn them out onto a wire rack to cool completely before filling.
- Step 3: Whip the Ermine Filling
- Once the filling base has cooled completely to room temperature (it should feel neither warm nor cold to the touch), you are ready to proceed.
- Place the softened butter in a large mixing bowl and beat on high speed with an electric mixer until pale, light, and fluffy.
- Drop the mixer to medium speed and add the cooled filling base one heaping spoonful at a time. Wait until each addition is fully blended before adding the next.
- Scrape the bowl, stir in the clear vanilla extract, then increase to medium-high and whip until the filling is smooth and airy. Use a spatula to press out any large air bubbles.
- Refrigerate the filling for 10 to 20 minutes so it firms up slightly and is easier to spread.
- Step 4: Prepare the Chocolate Ganache
- Combine the semi-sweet chocolate and heavy cream in a microwave-safe bowl.
- Microwave on high for 35 seconds, stir well, then microwave for another 25 seconds. Whisk until completely smooth. If any chunks remain, continue in 25-second intervals, stirring between each.
- Set the ganache aside, stirring occasionally, until it thickens to a spreadable consistency.
- Step 5: Assemble the Cake
- Use a cake leveler or serrated knife to trim any domes off the cooled cake layers so they sit flat.
- Place the first layer on a serving plate and spread all of the filling evenly across the top.
- Set the second cake layer on top and use an offset spatula to smooth the sides so no filling is bulging out.
- Pop the cake into the freezer for 10 to 15 minutes so the filling firms up before you apply the ganache.
- Pour or spread the ganache over the top and sides of the cake, smoothing with a spatula for an even finish.
- Refrigerate for at least 15 minutes to let the frosting set. Slice, serve, and enjoy your homemade Ding Dong cake!
Troubleshooting: Ermine Frosting Fixes
The ermine frosting, also known as boiled milk frosting or flour buttercream, is the soul of this recipe. It is also the step that trips up the most bakers. Here are the most common problems and exactly how to fix them.
My Ermine Frosting Curdled or Split
This is almost always a temperature problem. The butter and the cooled filling base need to be at the same room temperature when you combine them. If the base is still warm, the butter melts and separates. If the butter is too cold, it will not blend and you get a lumpy, broken mess.
The fix: If the frosting has split, try warming the bowl slightly by wrapping a warm, damp towel around the outside, then whipping again on medium-high. If that does not work, chill the bowl in the refrigerator for 5 minutes and re-whip. In the future, let the filling base cool completely and make sure your butter is genuinely soft, not cold and not melting.
My Filling Is Too Runny
Runny filling usually means the flour-and-milk base was not cooked long enough to fully thicken. The mixture should coat the back of a spoon and leave a clear trail when you drag the whisk through it. If yours was thin going into the bowl, the final filling will never hold its shape.
The fix: Refrigerate the filling for 20 to 30 minutes before using so the butter can firm up. For the next batch, cook the base a few minutes longer until that pudding-like consistency is unmistakable. You can also pop the assembled cake in the freezer for 15 minutes before adding the ganache to lock everything in place.
My Frosting Looks Greasy or Soupy
A greasy texture means the butter was over-whipped or got too warm during mixing. This is common on hot days or if your kitchen is particularly warm. The filling may look glossy and slippery rather than fluffy and matte.
The fix: Stop mixing immediately and refrigerate the bowl for 10 minutes to let the butter solidify. Then re-whip on medium speed until the texture comes back together. Work quickly during assembly, and if your kitchen is hot, chill the filling between each stage.
My Filling Has Flour Lumps
Small lumps in the cooled base mean the flour was not fully whisked in before the mixture heated up. Once the milk boils, those clumps lock in place and will not dissolve on their own.
The fix: While the base is still warm, push it through a fine-mesh sieve into your heat-proof container. This removes any lumps before cooling so your final filling stays perfectly smooth. For next time, whisk the flour, sugar, and salt thoroughly before adding any liquid.
Perfect Pairings: Serving Suggestions
This Ding Dong Cake is a showstopper on its own, but the right accompaniment can take it to another level. A scoop of vanilla bean ice cream melting against the warm ganache is a classic pairing. Fresh raspberries or sliced strawberries bring a bright acidity that cuts through the richness beautifully.
For a fun twist, try serving this alongside our ice cream cake recipe for the ultimate chocolate dessert spread. Or take the cream filling concept in a different direction with our banana pudding recipe for a Southern-style layered finish.
On the beverage side, a tall glass of cold milk is the nostalgic choice. A cup of strong black coffee or an espresso drink also pairs beautifully, echoing the coffee already baked into the cake layers.
Keep It Fresh: Storage Tips
Because of the dairy-based ermine filling, this cake must be refrigerated. Store it in an airtight container or tightly covered with plastic wrap in the fridge for up to 5 days. Let slices sit at room temperature for about 15 minutes before serving so the filling softens to its best texture.
To freeze, wrap individual slices tightly in plastic wrap, then place them in a freezer-safe bag or container for up to 3 months. Thaw frozen slices overnight in the refrigerator, then bring them to room temperature briefly before enjoying. In warm weather, keep the cake chilled until right before serving since the filling can soften quickly at high temperatures.
Quick Fixes: Time-Saving Tips
Breaking this recipe into stages makes it far less intimidating, and several components can be prepared ahead to lighten your baking day. Here are the smartest ways to save time without sacrificing quality.
Make the filling base a day early. The cooled flour-and-milk mixture keeps beautifully in the refrigerator for up to 2 days. Just bring it back to room temperature before whipping in the butter, and you have knocked out the most hands-on step ahead of time.
Bake and freeze the cake layers. Wrap cooled layers tightly in plastic wrap and freeze for up to a month. Thaw them overnight in the refrigerator, and they are ready to assemble whenever the craving strikes.
Take a shortcut on the ganache. If you are truly pressed for time, a good-quality store-bought chocolate frosting can stand in for the ganache layer. You lose some of the fudgy richness, but the cake will still be delicious.
Measure ingredients in advance. Having everything weighed and ready before you start means you can move smoothly from one step to the next without pausing. This is especially helpful for the filling, where timing matters once the butter starts whipping.
Use room-temperature ingredients. Cold eggs and cold buttermilk can cause the batter to seize or look curdled. Pull your eggs and buttermilk out 30 minutes ahead so everything blends smoothly and the cake bakes up tender.
Mix It Up: Recipe Variations
Once you have the basic Ding Dong Cake recipe down, there is plenty of room to get creative. These variations let you customize the cake for different tastes and occasions.
Swap the chocolate intensity: Trade the semi-sweet chocolate in the ganache for dark chocolate if you want a more bitter, sophisticated finish. Milk chocolate makes the topping sweeter and creamer for a kid-friendly version.
Add a nutty crunch: Fold chopped pecans or toasted walnuts into the filling for texture. A sprinkle of flaky sea salt on top of the wet ganache adds a grown-up salty-sweet contrast that chocolate lovers adore.
Try a fruity layer: Spread a thin layer of raspberry or strawberry jam between the cake and the filling for a fruity surprise. The tartness plays beautifully against the rich chocolate and the not-too-sweet ermine frosting.
Bake it in a 9×13 pan: Pour all the batter into a single 9×13 inch pan and bake for 30 to 35 minutes. Spread the filling over the top, then pour on the ganache for an easy sheet-cake version that skips the layering step entirely.
Turn it into cupcakes: Fill lined muffin tins about two-thirds full and bake for 18 to 22 minutes. Hollow out the center of each cupcake, pipe in the ermine filling, and dip the tops in ganache for miniature copycat Hostess treats.
Essential Tools: Equipment Guidance
Having the right equipment takes the guesswork out of this recipe and helps you get professional results at home. None of these tools are exotic, but each one plays a specific role.
Two 8-inch round cake pans: These give you the classic double-layer Ding Dong shape. Line the bottoms with parchment paper rounds so the cakes release cleanly without sticking or tearing.
A medium saucepan and whisk: You need these for cooking the ermine frosting base. A whisk with thin wires helps break up flour clumps so the custard stays perfectly smooth as it thickens.
An electric hand mixer or stand mixer: Whipping the butter and filling base by hand is exhausting and unlikely to reach the fluffy texture you want. A stand mixer with a whisk or paddle attachment lets you walk away while the filling whips to the right consistency.
A cake leveler or serrated knife: Flat cake layers mean a stable, professional-looking cake. A wire cake leveler lets you glide across the top for an even cut, but a long serrated knife works just as well if you keep it level.
An offset spatula: This angled spatula is the secret to smooth ganache and neat sides. Use it to press the filling flush with the cake edges before freezing, then to spread the ganache evenly over the top and sides.
A microwave-safe bowl: For the ganache, choose a bowl large enough to hold both the chocolate and cream with room for vigorous stirring. A glass bowl with a handle gives you the most control when pouring the finished ganache over the cake.
Frequently Asked Questions
Does Ding Dong cake need to be refrigerated?
Yes. Because the ermine filling is made with milk and butter, the cake must be stored in the refrigerator. Keep it in an airtight container for up to 5 days, and let slices sit at room temperature for about 15 minutes before serving for the best texture.
Can I substitute cream cheese for the ermine filling?
You can, but it will change the flavor and texture significantly. Cream cheese frosting is tangier and denser than the light, not-too-sweet ermine filling. If you want to try it, use 8 ounces of softened cream cheese whipped with 1/2 cup of butter and 2 cups of powdered sugar.
Can I make this Ding Dong cake recipe as cupcakes?
Absolutely. Fill lined muffin tins about two-thirds full and bake at 350 degrees F for 18 to 22 minutes. Hollow out the center of each cupcake, pipe in the filling, and dip the tops in ganache for mini copycat Hostess treats.
What is the difference between Ding Dongs and Ring Dings?
They are very similar cream-filled chocolate snack cakes, but they are made by different companies. Hostess makes Ding Dongs, while Drake’s makes Ring Dings. The regional terminology varies, but for this recipe they are essentially interchangeable inspirations.
Why did my ermine frosting come out runny?
Runny filling usually means the flour and milk base was not cooked long enough to thicken fully. The base should reach a pudding-like consistency where the whisk leaves a visible trail. You can refrigerate the finished filling for 20 to 30 minutes to help it firm up before spreading.
Can I make this cake in a 9×13 pan?
Yes. Pour all the batter into a greased 9×13 inch pan and bake for 30 to 35 minutes. Spread the filling directly on top, then pour on the ganache. This skips the layering step and makes an easy sheet-cake version perfect for potlucks.
Wrapping Up This Ding Dong Cake Recipe
This Ding Dong Cake recipe is proof that a childhood snack cake translates beautifully into a homemade layer cake worthy of any celebration. From the moist buttermilk chocolate layers to the silky ermine filling and fudgy ganache, every component earns its place. Take the process one step at a time, lean on the troubleshooting tips if the filling gives you trouble, and you will have a dessert that disappears fast.
If you love this kind of layered dessert, do not miss our banana pudding recipe next. Happy baking, and enjoy every nostalgic bite of your homemade Ding Dong cake!
Ding Dong Cake
Ingredients
Method
- For the filling base
- In a medium-sized saucepan, combine sugar, flour, and salt and whisk until well combined.
- While whisking, gradually pour in milk and whisk until mixture is smooth. Turn stovetop heat to medium.
- Whisk constantly on medium heat until mixture is thickened to a pudding-like consistency. The whisk should leave a trail through the mixture when it is ready.
- Remove from heat and pour into a heat-proof container. Cover with a piece of wax paper pressed directly against the surface. Set aside and allow to cool completely to room temperature while you prepare the cake.
- For the cake
- Preheat oven to 350F (175C) and prepare two 8” round cake pans by lining the bottoms with parchment paper and lightly greasing and flouring the sides. Set aside.
- In a large bowl, whisk together flour, sugars, cocoa powder, baking soda, and salt (you may make the batter by hand or use an electric hand mixer or stand mixer with paddle attachment).
- Add melted butter and oil, stir well until completely combined.
- Add eggs, egg yolk, and vanilla extract and stir well until batter is uniformly combined. Scrape the sides and bottom of the bowl to be sure all ingredients are well mixed.
- Gradually add buttermilk and stir well.
- Add hot coffee (carefully! Don’t splash and burn yourself) and stir until all ingredients are well combined. Scrape the sides and bottom of the bowl again to be sure everything is well incorporated.
- Evenly divide batter between prepared cake pans and bake on 350F (175C) for 33-35 minutes. A toothpick inserted in the center should come out clean or with a few moist crumbs.
- Allow cakes to cool for 15 minutes before inverting onto a cooling rack to cool completely before frosting. You may finish making the filling while the cakes cool, so long as the filling base has cooled to room temperature.
- For the filling
- Once the filling base has completely cooled to room temperature (it should not be warm or cold), you may proceed with the filling.
- Place the butter in a large mixing bowl and use an electric mixer or stand mixer with whisk or paddle attachment to beat the butter on high-speed until it is light and fluffy.
- Reduce mixer speed to medium and gradually add base mixture one heaping spoonful at a time. Wait until each spoonful is fully incorporated and well combined before adding the next.
- Once all filling base mixture is added, scrape the sides and bottom of the bowl with a spatula and stir in vanilla extract. Gradually increase mixer speed to medium-high and whip the frosting until it is smooth and airy. Use a spatula to deflate the frosting and work out any air bubbles.
- Place in refrigerator for about 10-20 minutes to allow it to become slightly firm before assembling. Meanwhile, prepare the ganache frosting.
- For the ganache frosting
- Combine chocolate and heavy cream in a medium-sized microwave-safe bowl.
- Microwave on high for 35 seconds. Stir well and microwave for another 25 seconds. Whisk mixture together until completely smooth. If not yet smooth, microwave again for 25 seconds. Set aside, stirring occasionally, until ganache is spreadable while you prepare your filling.
- Assembly
- Use a cake leveler or sharp serrated knife to level the cake layers, if needed.
- Place first layer on a cake plate. Spread all of the filling evenly over the cake layer.
- Top with next cake layer. Use an icing spatula to make the sides smooth so no filling is falling out. Place cake in the freezer for 10-15 minutes before spreading ganache frosting (note: if the ganache becomes too firm, you can heat in the microwave for 5-10 seconds until it’s soft enough to spread, but it should not be so soft that it runs right off the cake).
- Spread cooled ganache evenly over top of cake and around sides. Use a spatula to evenly cover the whole cake.
- Place in fridge to let the frosting harden for at least 15 minutes. Slice, serve, and enjoy!