
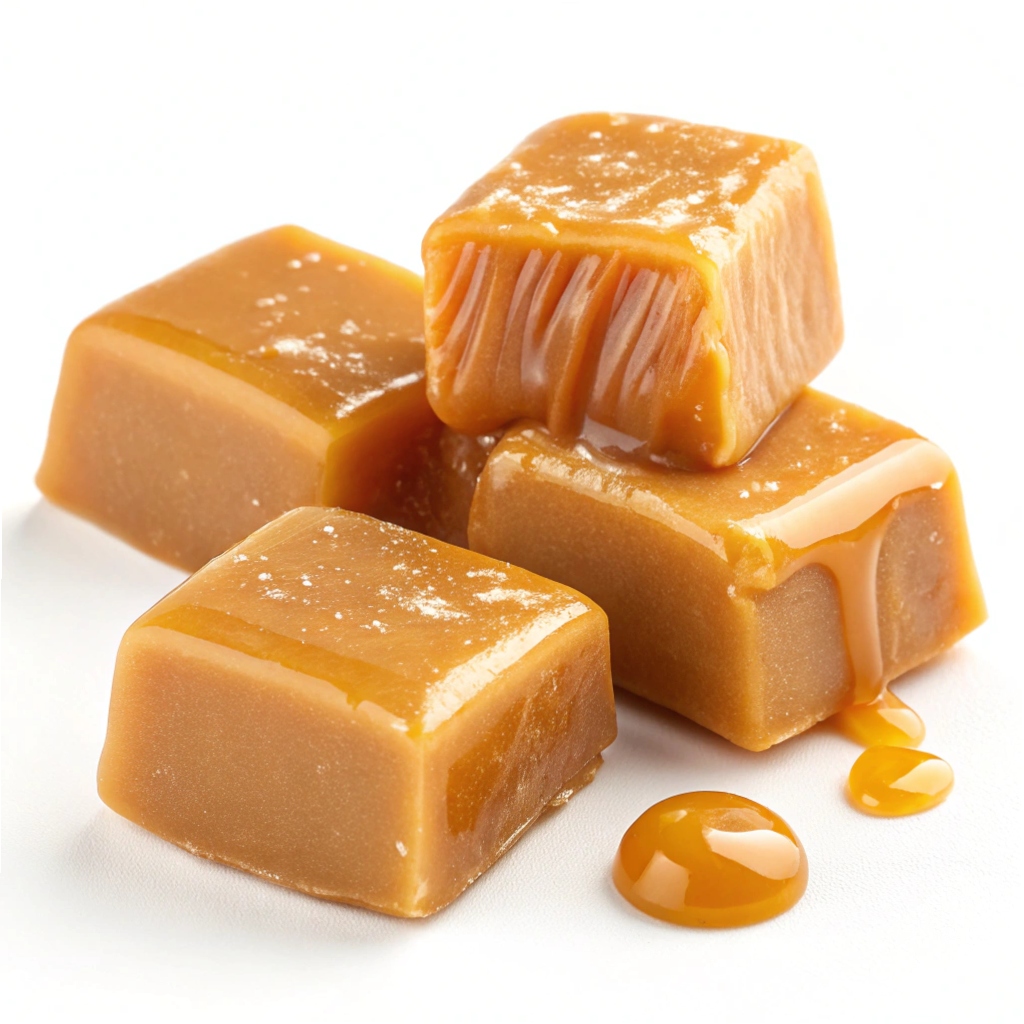
There’s something magical about the rich, buttery sweetness of homemade caramel candy melting on your tongue. This recipe delivers velvety, chewy caramels with a deep, golden flavor that store-bought versions simply can’t match. In just over an hour, you’ll create a batch of 42 indulgent treats, perfect for gifting or savoring yourself.
The process is surprisingly simple, requiring only a handful of ingredients and a little patience as the sugar transforms into a glossy, amber masterpiece. Each bite offers a satisfying balance of creamy texture and decadent sweetness, making it impossible to stop at just one.
These caramels are not only delicious but also customizable—add a pinch of sea salt or a drizzle of chocolate for an extra layer of flavor. With just 116 calories per piece, they’re a guilt-free way to satisfy your sweet tooth. The aroma of simmering sugar and butter will fill your kitchen, creating a cozy, nostalgic atmosphere.
Whether you’re a seasoned candy maker or a first-timer, this recipe is foolproof and rewarding. Share these little bites of happiness with loved ones or keep them all to yourself—they’re worth every minute of the hour-long cook time.
What You’ll Need for Homemade Caramel Candy
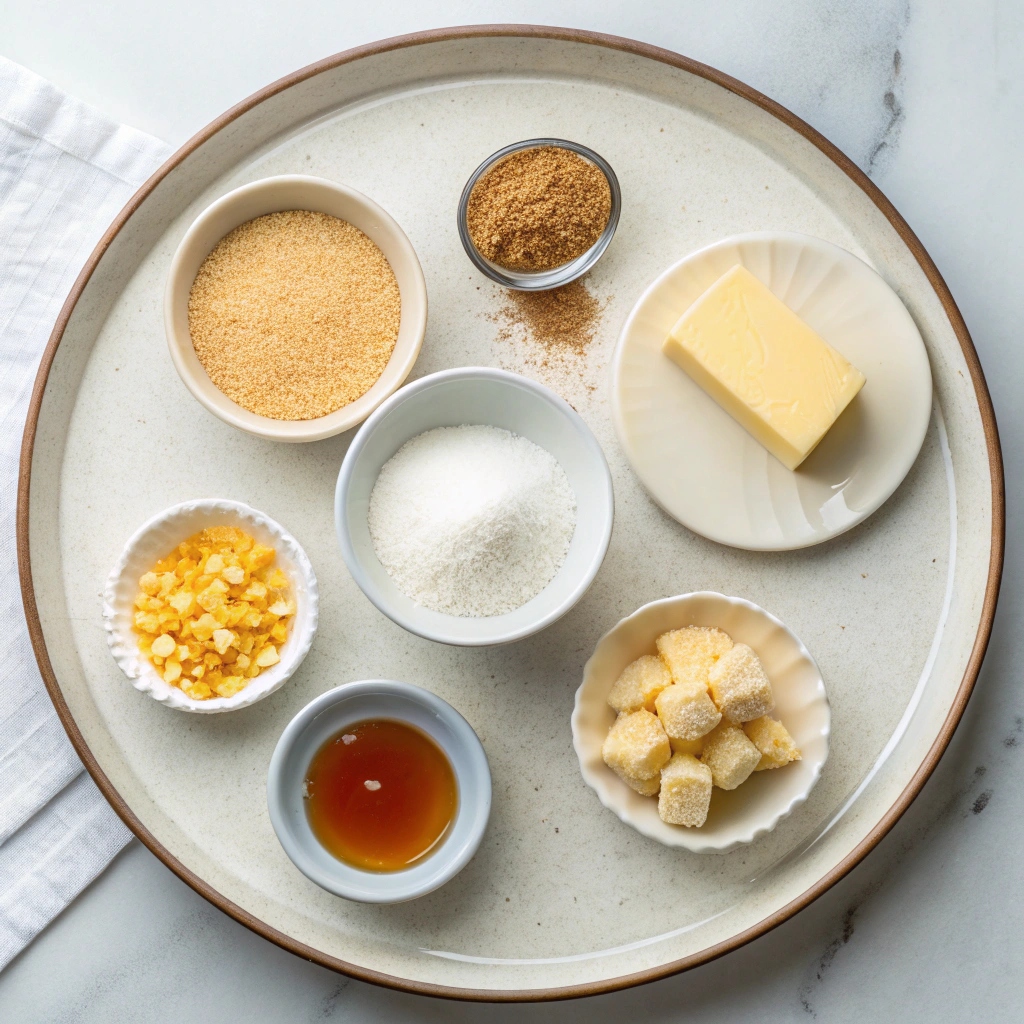
- 1 ½ cups (300 g) granulated sugar
- ½ cup (100 g) light brown sugar (firmly packed)
- 1 ½ cups (354 ml) evaporated milk (equivalent to one 12 fl oz can)
- 1 ½ cups (354 ml) heavy cream
- ¾ cup (255 g) light corn syrup
- ½ cup (113 g) unsalted butter
- 1 teaspoon salt
- 1 teaspoon vanilla extract
How to Make Homemade Caramel Candy
- Prepare the pan: Line an 8” square pan with parchment paper and set aside.
- Combine ingredients: In a heavy-bottomed saucepan, mix granulated sugar, light brown sugar, evaporated milk, heavy cream, corn syrup, butter, and salt.
- Cook the mixture: Turn the stovetop to medium heat. Stir frequently (using a wooden spoon or rubber spatula) until the butter melts and the mixture is smooth.
- Attach a candy thermometer: Place it on the side of the pot, ensuring it doesn’t touch the bottom and is suspended halfway in the caramel. Stir constantly until the mixture reaches 240-243°F (115-117°C). This may take about an hour.
- Add vanilla: Once the mixture reaches temperature, remove it from the heat and stir in the vanilla extract.
- Pour and cool: Immediately pour the caramel into the prepared pan. Let it cool completely (several hours or overnight) before cutting.
- Cut and wrap: Slice the caramel into pieces and optionally top with sea salt. Wrap individually in wax paper or cellophane wrappers for storage.
Perfect Pairings: Sauce and Topping Ideas
Take your homemade caramel candies to the next level by adding a sprinkle of flaky sea salt for a sweet-and-salty twist. For a decadent treat, drizzle melted chocolate over the cooled caramels or dip them halfway for a chocolate coating. You can also roll the caramels in crushed nuts, toasted coconut, or even cocoa powder for added texture and flavor.
Storage Secrets: Keeping Your Caramels Fresh
Store your caramels in an airtight container at room temperature for up to two weeks. If you’ve individually wrapped them in wax paper or cellophane, they’ll stay fresh and chewy. For longer storage, keep them in the fridge for up to a month—just let them come to room temperature before enjoying for the best texture.
Time-Saving Tips for Busy Bakers
To speed up the cooking process, use a wider saucepan to increase the surface area and reduce cooking time slightly. Keep a close eye on the thermometer to avoid overcooking. If you’re short on time, you can speed up the cooling process by placing the pan in the fridge for about an hour, though overnight cooling is ideal for the best consistency.
Equipment Guidance: Tools for Success
A heavy-bottomed saucepan is essential to prevent burning, and a candy thermometer is a must for achieving the perfect caramel consistency. If you don’t have parchment paper, lightly grease the pan with butter to make removal easier. For cutting, use a sharp knife or a pizza cutter for clean, even pieces.
Common Questions Answered
Why is my caramel grainy?
This usually happens if the sugar isn’t fully dissolved. Stir constantly and ensure the mixture is smooth before it starts boiling.
Can I use dark corn syrup instead of light?
Yes, but it will give the caramels a deeper, molasses-like flavor. Stick to light corn syrup for a classic taste.
Homemade Caramel Candy
Ingredients
Method
- Line an 8” square pan with parchment paper and set aside.
- In a heavy-bottomed saucepan, combine sugars, evaporated milk, heavy cream, corn syrup, butter, and salt.
- Turn stovetop heat to medium and cook, stirring frequently (I like to use a wooden spoon or rubber spatula, it makes it easy to scrape the bottom of the pot and ensure nothing burns), until butter is melted and mixture is smooth.
- Attach a candy thermometer to the side (make sure it is not touching the bottom of the pot and is suspended about halfway in the caramel) and stir constantly until mixture reaches 240-243F (115-117C). This will take some time, it usually takes me an hour of stirring!
- Once mixture reaches temperature, remove from heat and stir in the vanilla extract.
- Immediately pour into prepared pan and allow caramel to cool completely (several hours or overnight) before cutting and (and topping with sea salt, if using). Caramels may be cut and individually wrapped in strips of wax paper or cellophane wrappers, I linked to the wrappers that I used in the “Equipment” section above.
Love your caramel recipe!❤️ The picture you have with the candy mold, may I do that?
Thanks. Yes You May!