
If you have ever wished a Reese’s peanut butter cup and a bakery-style chocolate muffin had a baby, these peanut butter filled chocolate muffins are your answer. I have baked this recipe more times than I can count, and the first time I cut one open to reveal that molten peanut butter cheesecake center, I knew I had to share it.
What makes this recipe special is the contrast: a tender, double chocolate muffin studded with semisweet chocolate chips wraps around a creamy, slightly tangy peanut butter filling. The filling stays soft and spoonable even after baking, so every bite delivers a true dessert muffin experience. If you love peanut butter and chocolate together, you will also want to check out my peanut butter stuffed chocolate cookies for the same flavor in cookie form.
This is a no-mixer, one-bowl-friendly recipe that comes together in about 45 minutes and makes 18 generous muffins. They freeze beautifully, pack well in lunchboxes, and taste like a hug. Whether you need a back-to-school breakfast, a holiday dessert platter addition, or just a Wednesday afternoon pick-me-up, these peanut butter filled chocolate muffins deserve a permanent spot in your baking rotation.
Table of Contents
- Why This Recipe Works
- Ingredients for Peanut Butter Filled Chocolate Muffins
- Choosing Your Cocoa Powder
- Step-by-Step Instructions
- Tips for the Best Peanut Butter Filling
- How to Tell When Muffins Are Done
- Nutrition Information
- Storage and Reheating Tips
- Recipe Variations to Try
- Time-Saving Tips for Busy Bakers
- Equipment Guidance for Perfect Muffins
- What to Serve With These Muffins
- Common Questions Answered
- Can I use natural peanut butter?
- Can I make these gluten-free?
- Why are my muffins dry?
- Do peanut butter filled chocolate muffins need to be refrigerated?
- How do I keep the peanut butter filling from sinking to the bottom?
- Can I make these as mini muffins?
- What is the difference between a muffin and a cupcake?
- You May Also Like
Why This Recipe Works
There is real baking science behind why these peanut butter filled chocolate muffins turn out so reliably good, and understanding the why makes you a better baker every time you make them.
The combination of oil and sour cream is the secret to that ultra-moist crumb. Oil coats the flour proteins and prevents gluten from forming tough strands, while the fat and lactic acid in sour cream tenderize the crumb even further and add a subtle tang that balances the sweetness. You end up with muffins that stay soft for days rather than drying out by the next morning.
For the filling, cream cheese does double duty. It gives the peanut butter filling structure so it holds its shape inside the muffin rather than sinking to the bottom or leaking out the sides. It also cuts the richness of the peanut butter with a gentle tang that keeps the center from feeling cloyingly sweet. The result is a filling that tastes almost like the inside of a peanut butter cup, but fresher and more sophisticated.
Finally, the recipe uses both cocoa powder and semisweet chocolate chips. Cocoa delivers deep, roasty chocolate flavor throughout the batter, while the chips create those melty pockets you can see in every slice. Together, they make these true double chocolate muffins with a bakery-style texture that holds up beautifully under the gooey filling.
Ingredients for Peanut Butter Filled Chocolate Muffins
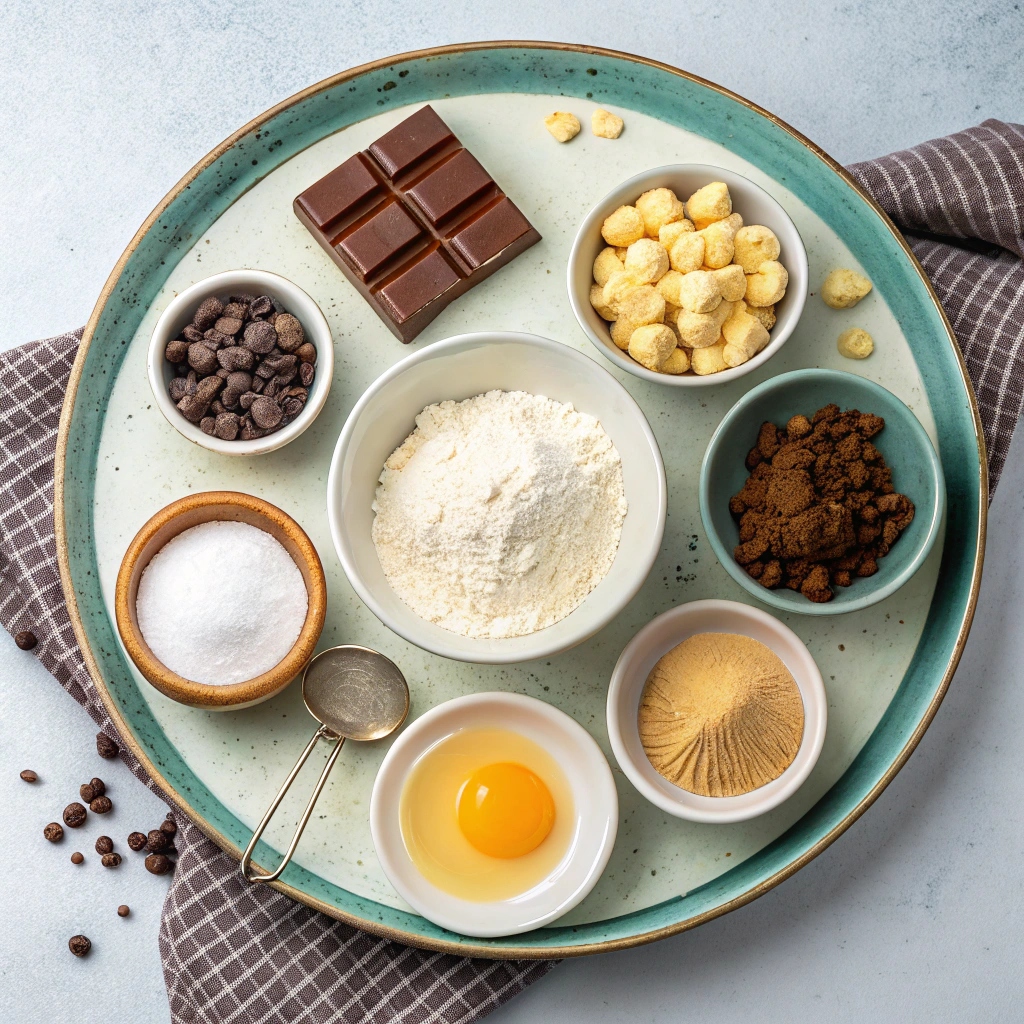
- Peanut Butter Filling:
- 8 oz cream cheese, softened
- ½ cup (145 g) peanut butter
- ½ cup (100 g) granulated sugar
- 1 large egg, lightly beaten
- ½ tsp vanilla extract
- Muffins:
- ½ cup canola oil (vegetable oil works too)
- 1 cup (200 g) granulated sugar
- ½ cup milk
- 2 large eggs, lightly beaten
- 1 tsp vanilla extract
- ⅔ cup (150 g) sour cream
- 2 cups (240 g) all-purpose flour
- ½ cup (50 g) cocoa powder
- 1 ½ tsp baking soda
- ½ tsp salt
- 2 cups semisweet chocolate chips, divided
Choosing Your Cocoa Powder
The cocoa powder you choose will change the flavor and color of your muffins more than almost any other ingredient. For these peanut butter filled chocolate muffins, here is what you need to know.
Natural unsweetened cocoa powder is acidic and reacts strongly with the baking soda in this recipe to give you tall, domed muffin tops and a deeper, slightly fruity chocolate flavor. Dutch-processed cocoa has been treated to neutralize the acidity, which produces a mellower, smoother chocolate taste and a darker color, but it will not react as vigorously with baking soda.
For this specific recipe, I recommend natural unsweetened cocoa powder. The reaction with baking soda is what gives you those beautiful bakery-style domed tops. If you only have Dutch-processed cocoa on hand, you can still use it, but add an extra quarter teaspoon of baking powder to compensate for the lost leavening power.
Step-by-Step Instructions
Before you start, make sure your cream cheese, eggs, and sour cream are at room temperature. Cold ingredients will cause lumps in your filling and an uneven muffin batter, so set everything out on the counter about 30 minutes before baking.
- Preheat and prep: Preheat your oven to 350°F (175°C). Line 18 muffin cups with paper liners or lightly grease and flour each well. A standard 12-cup tin works perfectly, but you will need to bake in two batches.
- Prepare the peanut butter filling first: Place the softened cream cheese and peanut butter in a microwave-safe bowl. Microwave in 10-second bursts, stirring in between, until the mixture is completely smooth and easy to stir. This usually takes 20 to 30 seconds total. Whisk in the granulated sugar, lightly beaten egg, and vanilla extract until completely smooth. Set aside.
- Mix the wet ingredients: In a large bowl, whisk together the canola oil, granulated sugar, and milk until the sugar mostly dissolves. Stir in the eggs and vanilla extract until well combined. Gently fold in the sour cream last. Do not overmix at this stage.
- Combine the dry ingredients: In a separate medium bowl, whisk together the flour, cocoa powder, baking soda, and salt. Whisking distributes the leavening evenly and breaks up any cocoa clumps.
- Bring it all together: Add the dry mixture to the wet ingredients and fold gently with a silicone spatula until just combined. A few streaks of flour are okay. Stir in 1 ½ cups of the semisweet chocolate chips. Overmixing now will give you tough muffins, so stop as soon as the chips are distributed.
- Assemble the muffins: Scoop chocolate batter into the prepared muffin cups, filling each about halfway. Use a heaping 1 ½-inch cookie dough scoop to drop a generous dollop of peanut butter filling on top of each. Cover with more chocolate batter until each cup is about ⅔ to ¾ full.
- Top and bake: Sprinkle the remaining ½ cup of chocolate chips over the tops of the muffins. Bake on the middle rack for 22 to 25 minutes. The muffins are done when a toothpick inserted near the edge comes out clean and a toothpick in the center comes out with a few moist crumbs, not wet batter.
- Cool and enjoy: Let the muffins cool in the pan for 5 minutes, then transfer them to a wire rack. The filling will set up a little as they cool, so resist the urge to bite in immediately. They are best enjoyed slightly warm when the center is still soft and gooey.
Tips for the Best Peanut Butter Filling
The filling is the star of these peanut butter filled chocolate muffins, so a few small details make a big difference. Here is what I have learned after many, many test batches.
Start with truly softened cream cheese. It should give easily when pressed and leave an indent with your finger. If it still feels cold in the center, microwave it for 10 seconds at a time until pliable. Cold cream cheese is the number one cause of lumpy filling that refuses to incorporate smoothly.
Use a no-stir commercial peanut butter like Jif or Skippy for the most consistent filling. Natural peanut butter works in a pinch, but stir it very thoroughly first to redistribute the oils, otherwise the filling can separate and become oily during baking. If your natural peanut butter is very dry or crumbly, add a teaspoon of milk to loosen it before mixing.
Do not skip the egg. It binds the filling together so the center stays soft and custardy rather than turning into a dry, crumbly lump. If you are baking at high altitude, you can reduce the egg slightly and add an extra tablespoon of sour cream for a softer set.
Finally, scoop the filling while it is still at room temperature. Cold filling is harder to portion and does not spread as evenly over the batter. If you made the filling ahead and chilled it, let it sit on the counter for 15 minutes before assembling.
How to Tell When Muffins Are Done
Telling when chocolate muffins are done is notoriously tricky because you cannot rely on golden-brown color like you can with vanilla or banana muffins. A few reliable signs will help you nail the timing every time.
The tops should look set and spring back lightly when you press them with your finger. If they leave a deep indent, give them another minute or two. Insert a toothpick near the edge of a muffin, where there is no filling, and it should come out clean or with a few moist crumbs. A toothpick in the very center will have some melted chocolate chips, so do not panic if you see streaks.
The muffins should also smell richly chocolatey and the tops will have small cracks. Most importantly, start checking at the 22-minute mark. Every oven runs slightly different, so trust the visual cues over the timer.
Nutrition Information
Each muffin (recipe makes 18) contains approximately the following nutritional values. Values are estimates and will vary based on the specific brands of cocoa powder, peanut butter, and chocolate chips you use.
- Calories: 320 kcal
- Total Fat: 18 g
- Saturated Fat: 6 g
- Cholesterol: 45 mg
- Sodium: 220 mg
- Potassium: 180 mg
- Total Carbohydrates: 38 g
- Dietary Fiber: 2 g
- Sugars: 25 g
- Protein: 6 g
- Vitamin A: 4% DV
- Calcium: 6% DV
- Iron: 10% DV
- Vitamin D: 2% DV
For a slightly lighter version, you can substitute unsweetened applesauce for half of the oil and use a sugar substitute like monk fruit in the filling. The result will be a touch less rich but still deeply chocolatey.
Storage and Reheating Tips
Because these muffins contain a cream cheese filling, they need a little extra storage care. At room temperature, the filling is fine for about 2 days if your kitchen is cool, but for longer storage, refrigeration is the safer choice.
Store leftover muffins in an airtight container in the refrigerator for up to 5 days. The cream cheese filling will firm up slightly when cold, so let the muffins sit at room temperature for 10 to 15 minutes before eating, or warm them briefly to bring back that gooey texture.
For longer storage, freeze the muffins in a single layer on a baking sheet until solid, then transfer them to a freezer-safe zip-top bag. They will keep beautifully for up to 3 months. To reheat from frozen, microwave for 20 to 30 seconds, or warm in a 300°F oven for 8 to 10 minutes. The chocolate chips on top will get melty and the filling will turn soft again like they just came out of the oven.
Avoid leaving these muffins in a hot car or in direct sunlight, as the cream cheese filling can spoil quickly at warm temperatures. If you are packing them for a lunchbox, include a small ice pack to be safe.
Recipe Variations to Try
Once you have mastered the classic version, these peanut butter filled chocolate muffins are a wonderful base for creative twists. Here are some of my favorite ways to change things up.
Nut butter swaps. Replace the peanut butter with almond butter, cashew butter, or even sunflower seed butter for a nut-free version. The flavor will change, but the technique stays exactly the same. If you love this flavor combination in another format, try my peanut butter chocolate chip muffins for a quicker version without the filling.
Chocolate upgrades. Swap the semisweet chocolate chips for dark chocolate chunks, white chocolate chips, or even a mix of all three for a colorful presentation. A handful of chopped Reese’s peanut butter cups folded into the batter is also a fantastic way to lean further into the flavor combination.
Salted peanut butter. Sprinkle flaky sea salt on top of the muffins right after they come out of the oven. The sweet-and-salty contrast is the same trick that makes a peanut butter cup so addictive, and it elevates the entire muffin.
Espresso boost. Add 1 teaspoon of instant espresso powder to the dry ingredients. You will not taste coffee, but it will deepen the chocolate flavor and make the muffins taste even more decadent.
Gluten-free version. Substitute the all-purpose flour with a 1:1 gluten-free baking flour that contains xanthan gum. The texture will be slightly more delicate, but the flavor is just as good. Let the batter rest for 10 minutes before scooping to give the flour time to hydrate.
Mini muffin version. Spoon the batter into a mini muffin tin lined with mini liners, reduce the baking time to 12 to 14 minutes, and use a small teaspoon of filling for each cup. This makes about 36 bite-sized muffins, perfect for parties or lunchboxes. For a fun party dessert with the same flavor, my peanut butter pie dessert shooters are another great option.
Time-Saving Tips for Busy Bakers
Make the peanut butter filling up to 3 days ahead and store it covered in the refrigerator. On baking day, pull it out while you preheat the oven so it has time to soften slightly. The flavor actually develops nicely after a day in the fridge.
Use a cookie dough scoop for both the muffin batter and the filling. A 1 ½-inch scoop is the perfect size for the filling dollops, and a larger ¼-cup scoop speeds up portioning the batter into the muffin cups. This single tool swap can save you 10 minutes of assembly time.
Measure your dry ingredients the night before and leave them in a covered bowl on the counter. In the morning, all you have to do is whisk the wet ingredients, combine the two, and assemble. Total active time drops to about 15 minutes.
Equipment Guidance for Perfect Muffins
A standard 12-cup muffin tin is essential, and you will need to bake in two batches since this recipe makes 18 muffins. Dark-colored muffin tins produce slightly taller muffin tops, while light-colored tins bake more evenly. Either works here, just adjust your bake time by a minute or two based on what you have.
A 1 ½-inch cookie dough scoop is the single most useful tool for this recipe. It ensures your filling dollops are uniform, which means every muffin has the same generous center. A medium cookie scoop or even a ¼-cup measure also works in a pinch.
A silicone spatula is the right tool for folding the dry ingredients into the wet. It gently combines the batter without overworking it, which is the key to tender muffins. A wooden spoon or whisk will work, but be extra careful not to overmix.
Use paper liners for easier cleanup and a prettier presentation. If you prefer to skip liners, generously grease and flour each muffin cup, or use a baking spray that contains flour. Otherwise the chocolate muffins will stick and lose their lovely domed tops when you try to remove them.
What to Serve With These Muffins
These peanut butter filled chocolate muffins are rich enough to stand on their own, but a few pairings take them over the top. A cold glass of milk is the classic choice, and the creamy coolness balances the warm chocolate and peanut butter beautifully.
For a dessert-style presentation, serve slightly warmed muffins with a small scoop of vanilla ice cream or a drizzle of warm chocolate sauce. Fresh berries, especially raspberries or sliced strawberries, add a bright tartness that cuts through the richness and makes the plate look elegant.
For a breakfast or brunch spread, pair these muffins with fresh fruit, scrambled eggs, and a hot cup of coffee. The muffins work as a sweet counterpoint to savory breakfast items, and they look beautiful on a holiday brunch table.
Common Questions Answered
Can I use natural peanut butter?
Yes, you can use natural peanut butter in these muffins, but stir it very thoroughly first to redistribute the oils. Natural peanut butter that has separated will give the filling an oily, uneven texture during baking. If your natural peanut butter is very dry, add a teaspoon of milk to loosen it before mixing with the cream cheese.
Can I make these gluten-free?
Absolutely. Substitute the all-purpose flour with a 1:1 gluten-free baking flour blend that contains xanthan gum. Let the batter rest for 10 minutes after mixing so the flour has time to hydrate fully. The texture will be slightly more delicate, but the flavor is just as good as the original.
Why are my muffins dry?
Dry muffins are usually caused by overbaking or overmixing. Start checking at the 22-minute mark and pull them out as soon as a toothpick near the edge comes out clean. When mixing, fold the dry ingredients into the wet just until combined, since overworking the batter develops gluten and creates a tougher, drier crumb.
Do peanut butter filled chocolate muffins need to be refrigerated?
Because the filling contains cream cheese and a fresh egg, refrigeration is the safer choice for storage beyond 2 days. Store the muffins in an airtight container in the fridge for up to 5 days. Let them sit at room temperature for 10 to 15 minutes before serving so the filling softens back up.
How do I keep the peanut butter filling from sinking to the bottom?
The filling will stay suspended in the center if you layer the batter properly. First, fill each muffin cup halfway with chocolate batter. Add the filling on top, then cover with more batter so the cup is about three-quarters full. The bottom layer of batter creates a base that supports the filling as everything bakes and rises together.
Can I make these as mini muffins?
Yes. Spoon the batter into a mini muffin tin lined with mini liners, add a small teaspoon of filling to each cup, and cover with more batter. Bake at 350°F for 12 to 14 minutes. You will get about 36 bite-sized muffins, perfect for parties, lunchboxes, or holiday cookie trays.
What is the difference between a muffin and a cupcake?
Muffins and cupcakes look similar but are quite different in philosophy. Muffins are quick breads meant for breakfast or snacking, with less sugar, more whole ingredients like sour cream or fruit, and a sturdier crumb. Cupcakes are miniature cakes with frosting, more sugar, and a tender, cake-like texture. These peanut butter filled chocolate muffins fall firmly on the muffin side of the line.
You May Also Like
If these peanut butter filled chocolate muffins hit the spot, you will love these other peanut butter and chocolate recipes from the kitchen. My peanut butter chocolate chunk cookies are a chewy, bakery-style cookie version of this same flavor combination. For sandwich cookie lovers, the chocolate peanut butter sandwich cookies deliver that perfect sweet-salty balance in a classic two-cookie format.
If you would like a simpler muffin without the filling, my peanut butter chocolate chip muffins come together in under 30 minutes and are perfect for busy mornings. For an elegant party dessert with the same flavors, the peanut butter pie dessert shooters are a showstopper that can be made ahead. And for a cookie version of the stuffed concept, my peanut butter stuffed chocolate cookies are always a hit.
Happy baking, and may your kitchen smell like warm chocolate and peanut butter for the rest of the week.